

What Was Under This Sherman Oaks Roof?
When the shingles came off at 4244 Sunnyslope Ave in Sherman Oaks, the crew found what older homes in this part of the San Fernando Valley often hide beneath a layer of asphalt: skip sheathing. Skip sheathing is a system of spaced wood boards with open gaps running between them, standard practice when the original roof was designed to carry wood shake. Shake allows air to circulate beneath it, so the gaps made sense at the time. Asphalt shingles are a different story entirely. They need a continuous, solid deck underneath for proper nail holding, uniform surface support, and an airtight substrate for the underlayment. Laying shingles directly onto skip sheathing is not an acceptable installation, and it also falls outside current California Residential Code requirements for roof decking.
This job started on September 28, 2026. The property is a single-story home with a hip-and-gable roof, a brick chimney, and painted eave trim. Before anything new could go onto this roof, the deck itself had to be rebuilt from scratch.
Project Gallery
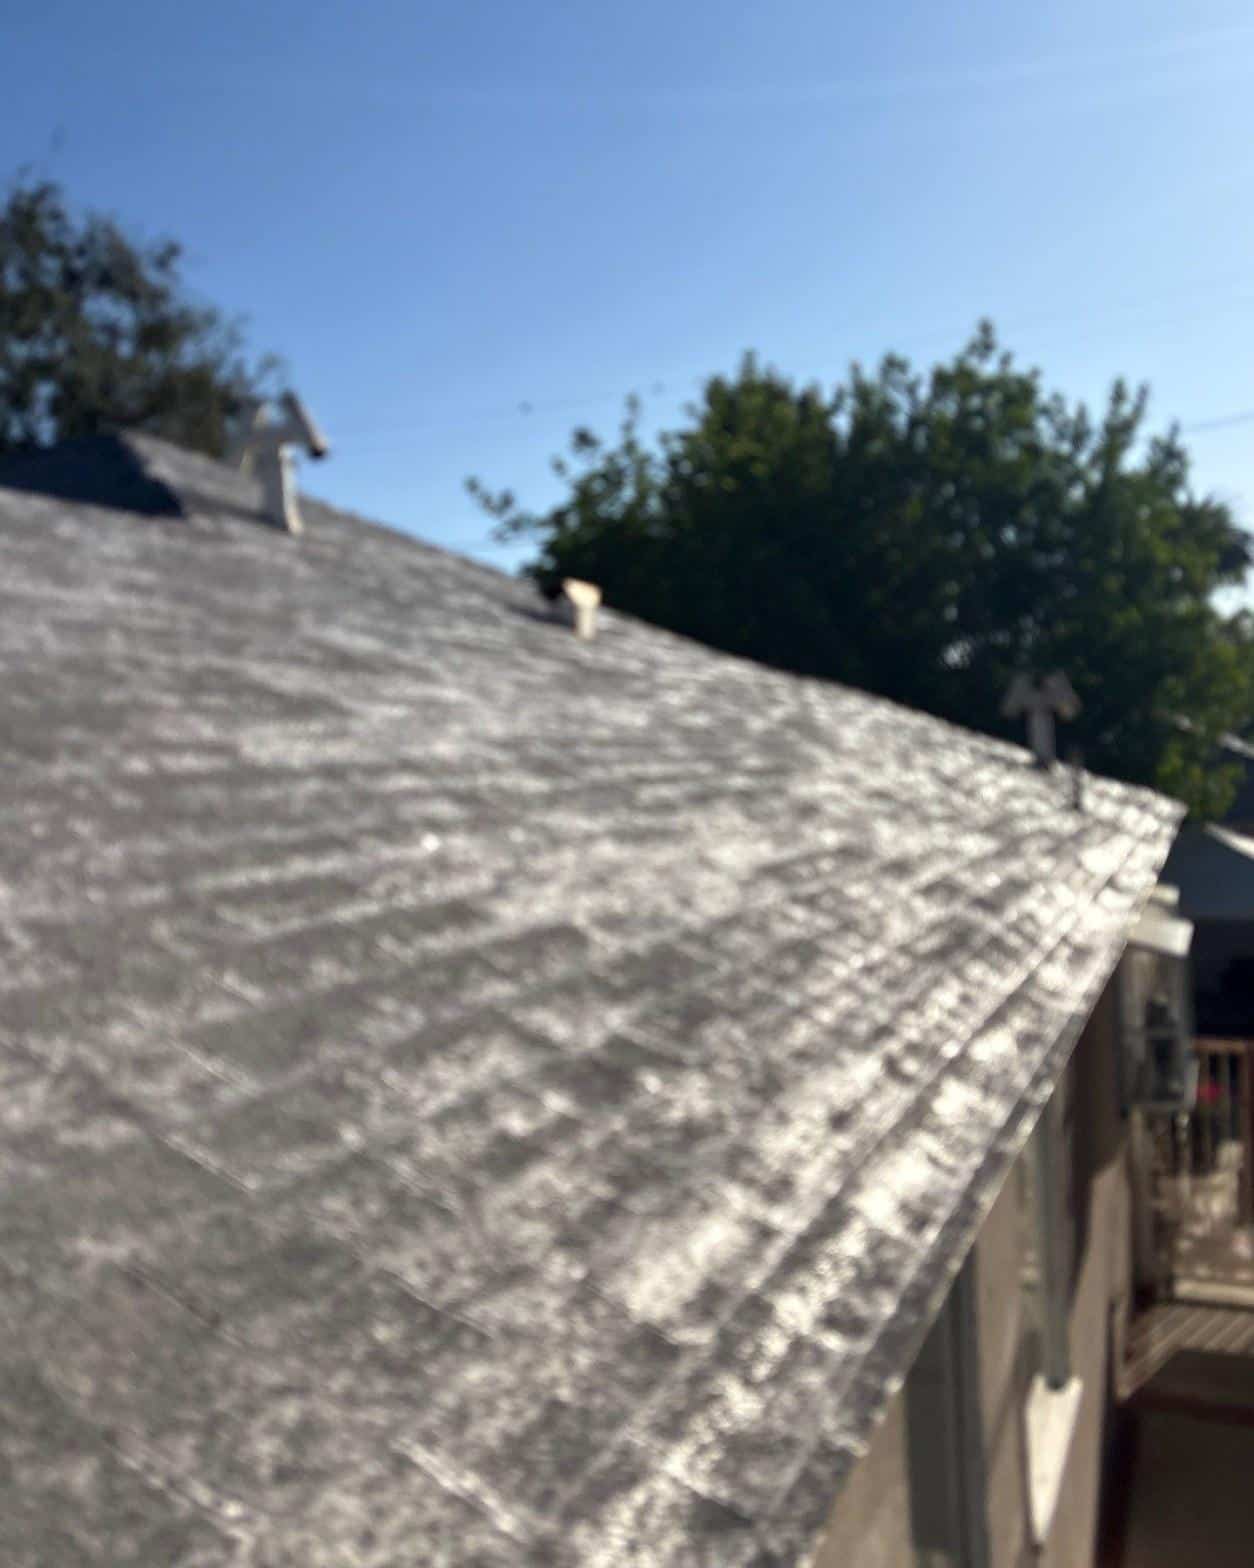
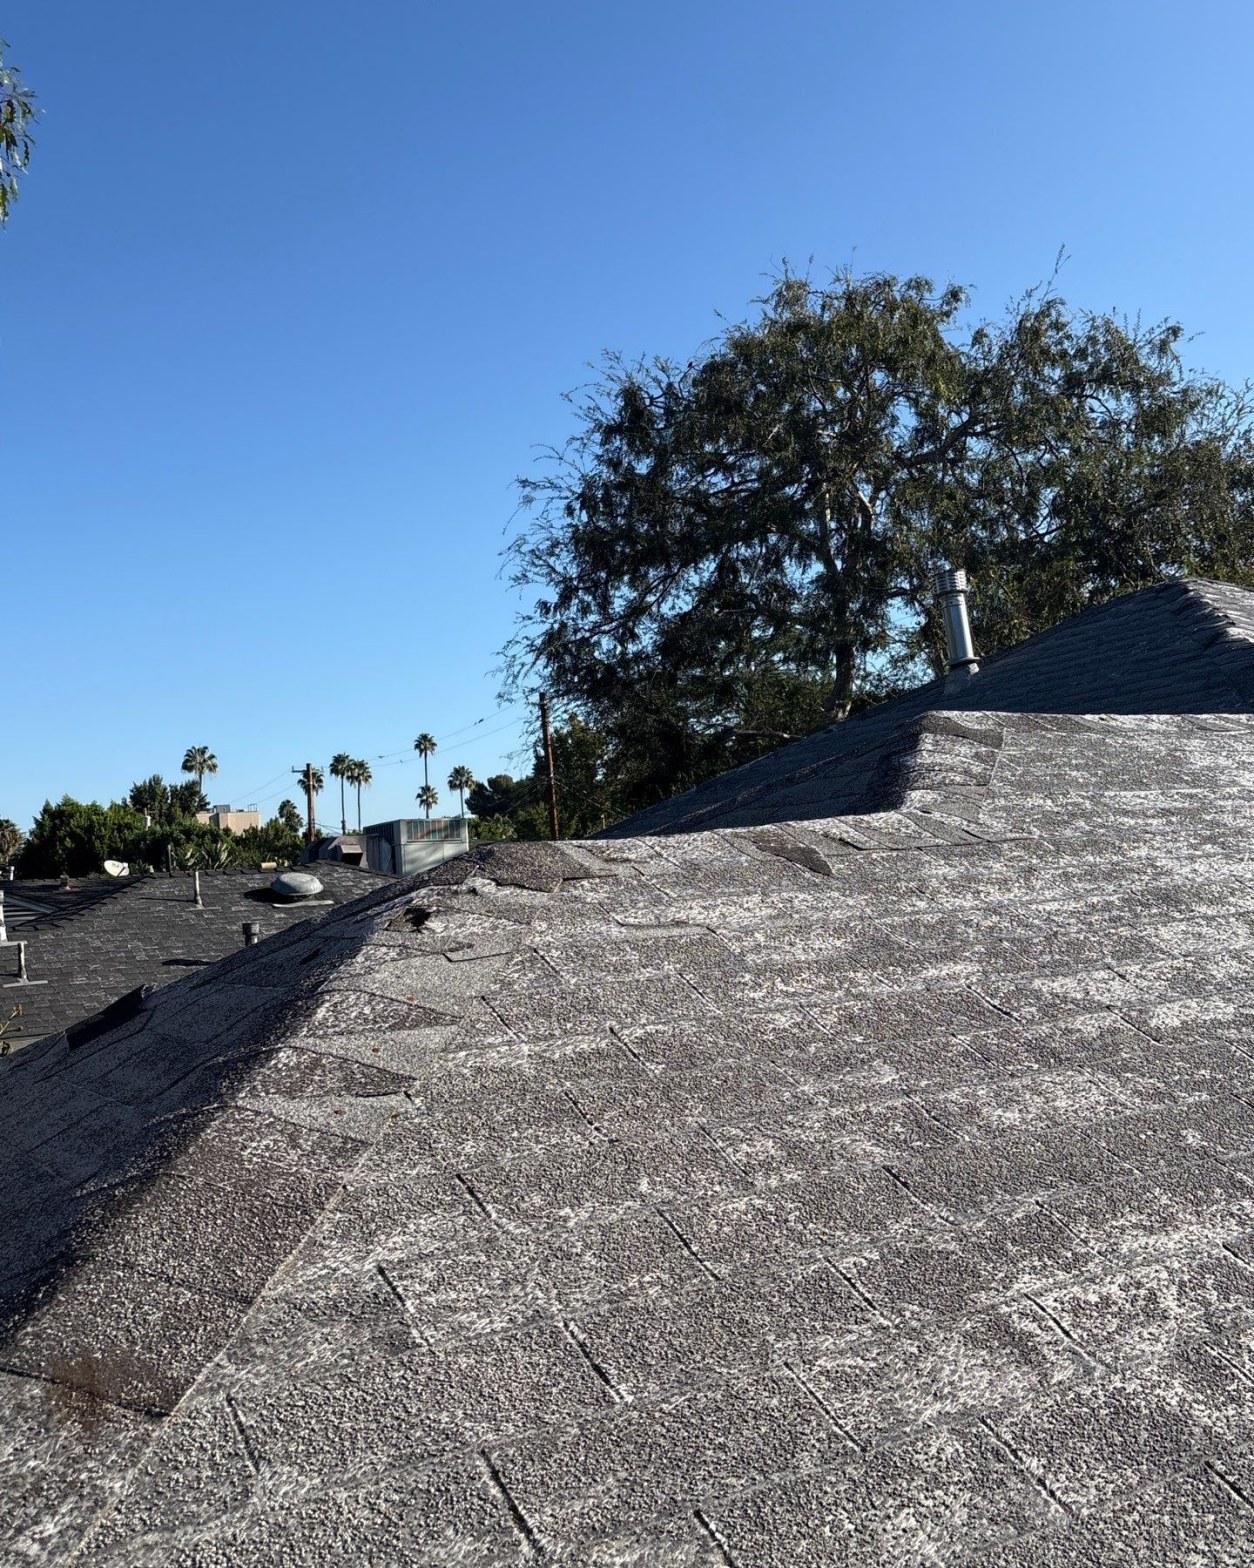
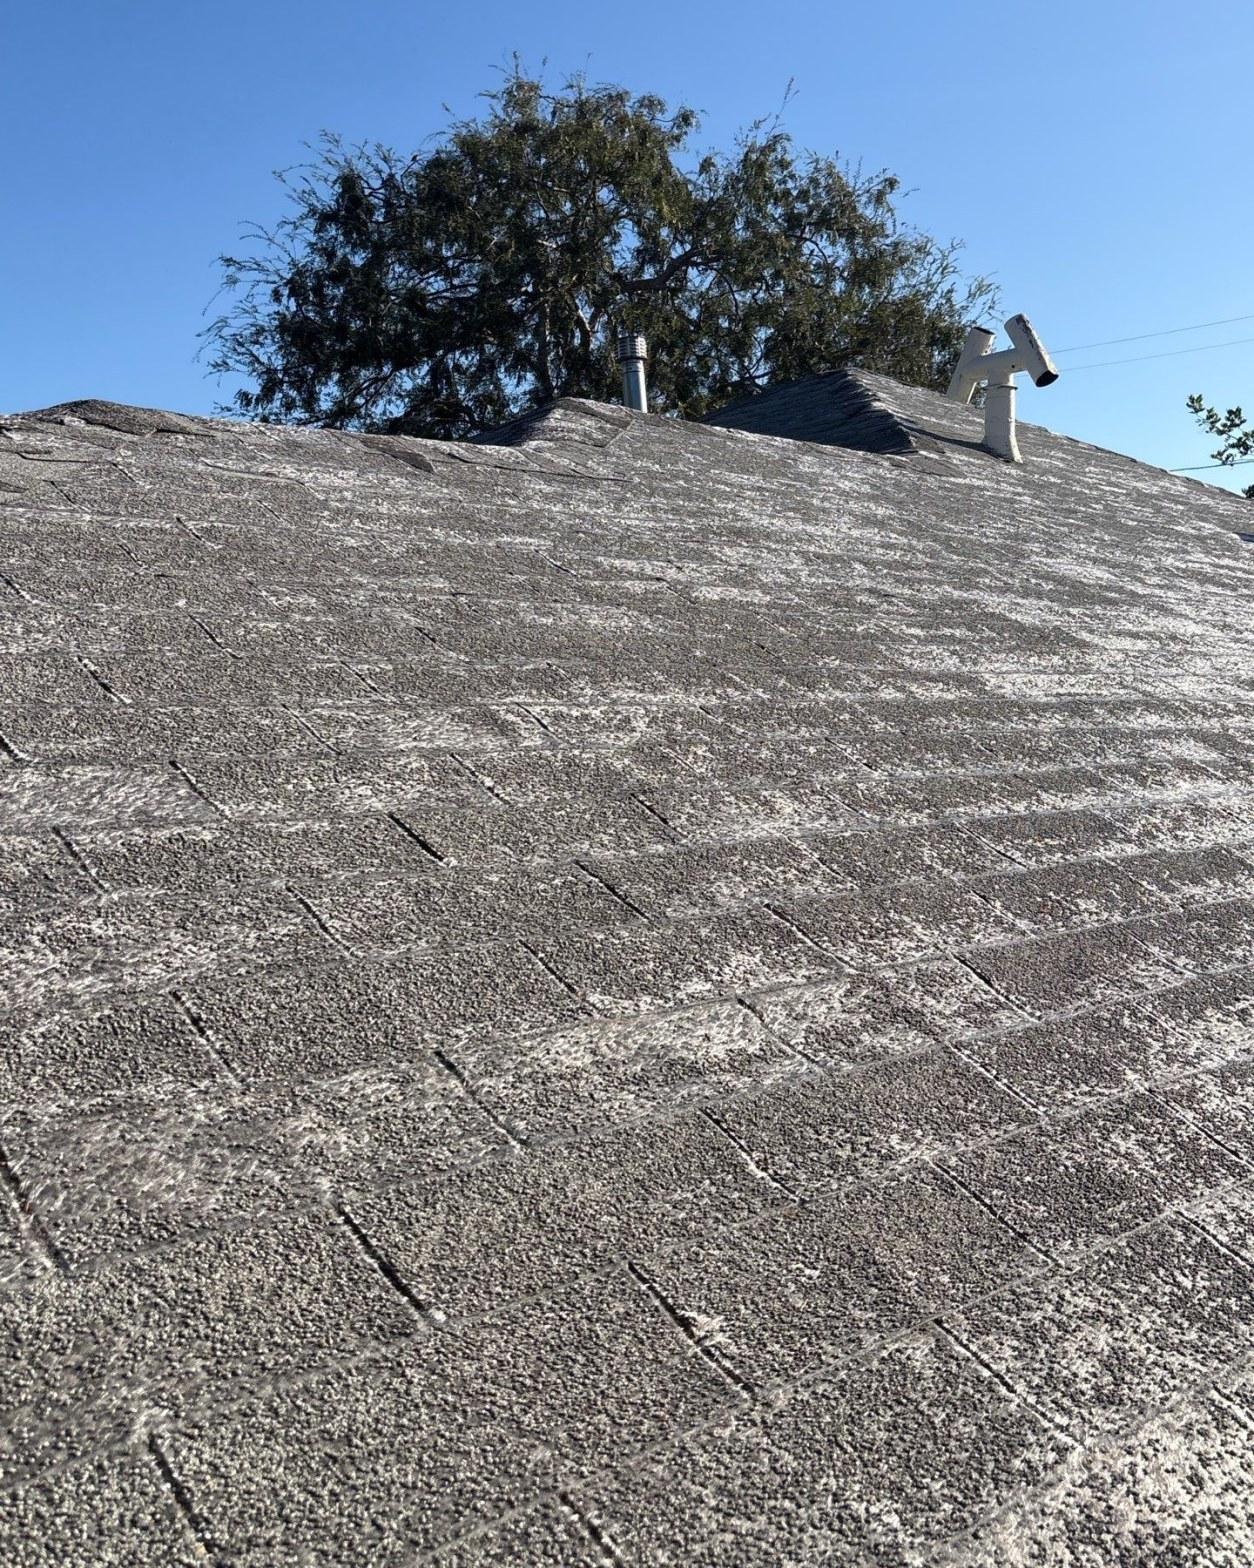
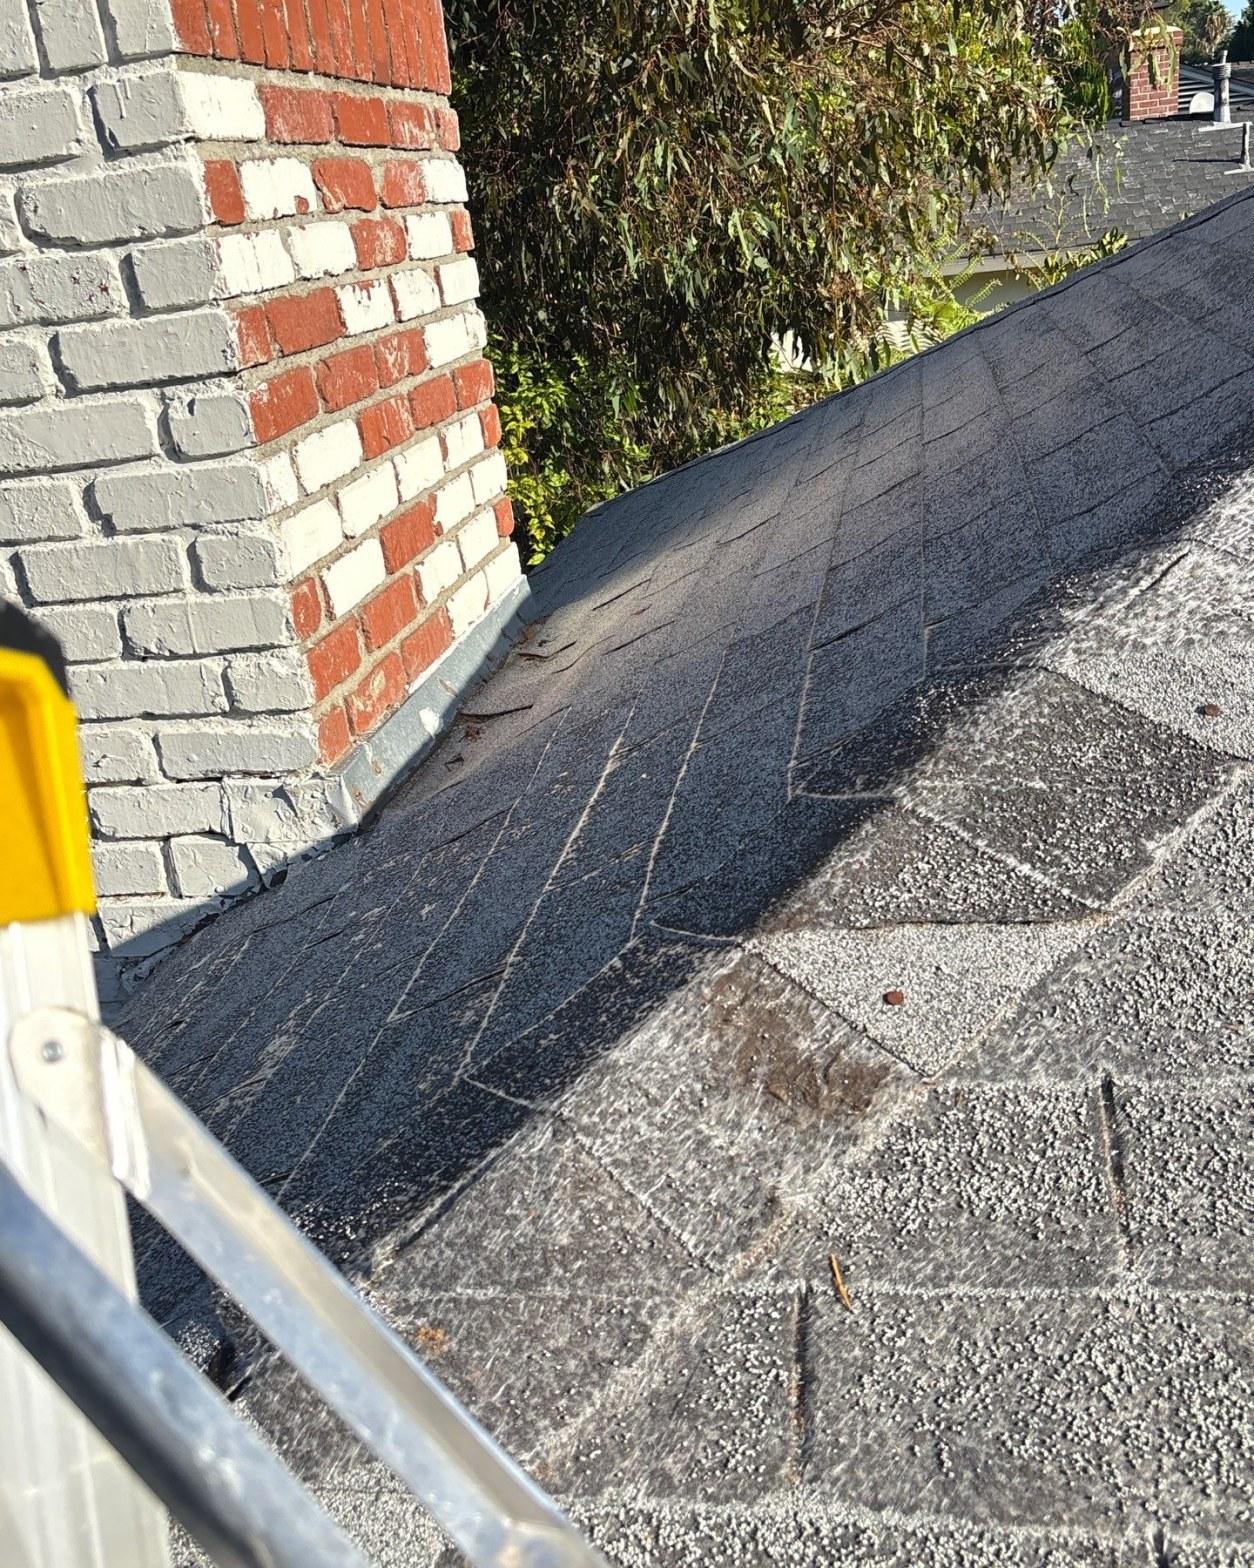
The existing asphalt shingles showed the kind of wear that comes from age and years of Southern California sun rather than any single weather event. Across the entire field, granule loss was severe and widespread. The white streaking visible on the shingle surface is a sign that the protective mineral coating had worn through to the mat underneath, leaving the mat exposed to UV. At that stage of deterioration, the shingles are no longer doing the job they were manufactured to do. A roof in this condition is not a candidate for patching or coating. Full replacement is the only path forward.
The California Building Code, like most model codes adopted from the International Residential Code, requires roof sheathing to be a structural panel or solid board product approved for the application. Skip sheathing, however sound the individual boards may be, does not meet that requirement for a new asphalt shingle installation.
What Does Skip Sheathing Look Like, and Why Does It Matter?
Skip sheathing is a grid of horizontal wood boards, typically 1×4 or 1×6 lumber, nailed across the rafters with a gap equal to roughly the board width between each course. The result is an open, ladder-like surface when you look at a roof mid-construction. It was the right call when wood shake was the finish material, because shake tiles need airflow beneath them to dry out after rain. Many Sherman Oaks homes built before the 1970s still have this system under whatever roofing was put on later.
The problem appears the moment a re-roofing crew strips those original shake tiles and a homeowner wants a modern asphalt shingle system. The 4244 Sunnyslope Ave home had already gone through that transition at some point: the skip sheathing was carrying asphalt shingles when the job started, almost certainly installed before continuous sheathing requirements became standard practice or were enforced uniformly. By the time this reroof began, the deck had no structural panel layer at all between the rafters and the finish roofing.
When we pull old shingles on homes like this one and hit skip sheathing, the board edges are frequently weathered from decades of moisture that worked past the aging shingles above. That condition matters because OSB panels must be fastened into solid framing members, not into punky board edges, so the nailing schedule and panel layout have to account for what the inspection of each rafter bay shows.
This photo, taken before the tear-off reached the chimney section, shows the two-layer reality clearly: the remaining shingle field runs right up to the brick, and you can see how the original roofing met the masonry. The chimney saddle and flashing detail is a separate scope item that follows the deck rebuild. Getting the deck right first is what determines how well everything above it performs.
How the Re-Sheathing Was Done
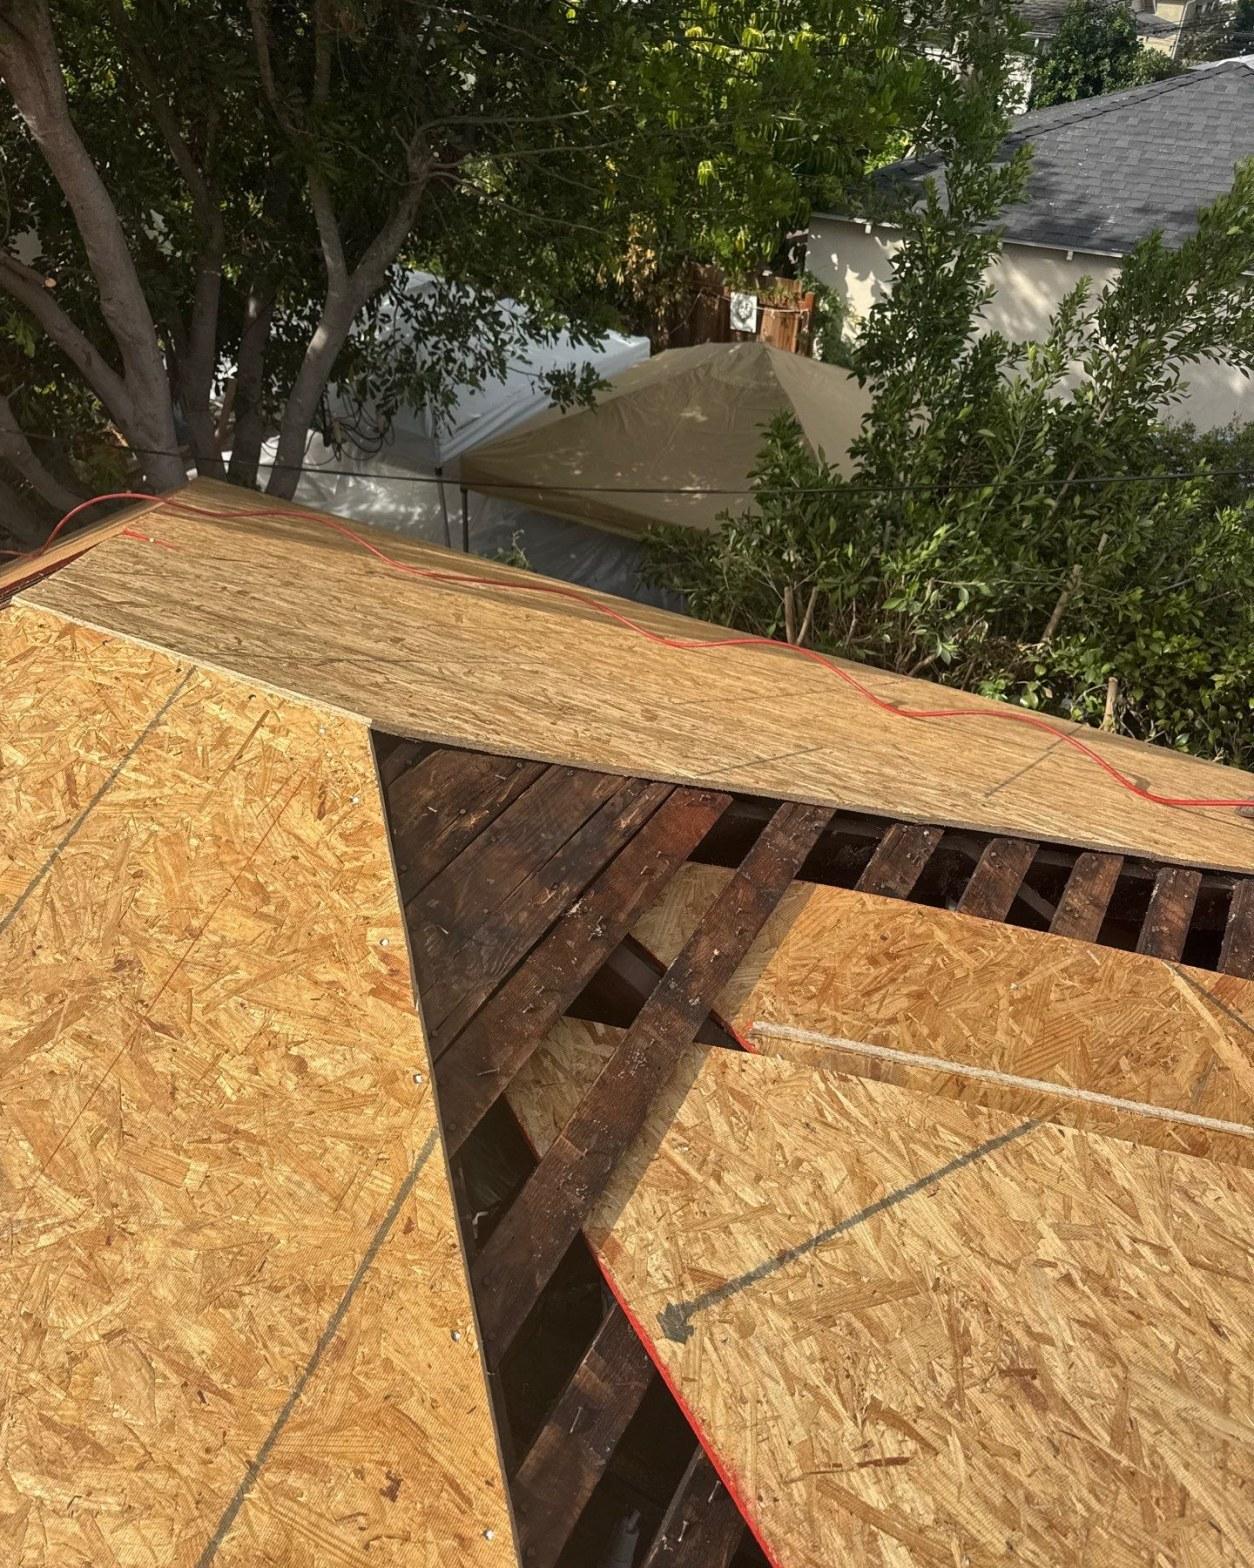
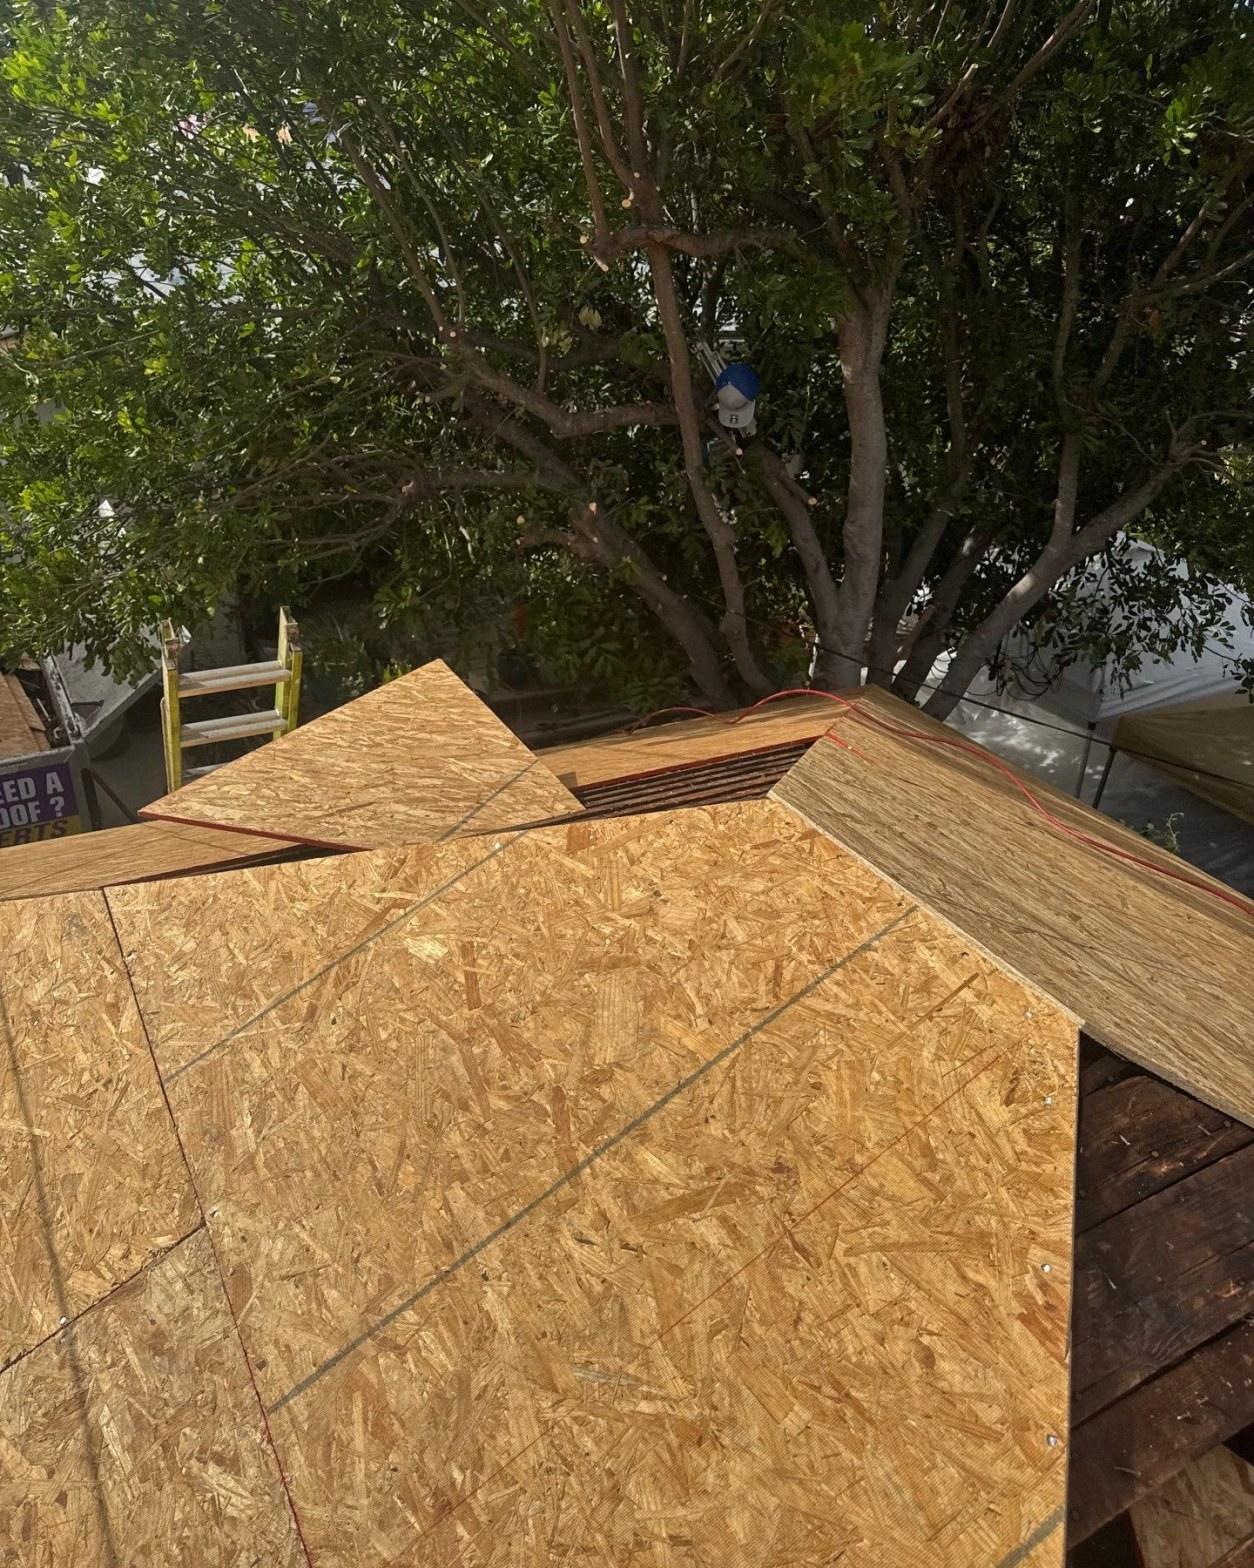
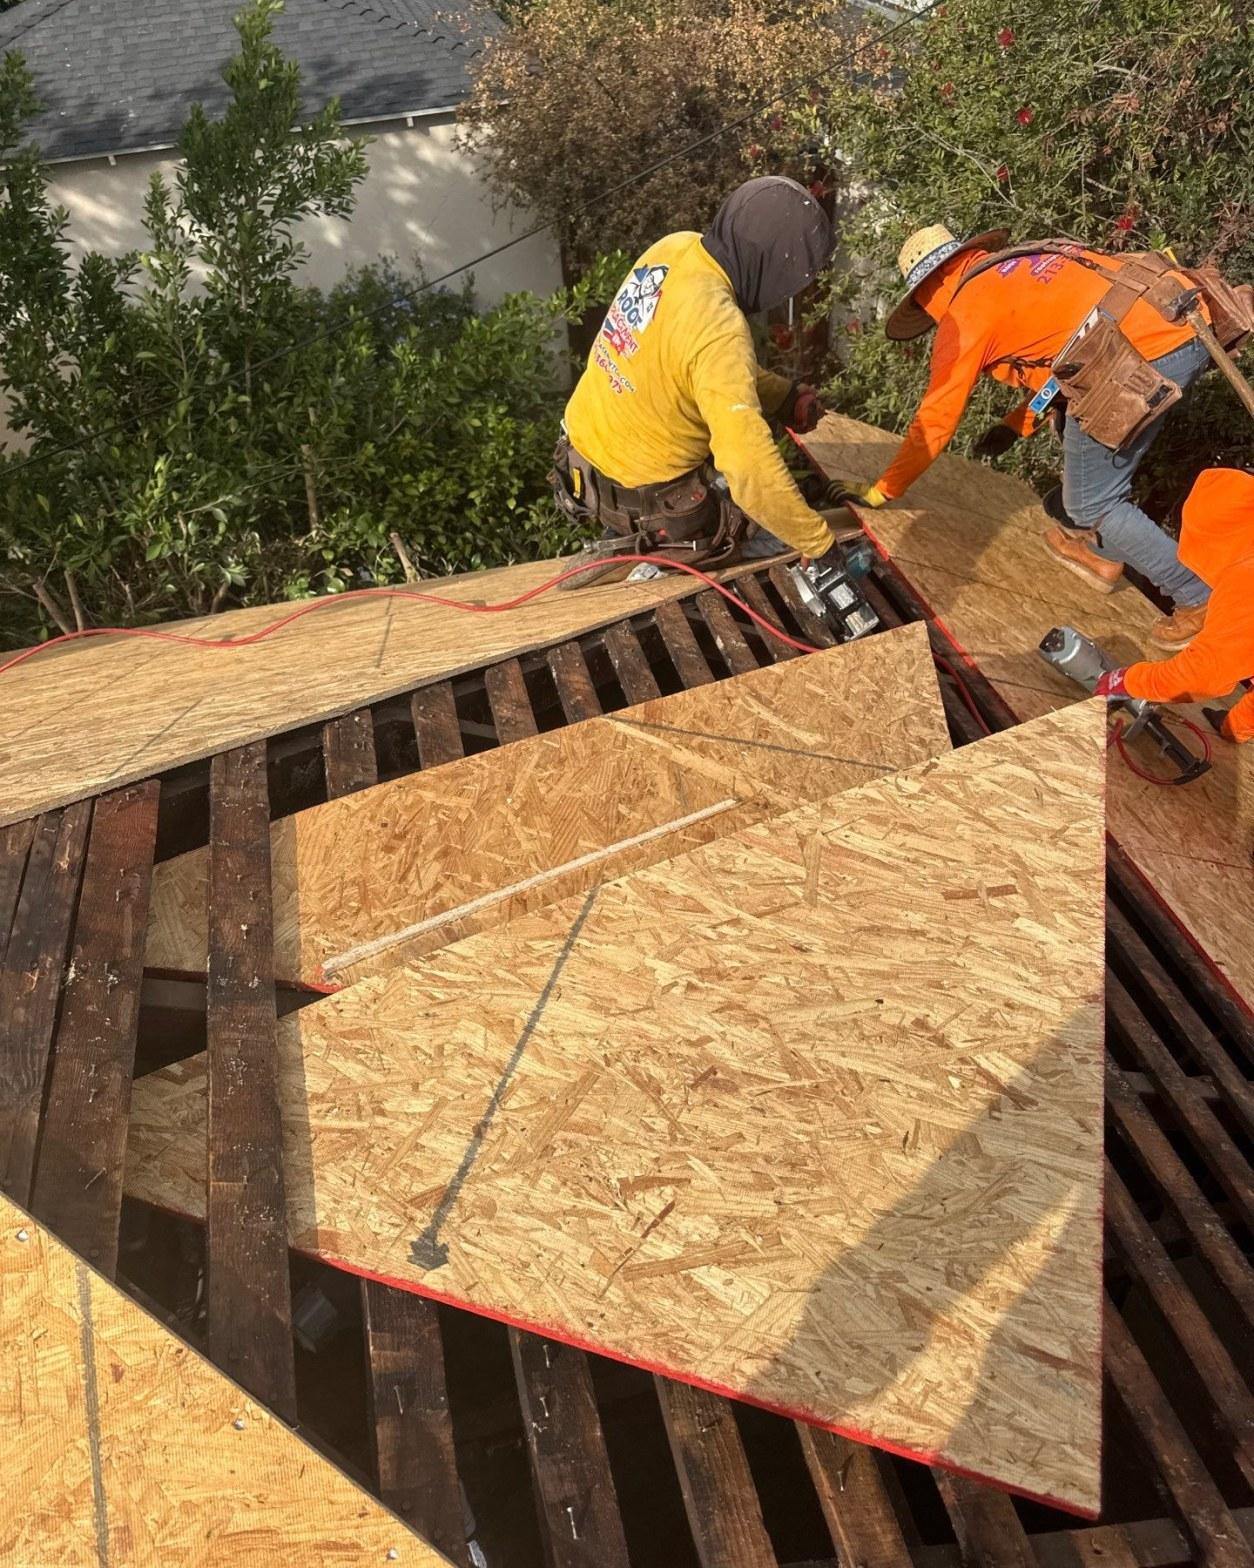
The crew stripped the full shingle field, then laid 4-by-8-foot OSB panels directly over the skip sheathing, working plane by plane across the hip-and-gable geometry. OSB, or oriented strand board, is a structural panel product manufactured from compressed wood strands bonded with resin under heat and pressure. It is one of the two panel products (alongside plywood) accepted under the American Plywood Association’s PS 2 performance standard for structural roof sheathing. A properly installed OSB deck gives asphalt shingles a consistent nailing base across every square inch of the roof, eliminates the risk of shingles bridging across gaps, and provides the continuous surface that self-adhering underlayment and synthetic felt both require to seal correctly.
The panels were cut to fit each plane individually, staggered so that no two vertical seams lined up on adjacent rows, which distributes load and prevents any single joint from becoming a weak point. Each panel was fastened at the perimeter and in the field at spacing that meets the nailing schedule in the applicable code table. The red-edged sealant line visible on the panel edges in several photos is the factory moisture indicator that ships on structural OSB panels; it confirms the product is rated for exterior exposure during the construction window before underlayment goes down.
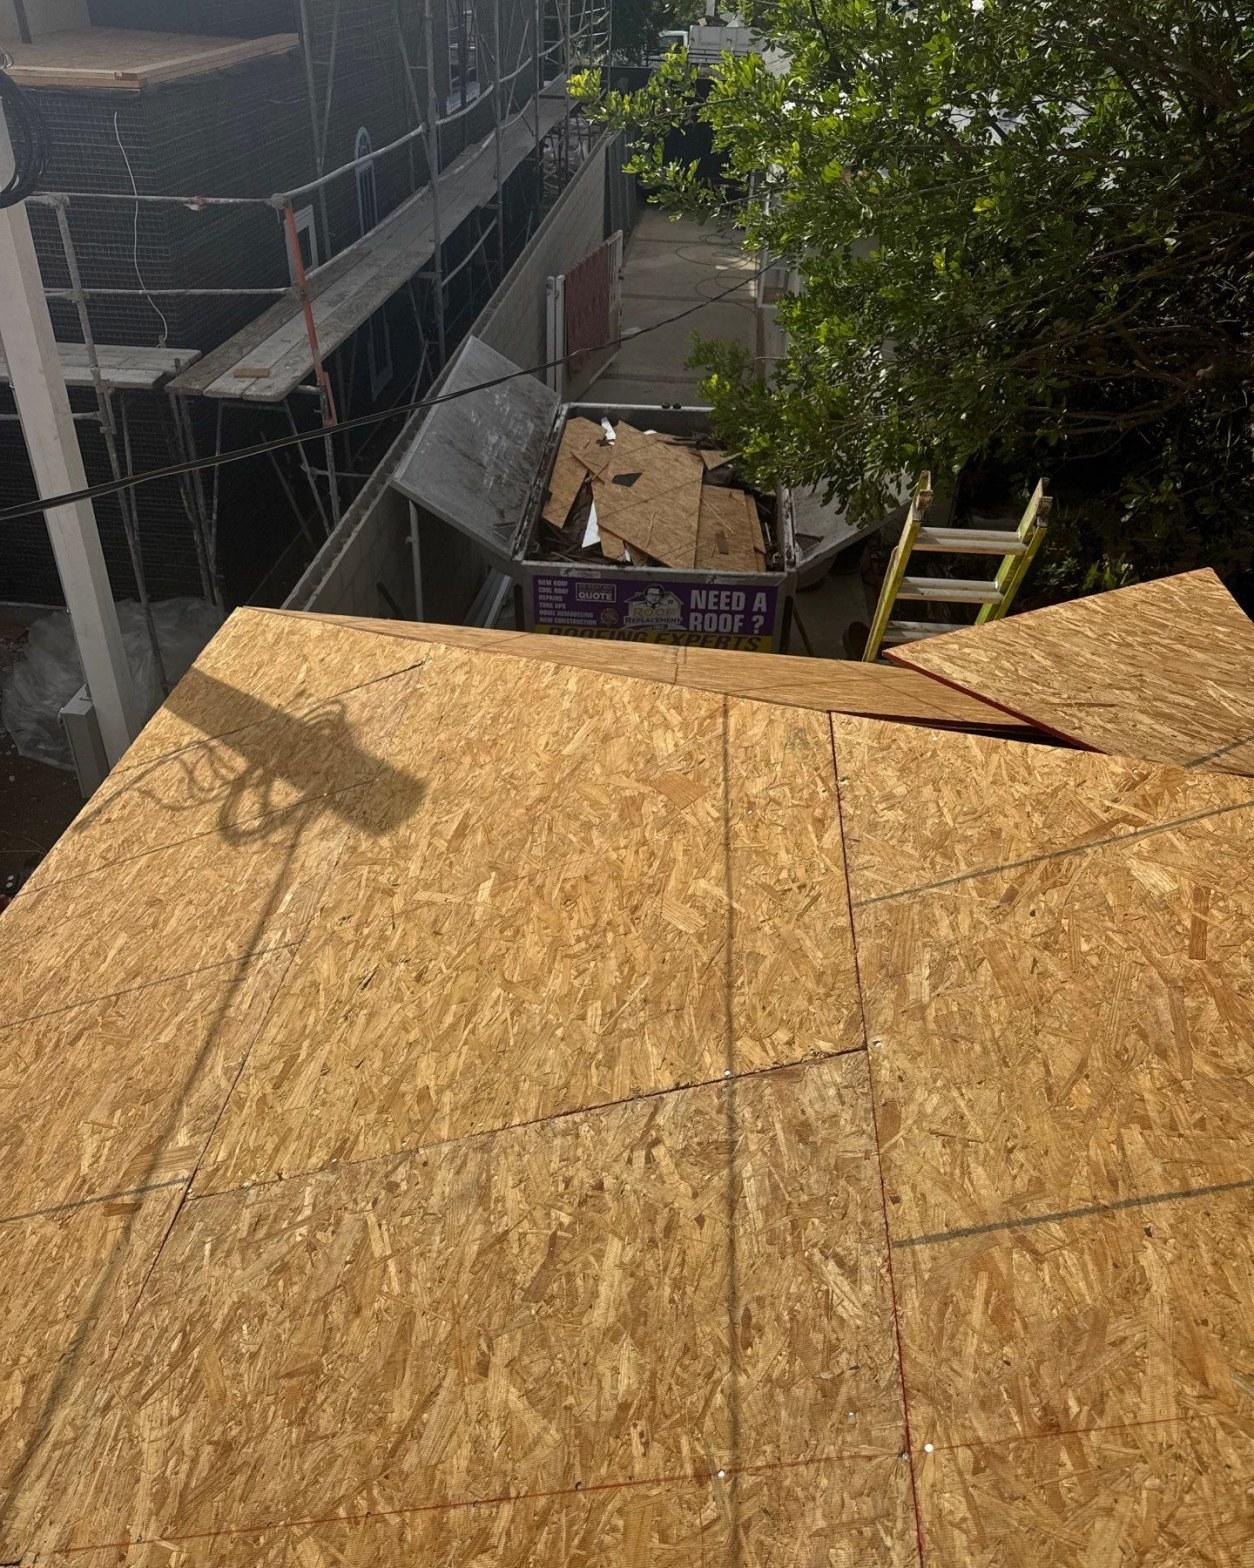
This aerial view from above the roof deck shows the scale of the re-sheathing operation: the new OSB already covers the main planes while the debris from the tear-off is visible in the dumpster below. The crew worked in fall-protection harnesses throughout. At the pitch this roof carries, harness anchoring is not optional under California’s Division of Occupational Safety and Health (Cal/OSHA) fall protection standards, which require fall protection for roofing work at heights of 7.5 feet or greater measured to the lower level.
The Deck at the Hip and Panel Seams
On a hip-and-gable roof, the panel layout gets more complex at the hip ridges, where the roof planes intersect at angles other than 90 degrees. Full 4-by-8 sheets can cover the central field efficiently, but the panels must be scribed and cut along each hip line so that every edge lands on a rafter or a blocking member. Gaps that fall in open air between rafters compromise the fastening and can telegraph as a ridge line through the finished shingles.
The photos taken at the seams show the nailing pattern and the tight, consistent gaps left between adjacent panels. Structural sheathing panels are installed with a small gap at each edge, typically 1/8 inch, to allow for seasonal expansion. That gap is deliberate. OSB absorbs ambient humidity and expands slightly; panels installed edge-to-edge with no gap can buckle at the seams, which then shows up as a wave in the finished roof surface. The nailing lines snapped in chalk across the face of each panel mark the rafter locations below, so the fasteners hit solid wood rather than landing in the gap between boards on the skip sheathing underneath.
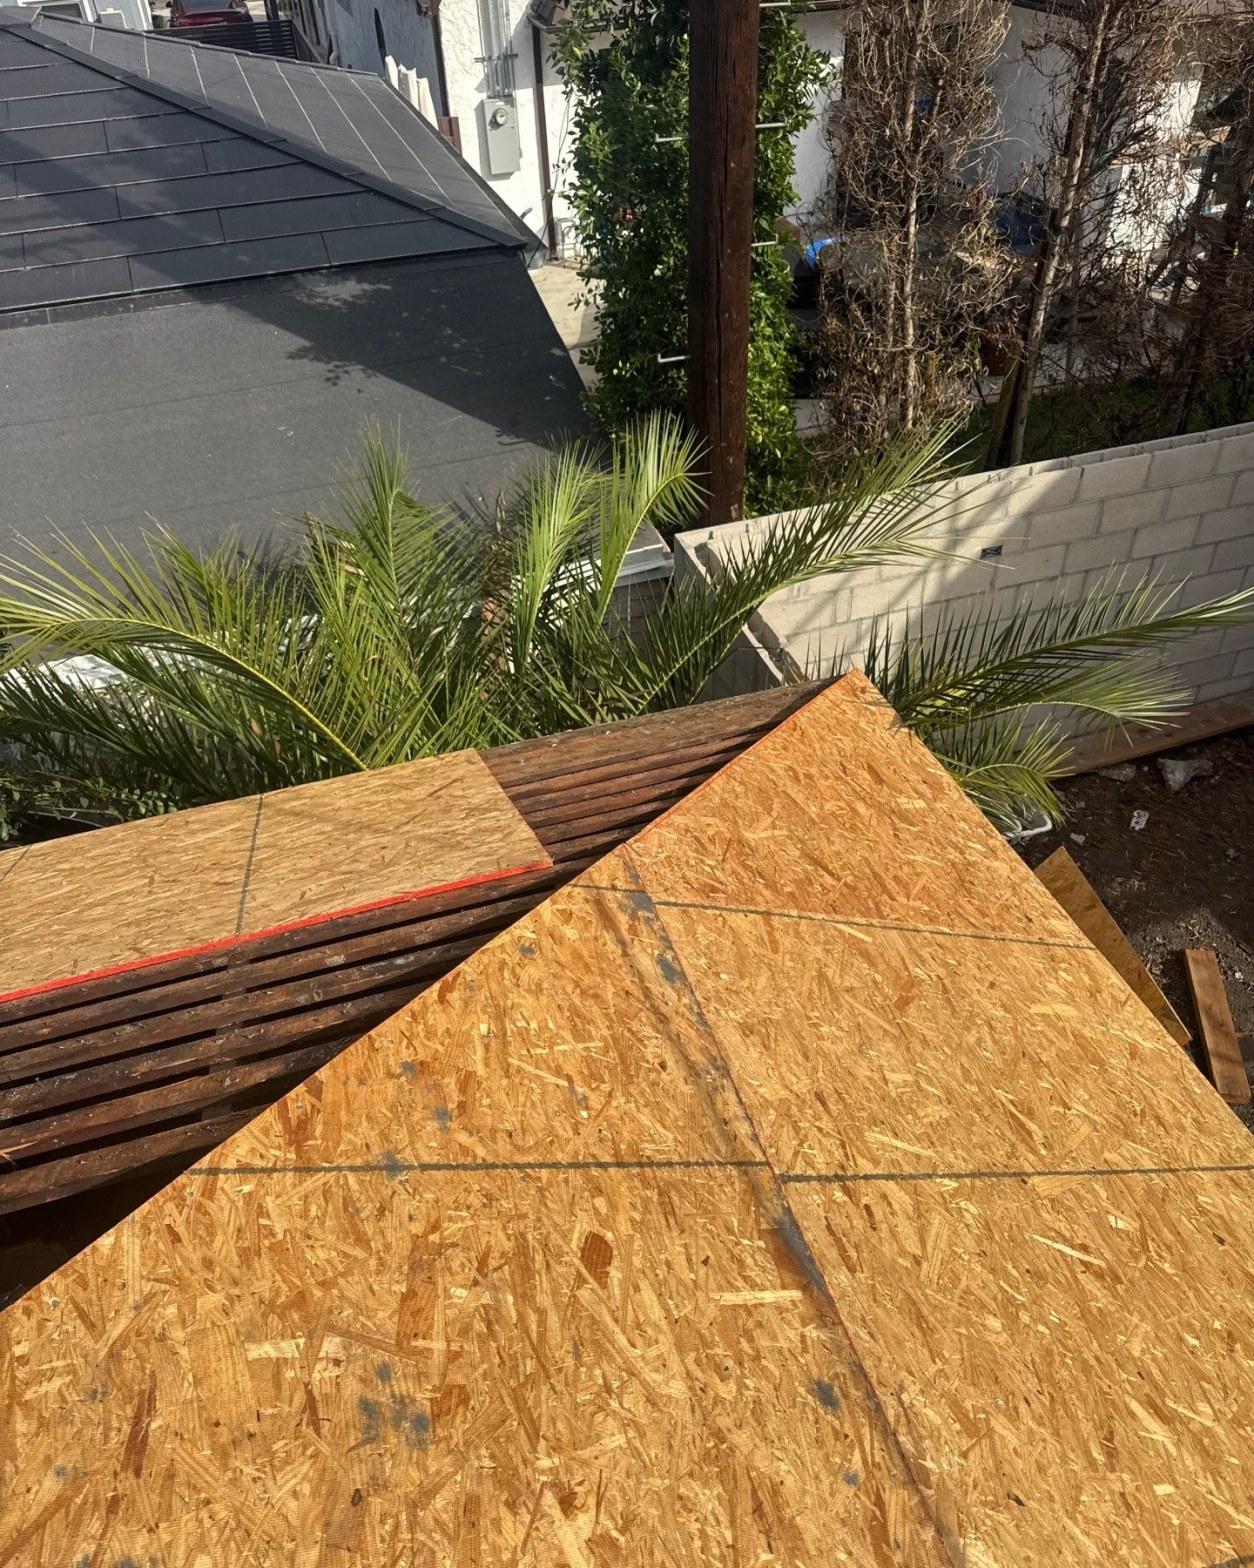
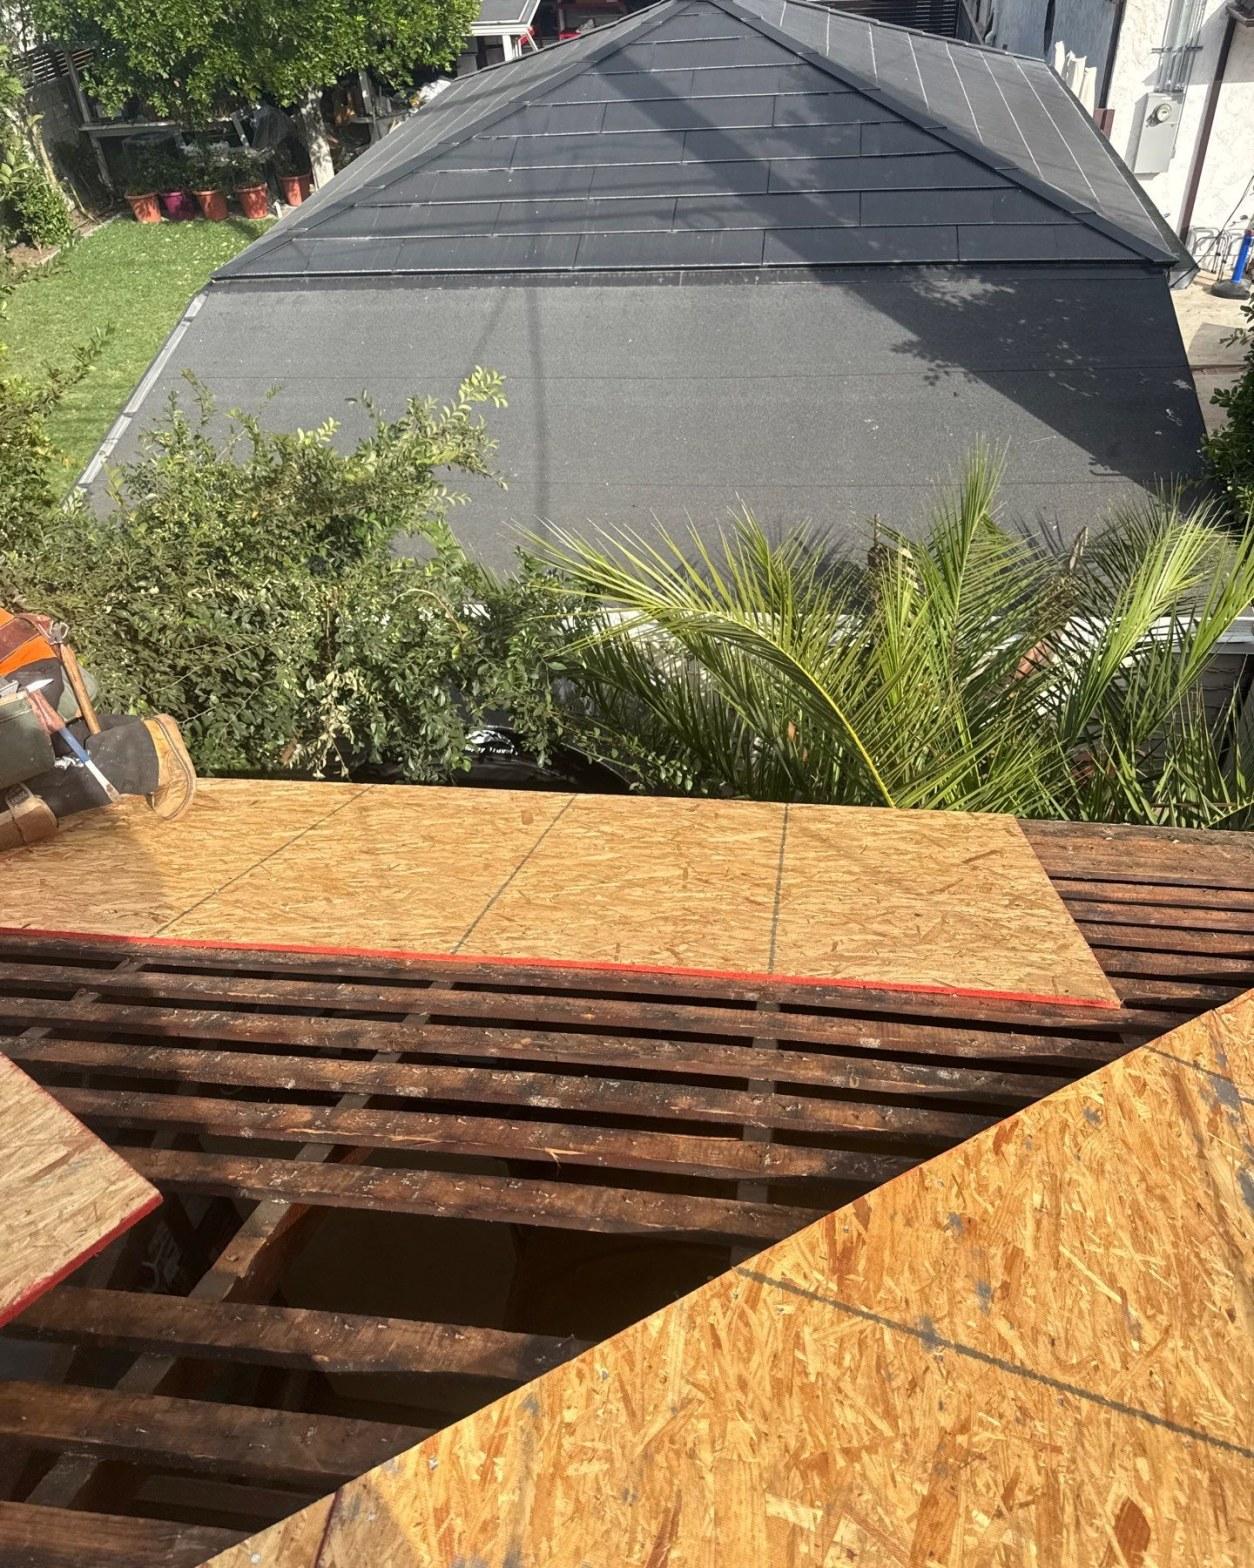
This view shows two OSB panels already fastened down at the lower portion of the slope, with the original skip sheathing visible in the section not yet covered. The contrast between the two systems is stark: the gap-board grid of the skip sheathing on one side, the continuous structural panel surface on the other. A neighboring home in the background has already received its underlayment and new finish roof, which gives a reference point for where this project is headed once the deck stage is complete.
Panel Seams Up Close: What Proper Fastening Looks Like
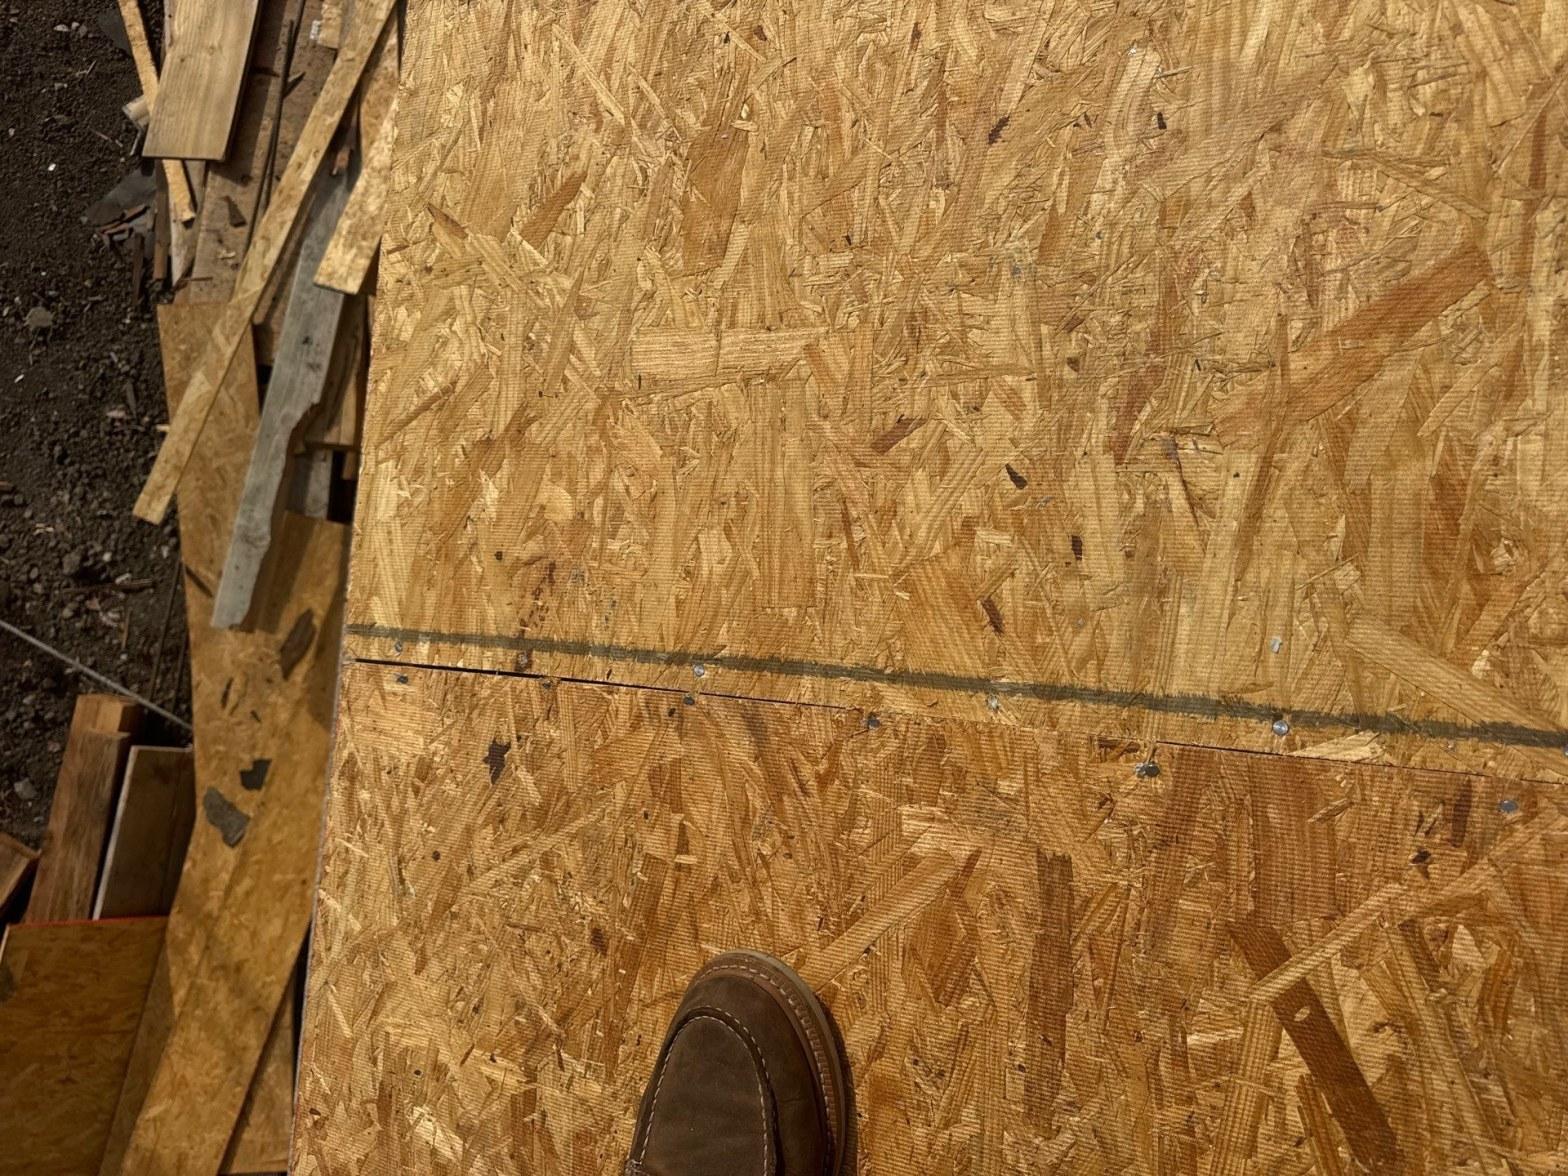
A well-fastened OSB deck shows nails or screws set flush with the panel face at regular intervals along every seam and across the field. Fasteners that miss the rafter below, or that are overdriven and break through the panel face, do not count toward the required fastening schedule. On a re-sheathing job over skip sheathing, hitting the rafters consistently requires a clear nailing plan, because the rafter layout may not be on a standard 16-inch or 24-inch center in every bay of an older home.
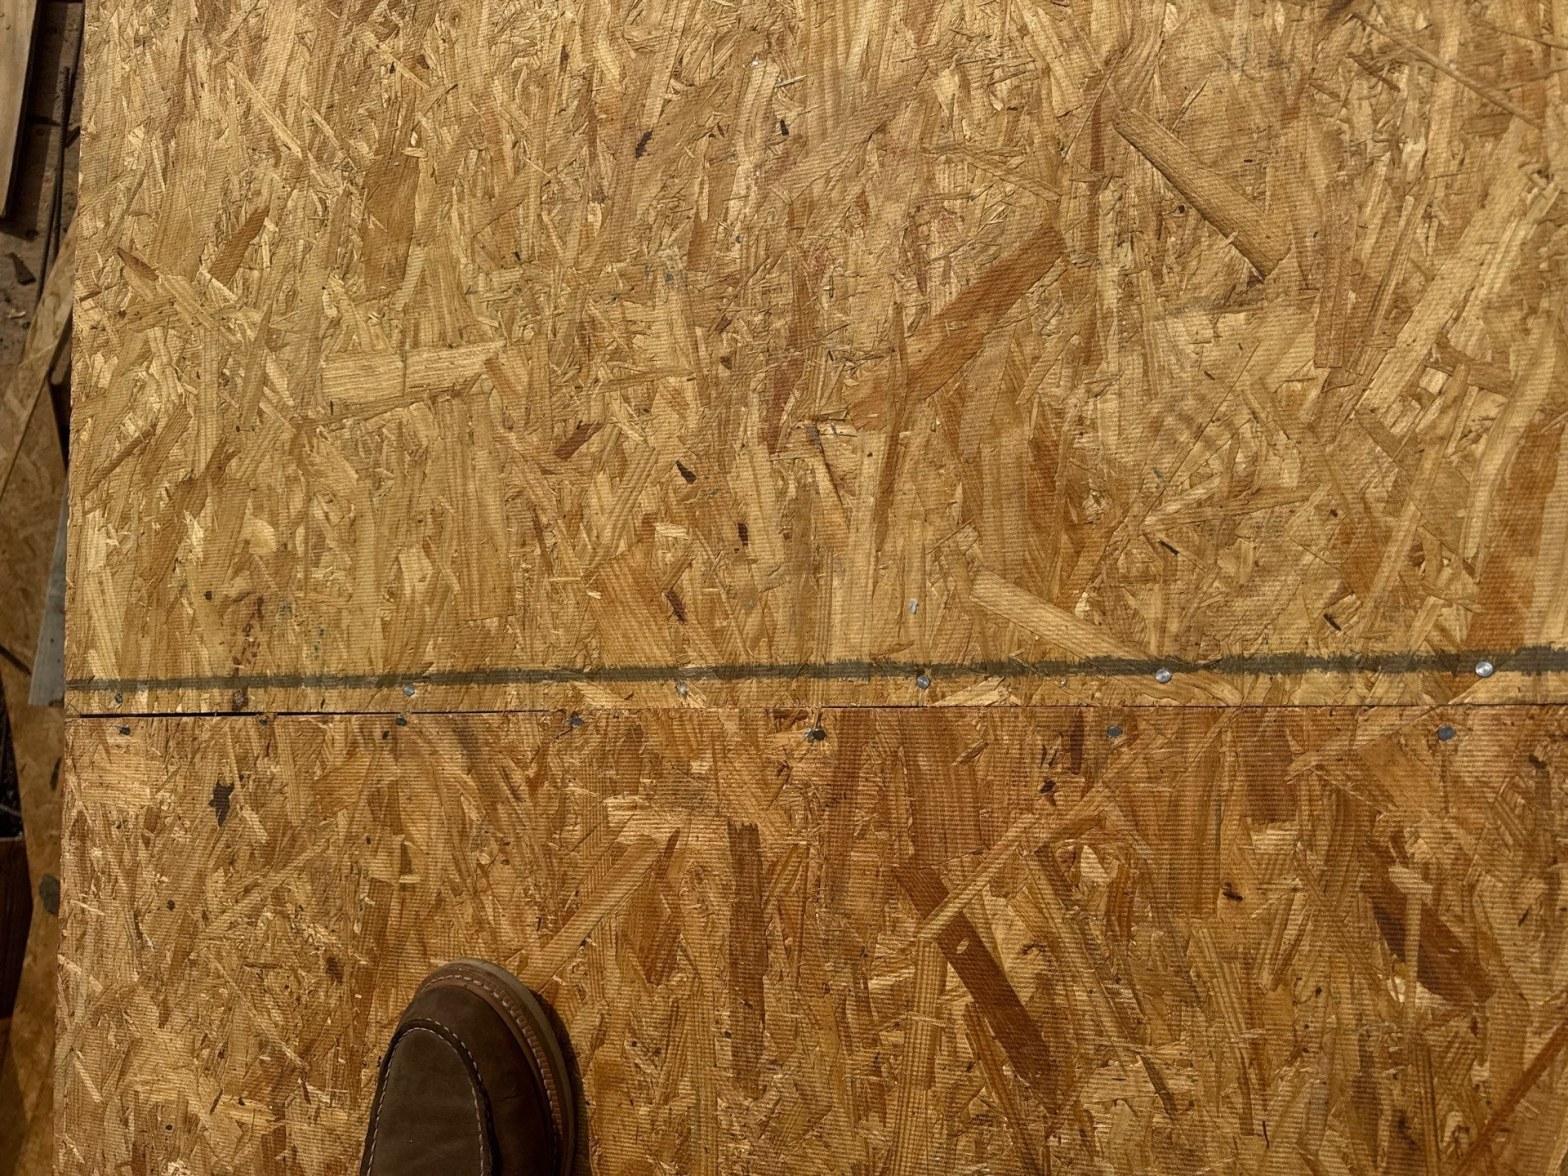
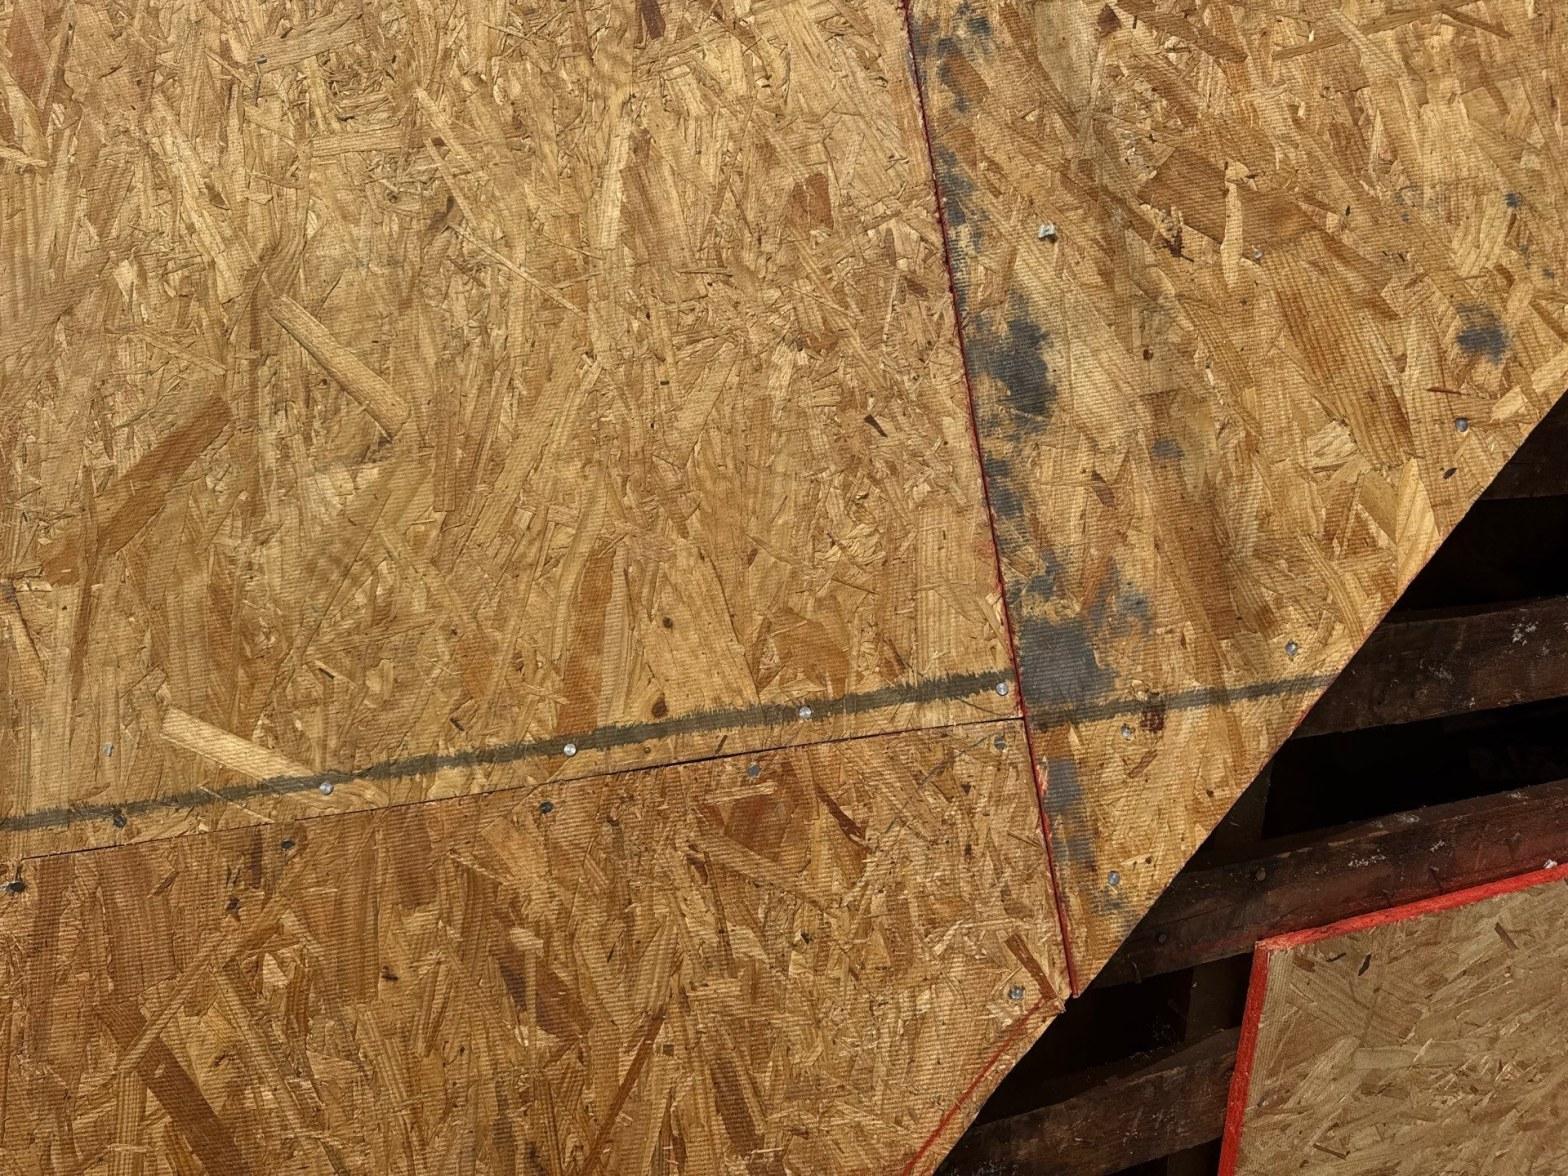
This close-up shows a horizontal panel seam with fasteners driven at consistent spacing, the chalk line still visible above them. Both panels are flush, with no buckling at the joint. The small gap between the two panel edges is correct. This level of detail at the seam matters because the seam is where the panel is most vulnerable to movement; a tight, well-fastened seam stays flat under the load of foot traffic during installation and under the long-term load of the finish roofing above.
As of 2026, the California Residential Code Section R803 specifies minimum panel thickness and fastening requirements for roof sheathing based on rafter spacing. For a typical residential rafter spacing of 24 inches on center, 7/16-inch OSB is the minimum rated panel; for 16-inch spacing, the same thickness typically applies with the specified nail size and pattern. The panels installed on this job are consistent with those requirements based on what is visible in the photos.
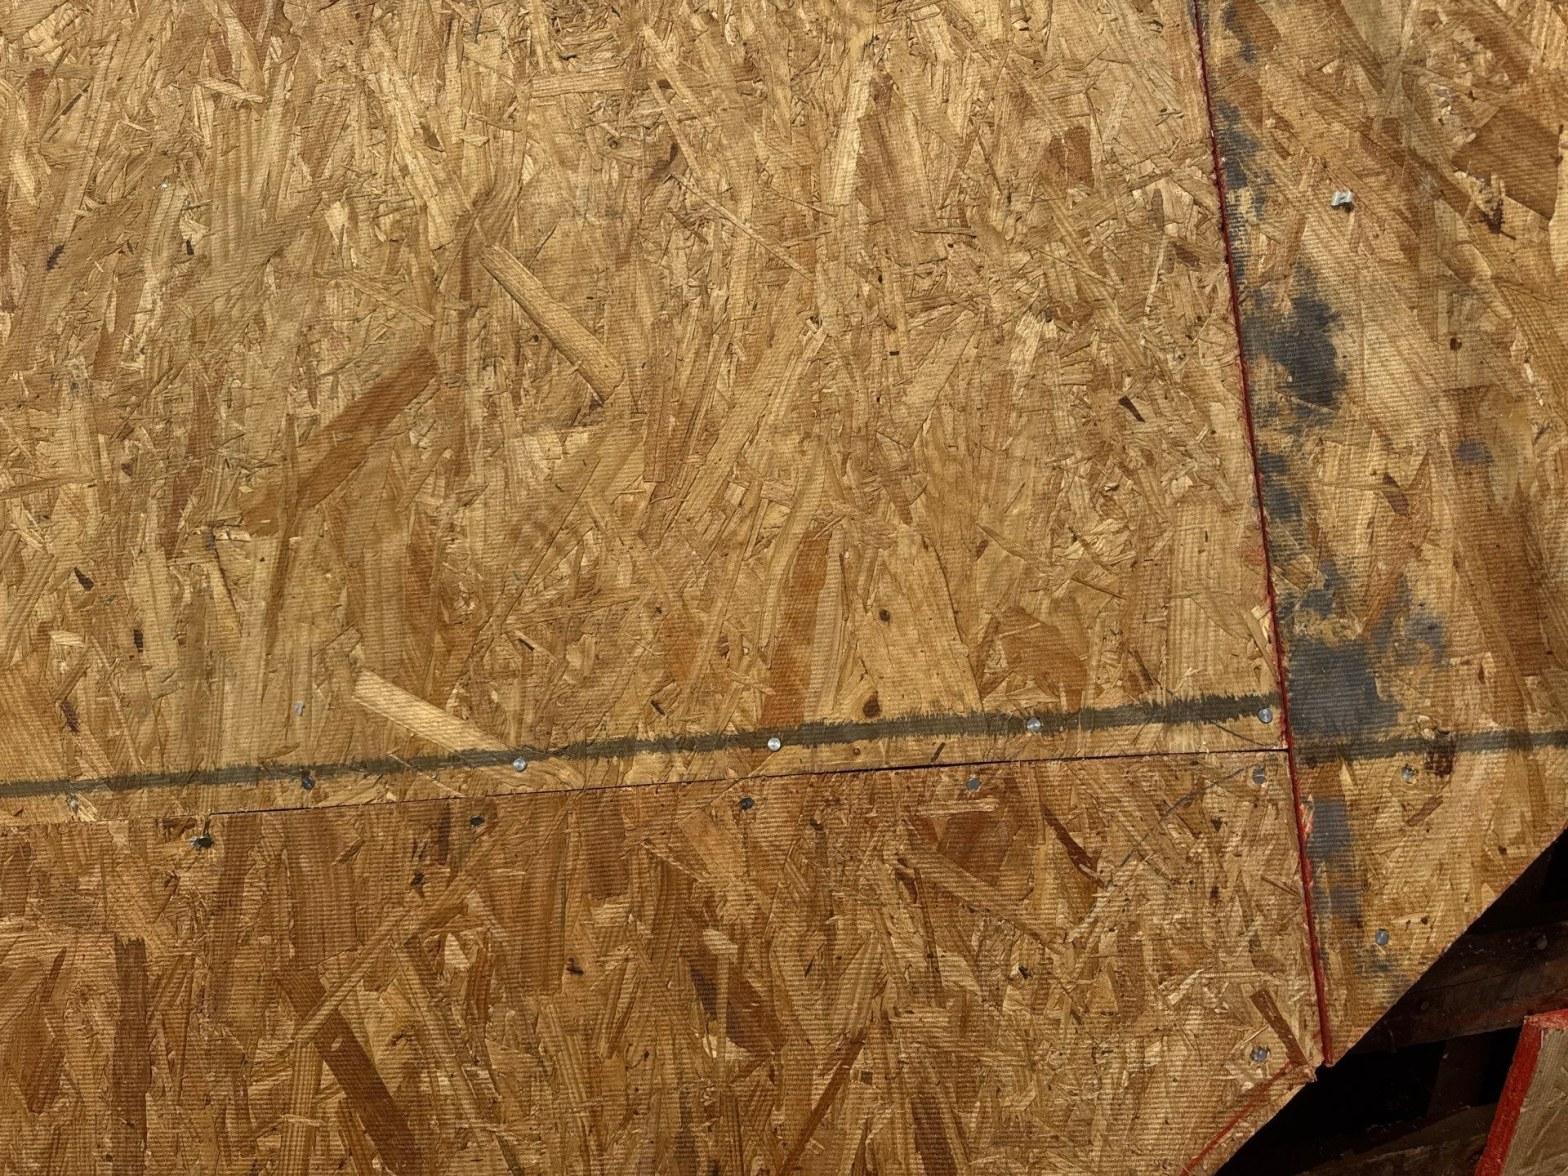
This final seam photograph, taken from a slightly different angle, shows the same nailing quality at a T-intersection where three panel corners meet. The vertical seam is offset from the row below, confirming the staggered layout. This is the deck that the new shingle system will go onto, once underlayment is installed across the full surface.
What Comes Next on This Roof
The completed OSB deck is the foundation for the remaining stages of the reroof: underlayment, drip edge, chimney flashing, and finally the new shingle system across all planes. None of those stages can be done correctly without a solid, continuous deck underneath them, which is exactly why the re-sheathing had to come first.
Homeowners whose roofs were originally built over skip sheathing should expect this deck rebuild to be part of their reroof scope. It is not an upsell or a surprise; it is the structural prerequisite for a code-compliant installation. The only way to know for certain what is under an old shingle roof is to do the tear-off and look.
Roof Replacement Inc is licensed by the California Contractors State License Board (CSLB). If your Sherman Oaks home has a roof of similar age and you are seeing granule loss, fading, or streaking on the shingle field, call us to schedule an inspection. We will tell you honestly what the deck looks like once the material comes off, and quote the full scope of work before anything starts.


