

The Project: A Sherman Oaks Ranch Home Ready for a New Roof
This job at 15308 Valley Vista Blvd in Sherman Oaks was a full asphalt shingle replacement on a single-story ranch-style home, with a tall stone-faced chimney and a covered rear patio as the two most detail-intensive parts of the site. The homeowner’s goal was straightforward: replace an aging dark shingle roof before the next rainy season, address any deck problems uncovered during tear-off, and refresh the rear pergola at the same time.
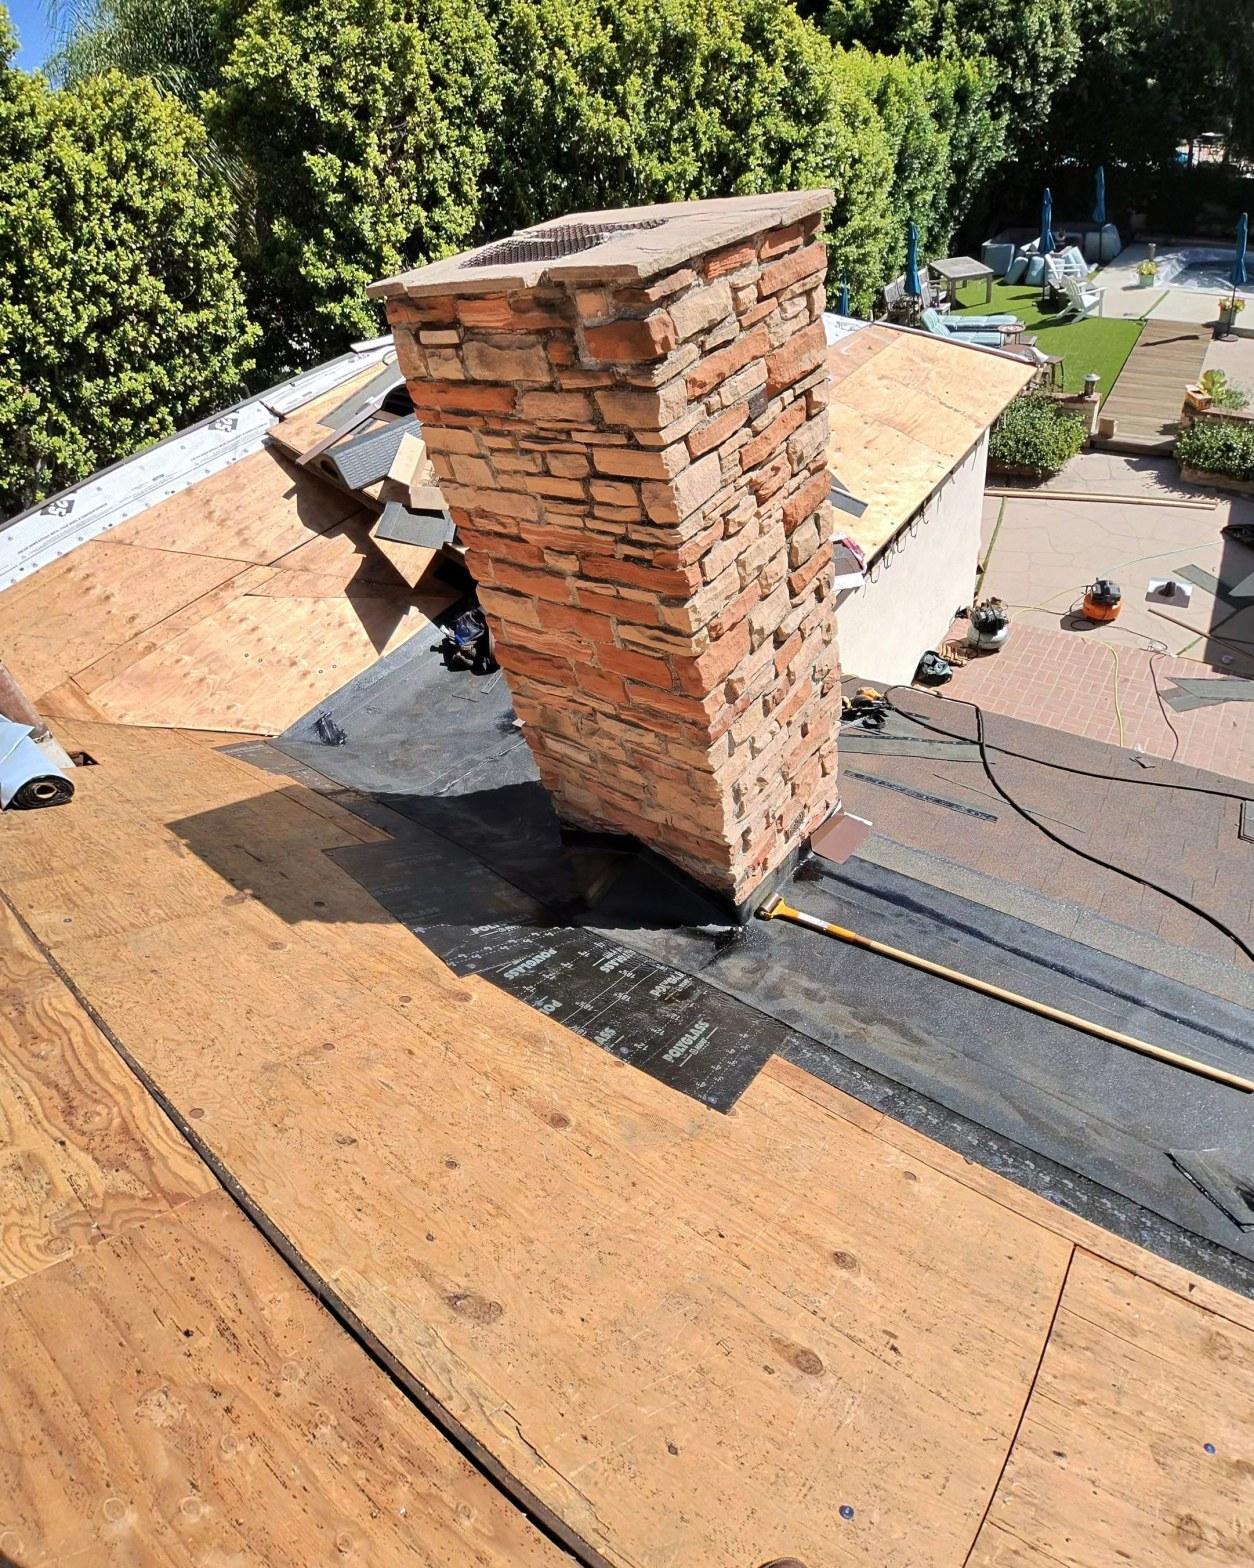
The roof’s hip geometry and multiple intersecting planes added complexity beyond a simple gable. The stone-faced chimney, which rises well above the ridge line and passes through two separate roof planes, required careful flashing work at every transition. Getting the waterproofing right at that penetration was the most consequential single task on the job.
Project Gallery
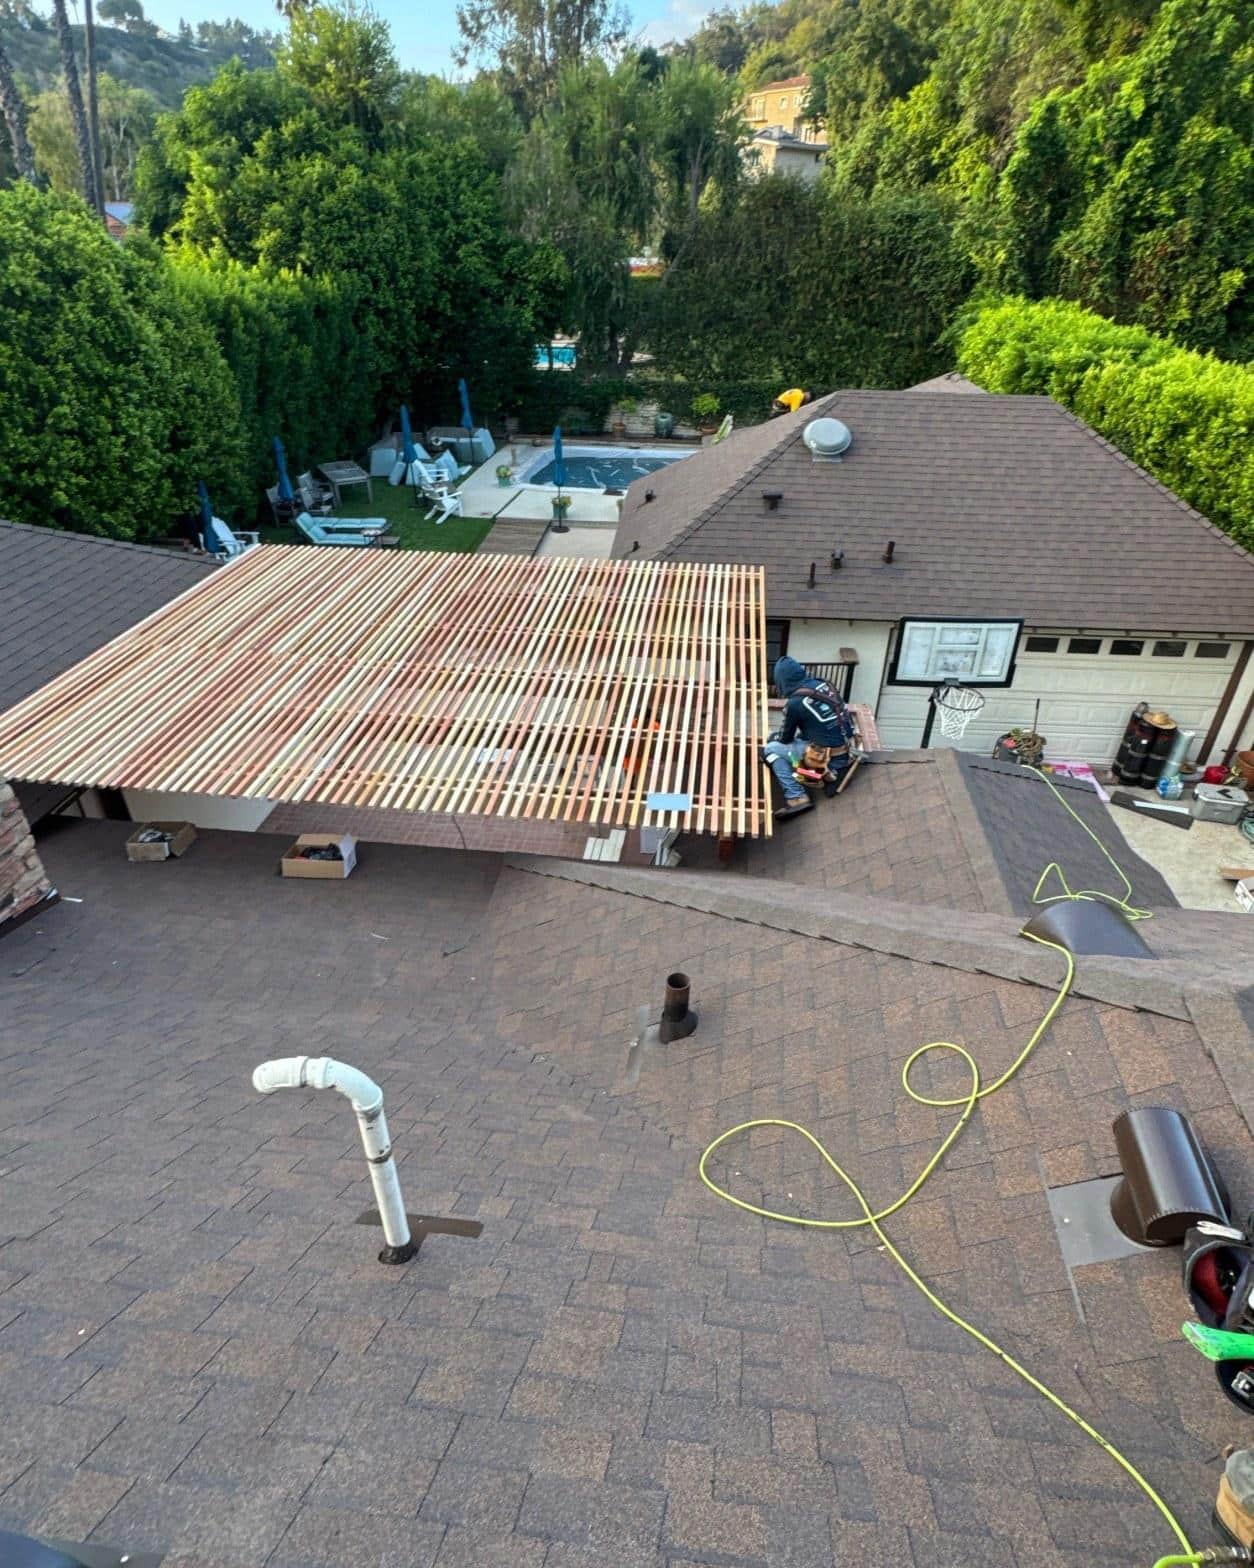
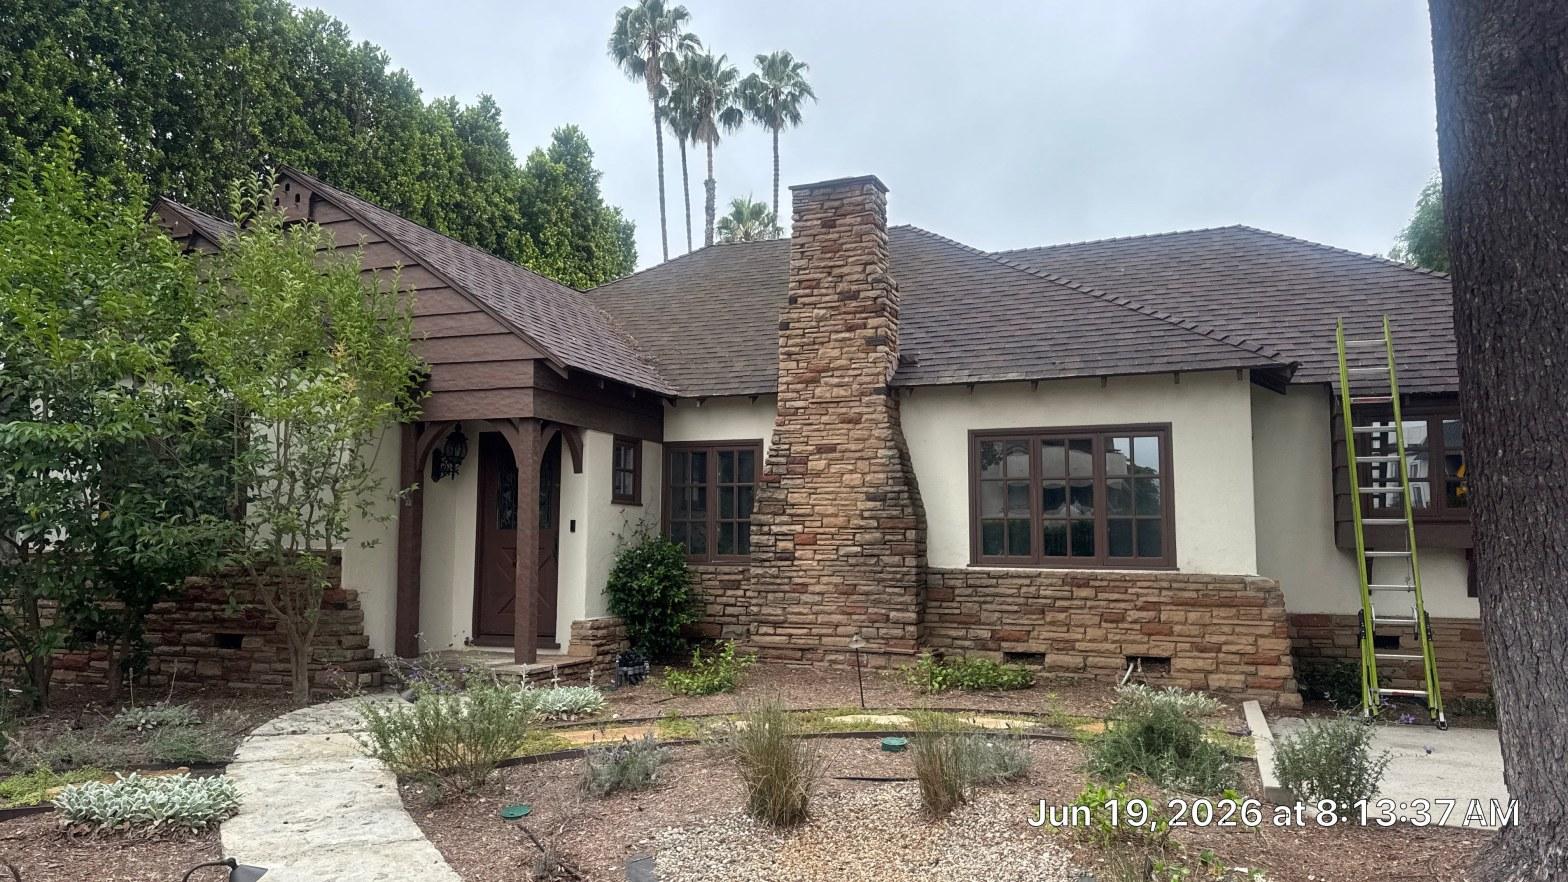
The property sits on a leafy Sherman Oaks lot with mature trees on three sides. That canopy contributes to debris accumulation, and years of organic material sitting on the old shingles had accelerated their wear. A complete replacement, rather than a patch repair, was clearly the right call. The old shingles had served their expected service life, and the homeowner wanted a clean start with modern materials underneath.
What Did the Attic Inspection Find?
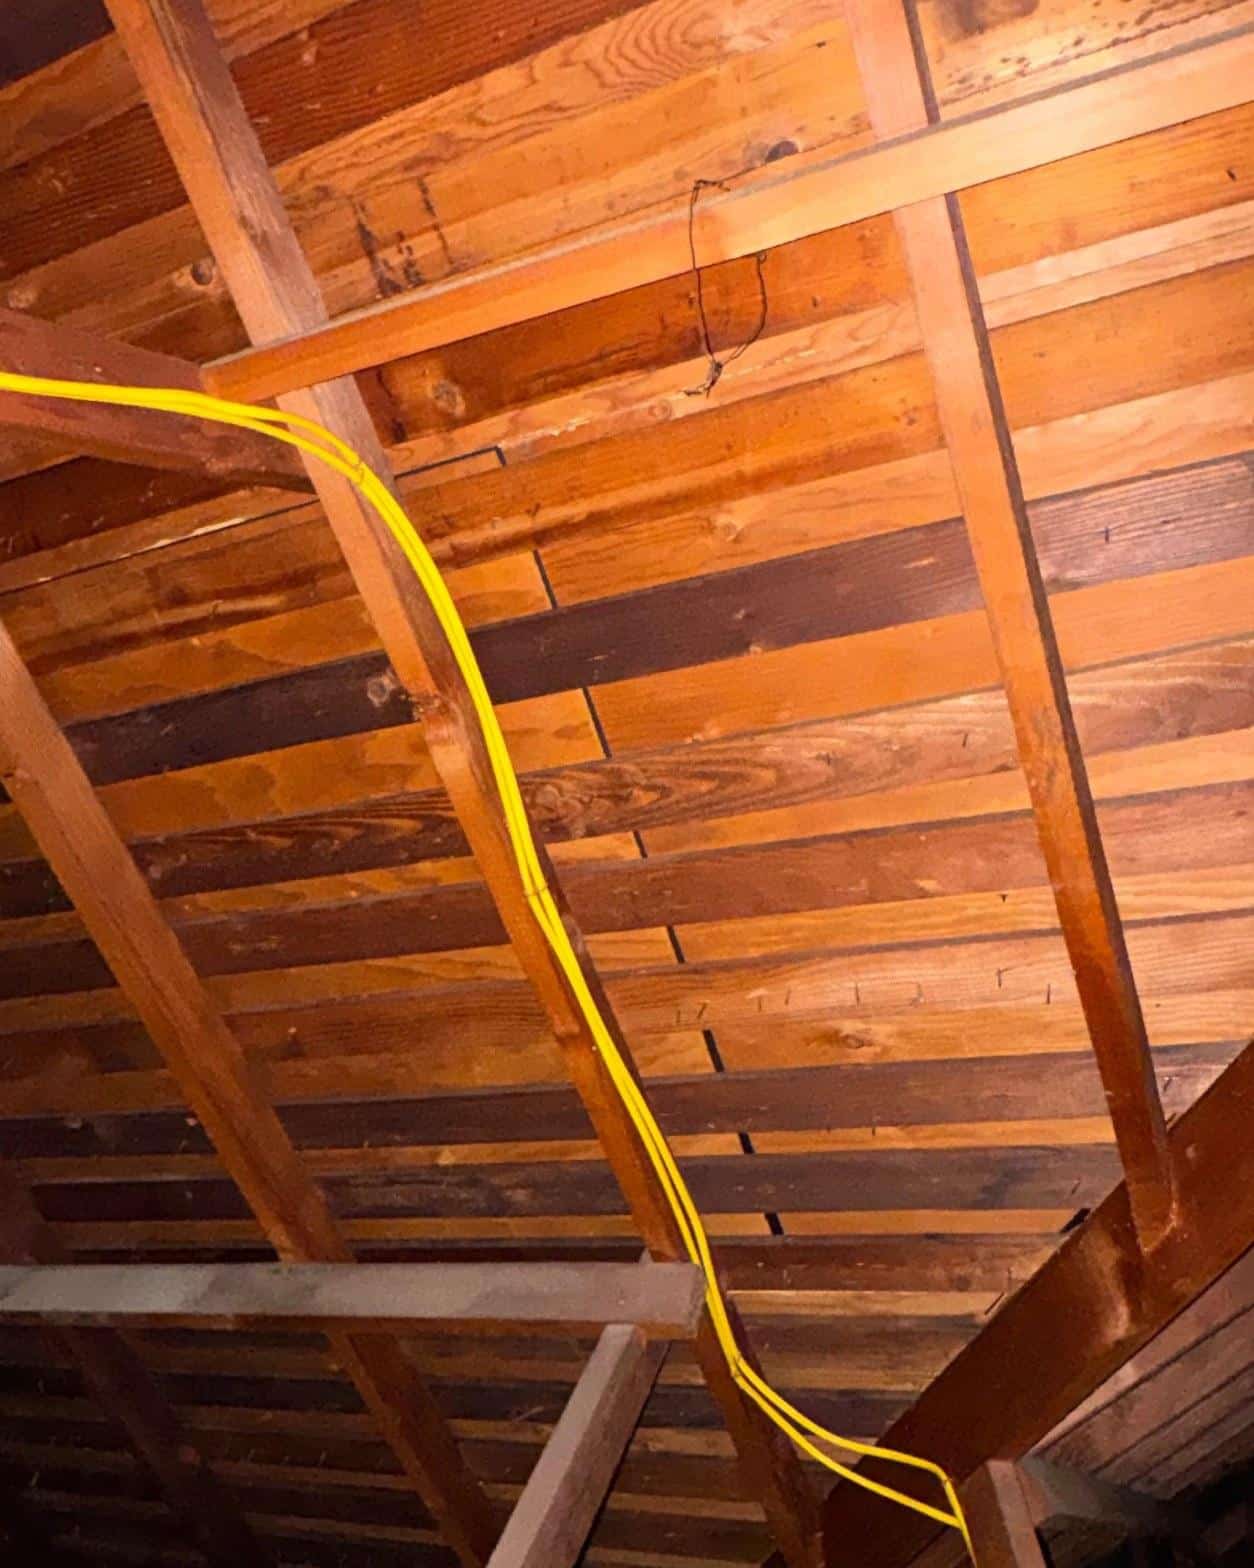
The inspection began on June 19, 2026, with a walk through the attic space to assess the framing, sheathing, and any evidence of moisture intrusion from above. This step matters enormously on a home of this age: it tells us whether the deck can be resheeted over in sections or needs wholesale replacement, and it surfaces any structural surprises before tear-off day.
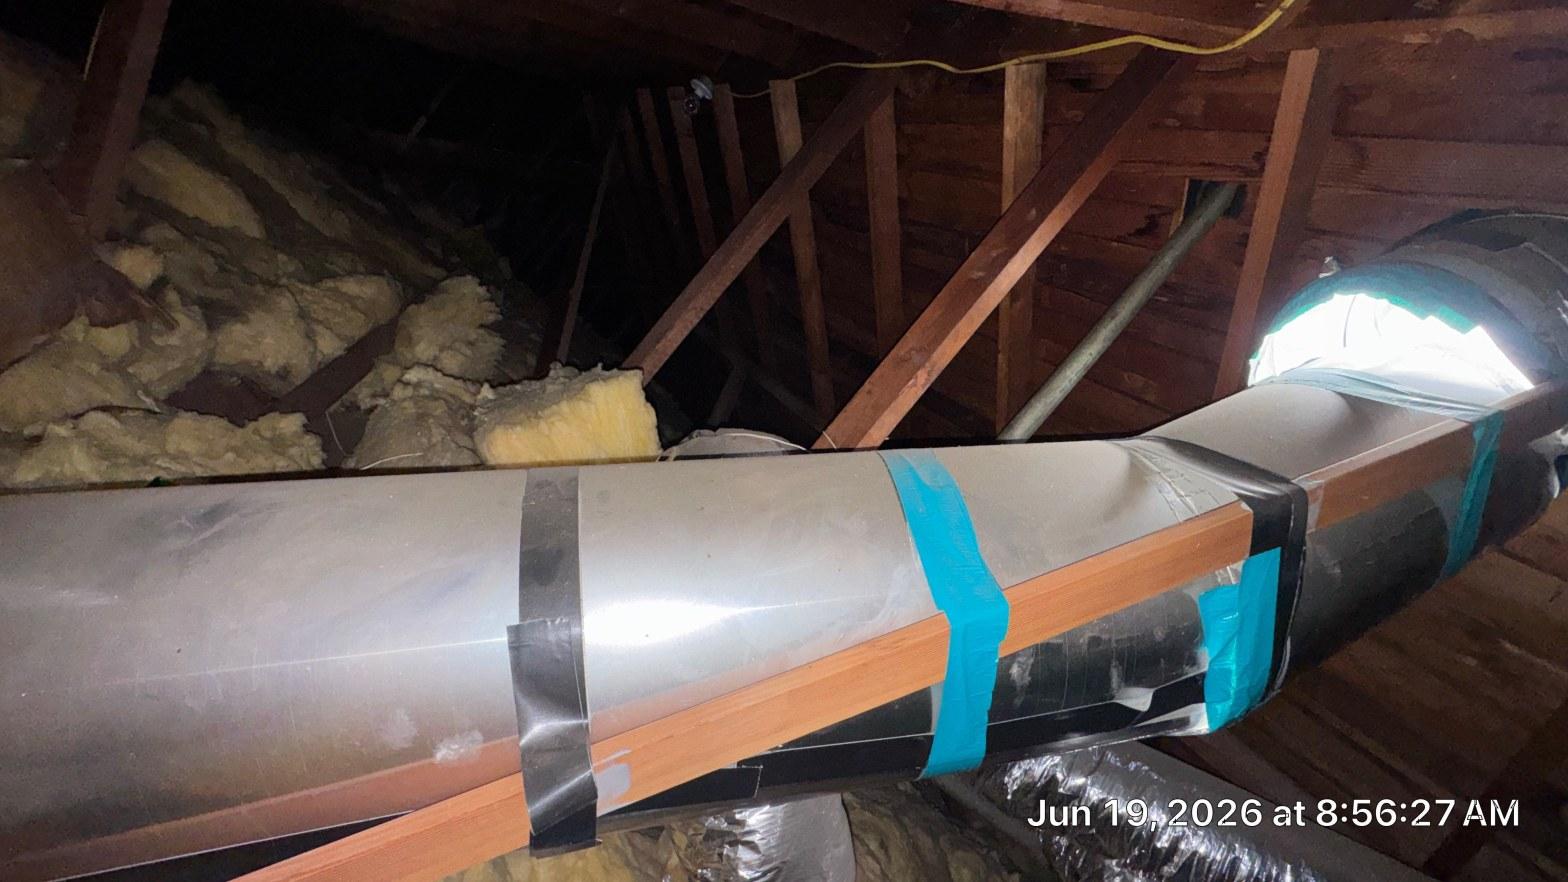
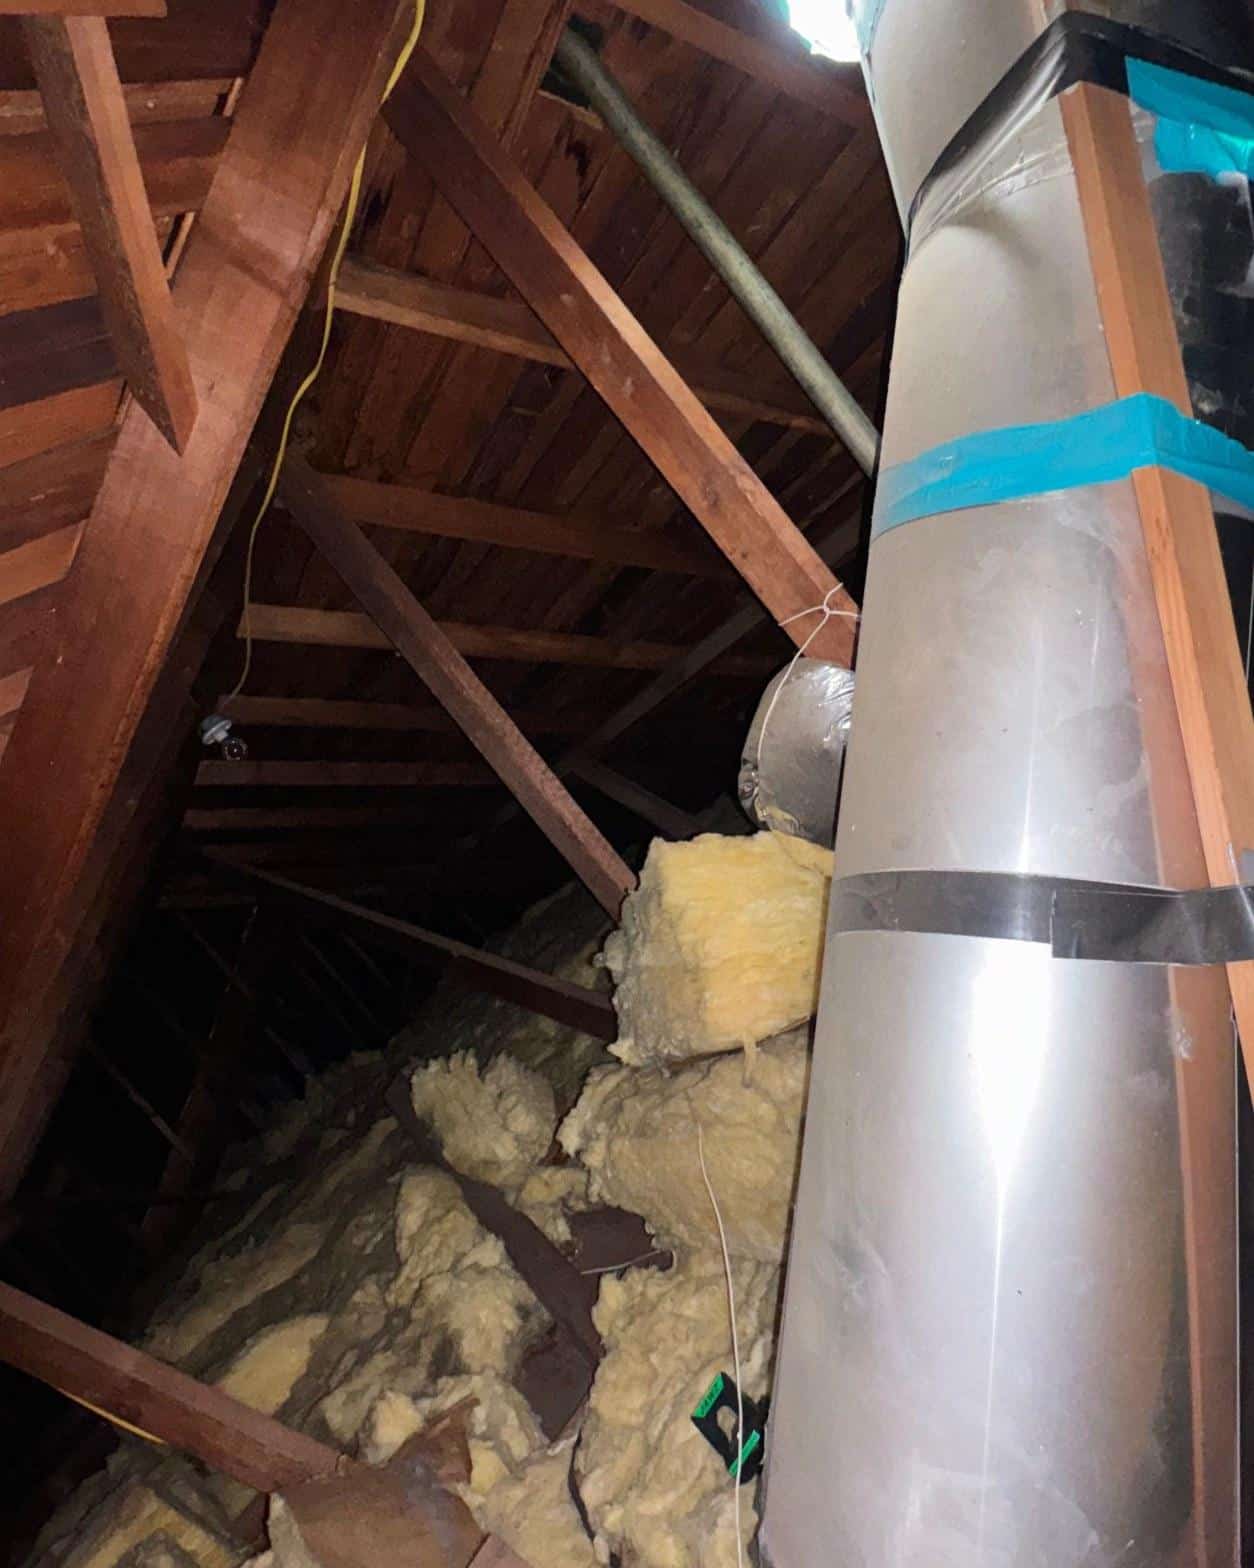
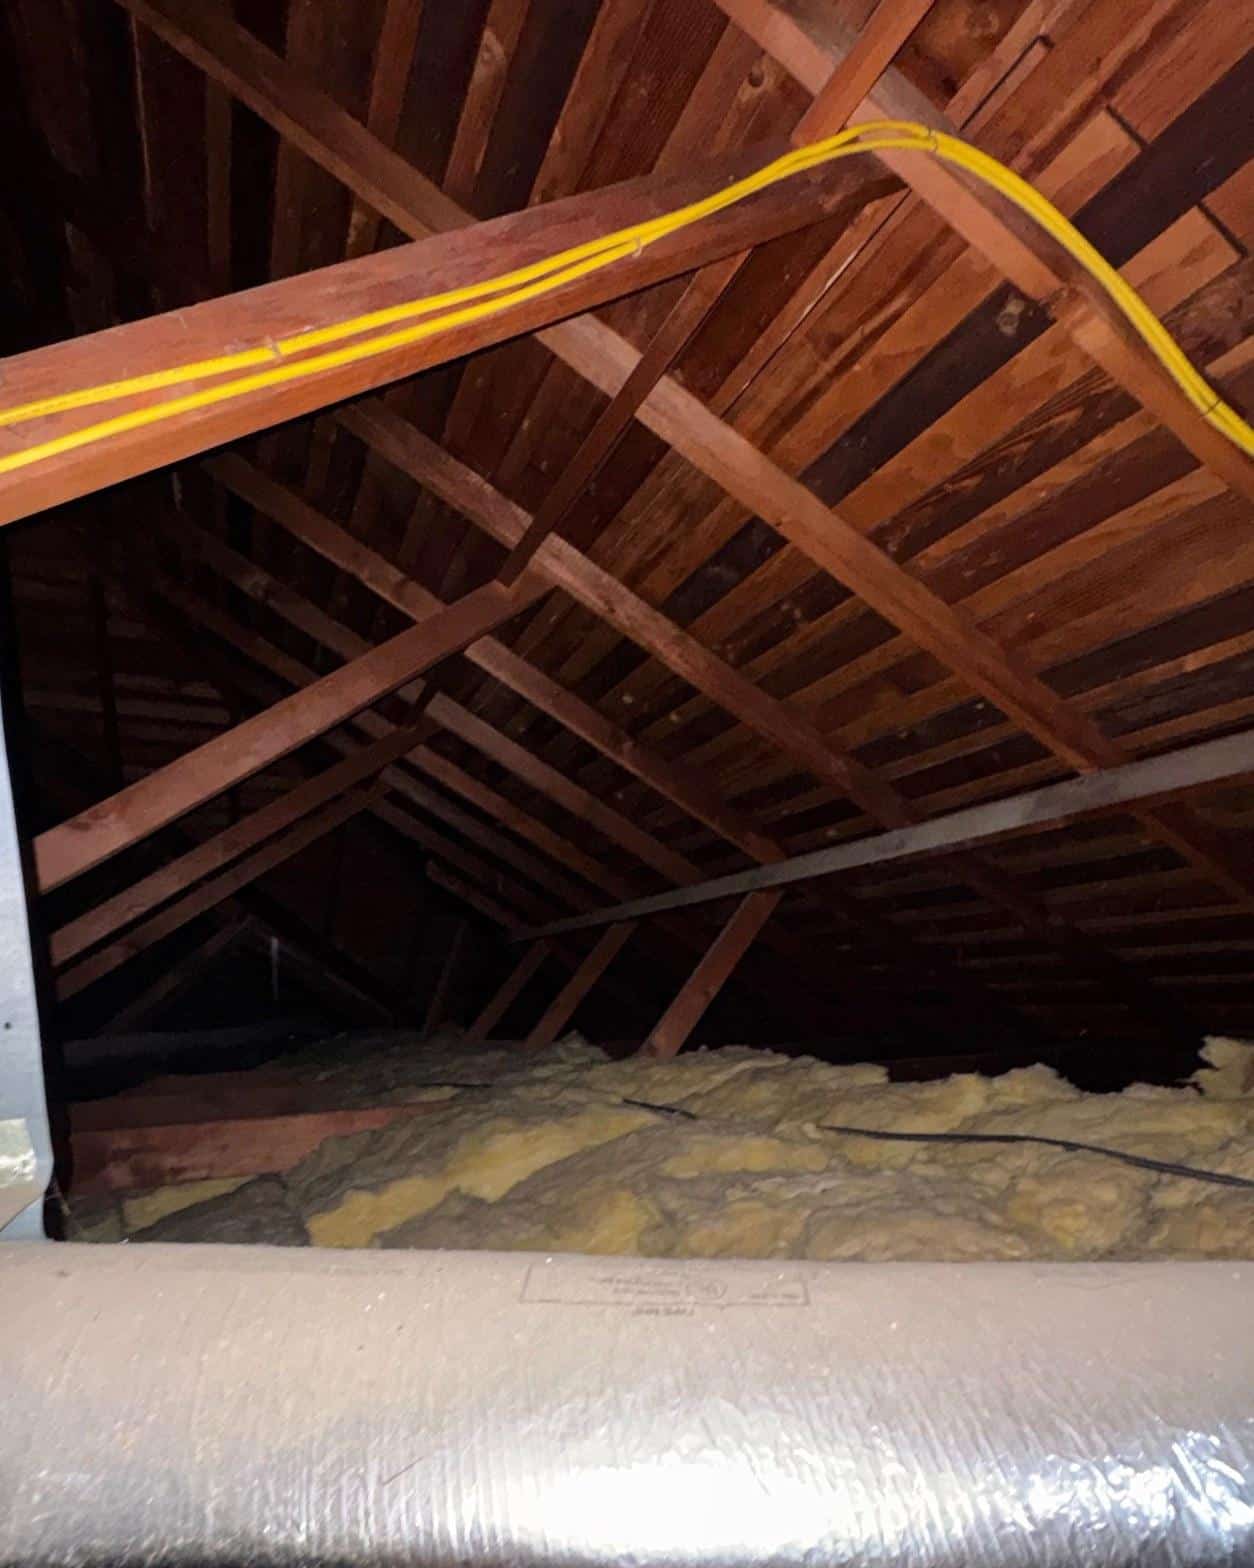
Inside the roof space, the rafter framing proved to be sound. The original sheathing was board-on-board construction, a material choice common in older Southern California residential builds, where individual boards are face-nailed directly to the rafters rather than sheeted with plywood panels. The boards showed their age in color but held firm underfoot. Batt insulation occupied the joist bays below the rafters, and a metal flue duct ran vertically through the space, terminating through the roof plane. That penetration would need to be properly booted and flashed during the re-roof. Electrical runs were also visible along the rafter framing.
The inspection confirmed no active rot and no structural compromise. That allowed the project to proceed with targeted deck repairs at tear-off rather than a full re-deck, keeping the scope honest and the timeline controlled.
On re-roofs with original board sheathing, our team often finds the boards have weathered unevenly at eaves and valleys where debris collects. Knowing that before tear-off lets us pre-order the right quantity of repair panels without slowing the job mid-week.
How Was the Deck Prepared Before Shingles Went On?
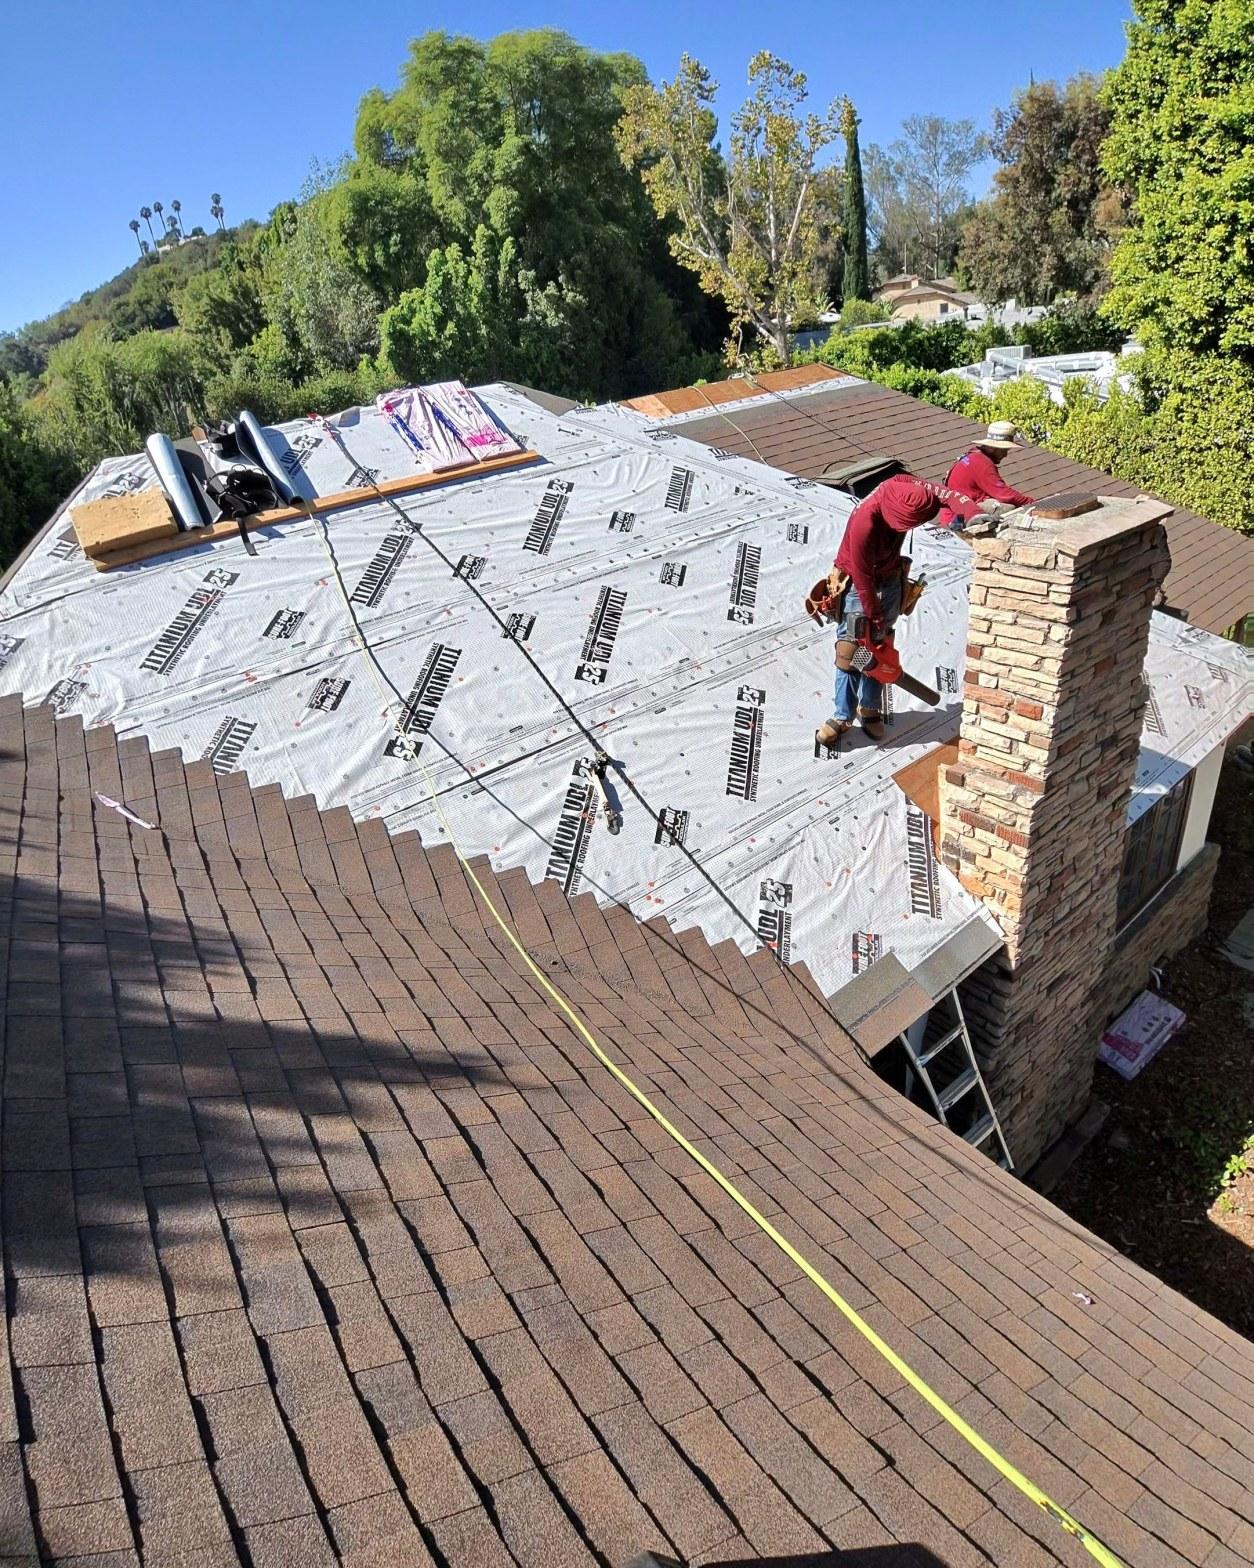
The proper foundation for any new shingle installation is a flat, solid, continuous deck, and achieving that on a home with original board sheathing meant systematic repair during tear-off. Once the old shingles were stripped, the crew identified sections of board decking that had softened or cupped over decades of thermal cycling and moisture exposure. Those sections were cut out and replaced with plywood panels, creating a uniform nailing surface flush with the surrounding boards.
With the deck sound and flat, the next layer was Titanium synthetic underlayment, rolled out across the entire field in overlapping courses from eave to ridge. Titanium is a woven polypropylene product that is significantly more tear-resistant than traditional 30-pound felt, and it stays dimensionally stable in Southern California’s temperature swings, which the National Weather Service records as ranging from near-freezing winter nights to summer highs well above 90 degrees Fahrenheit in the San Fernando Valley. That dimensional stability matters: underlayment that wrinkles or buckles in heat creates an uneven surface that telegraphs through finished shingles.
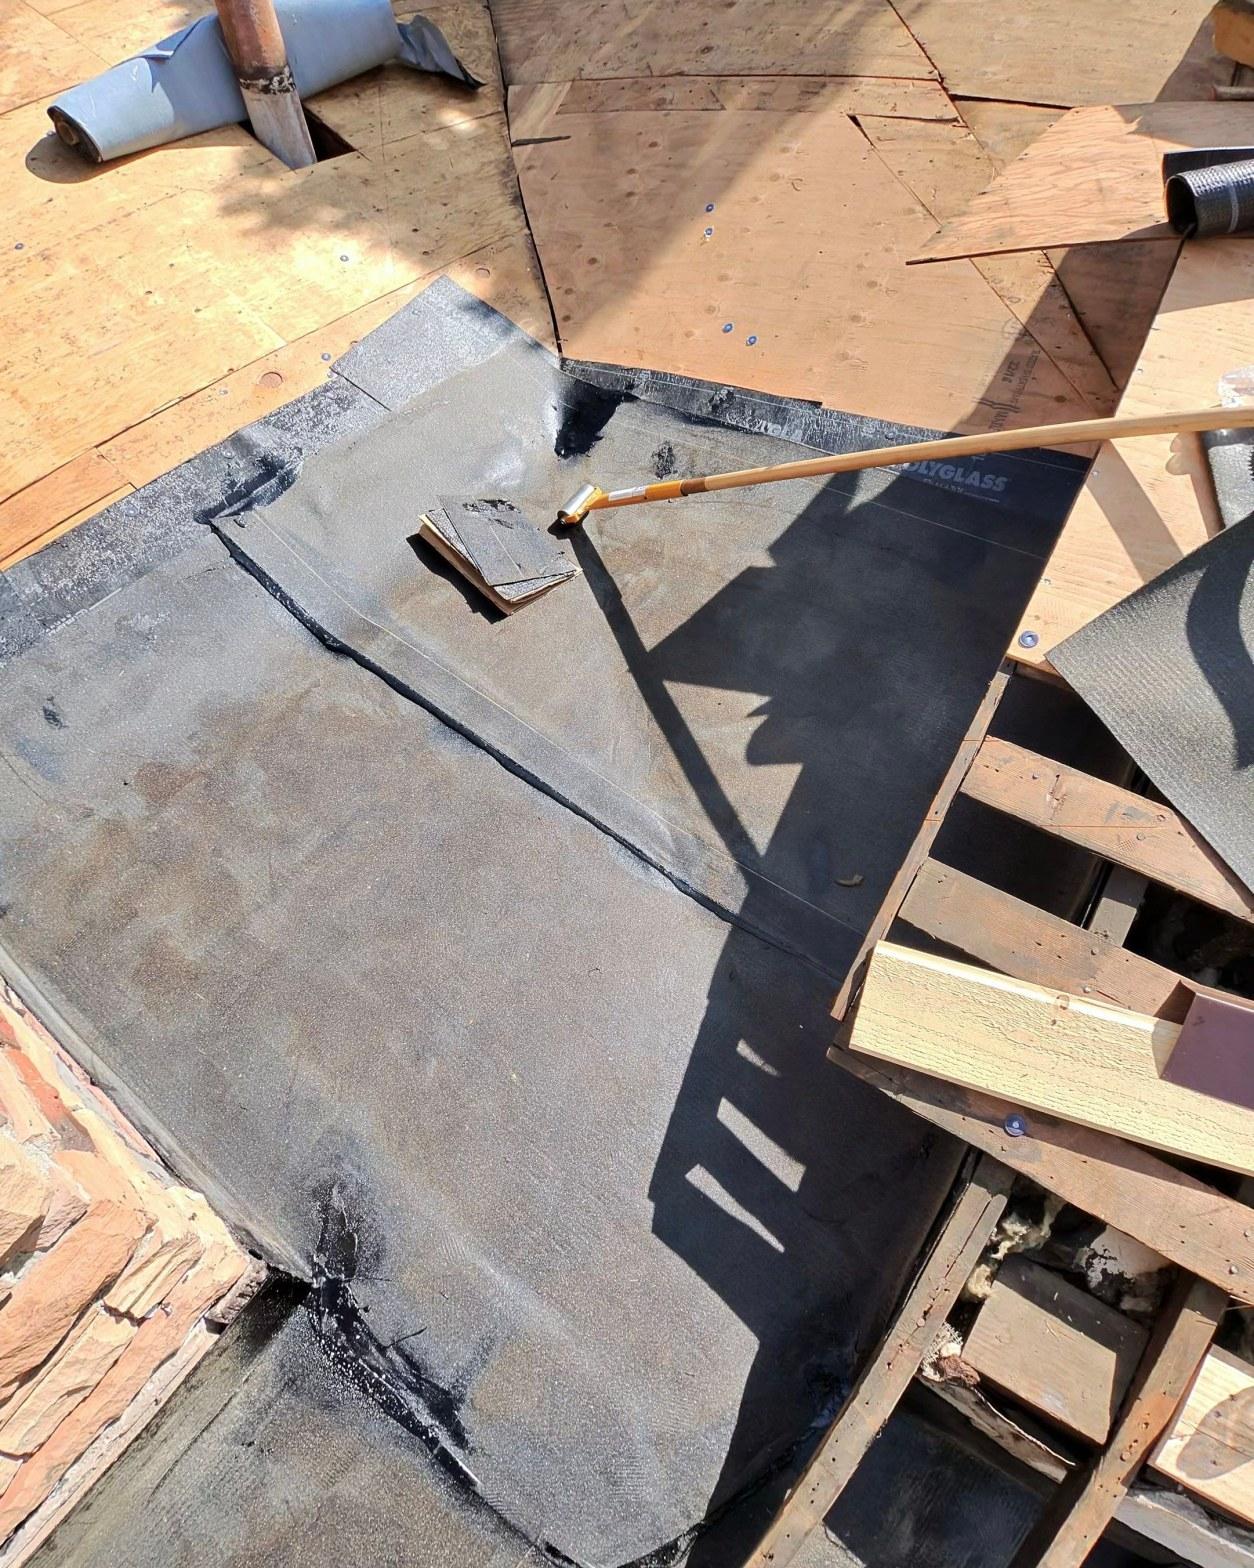
At the stone chimney and other detail zones, the approach changed. Those areas called for Polyglass self-adhered membrane rather than the mechanically fastened Titanium sheet. The stone chimney’s base is an inherently complex waterproofing challenge: the stone profile is irregular, rain can drive at it from any direction, and the mass of the chimney creates a temperature differential that works lap-sealed underlayment loose over time. A self-adhering membrane bonds directly to the deck without relying on fasteners, sealing itself around the base of the masonry and lapping up the stone face before flashing is set over the top.
How Was the Stone Chimney Flashed?
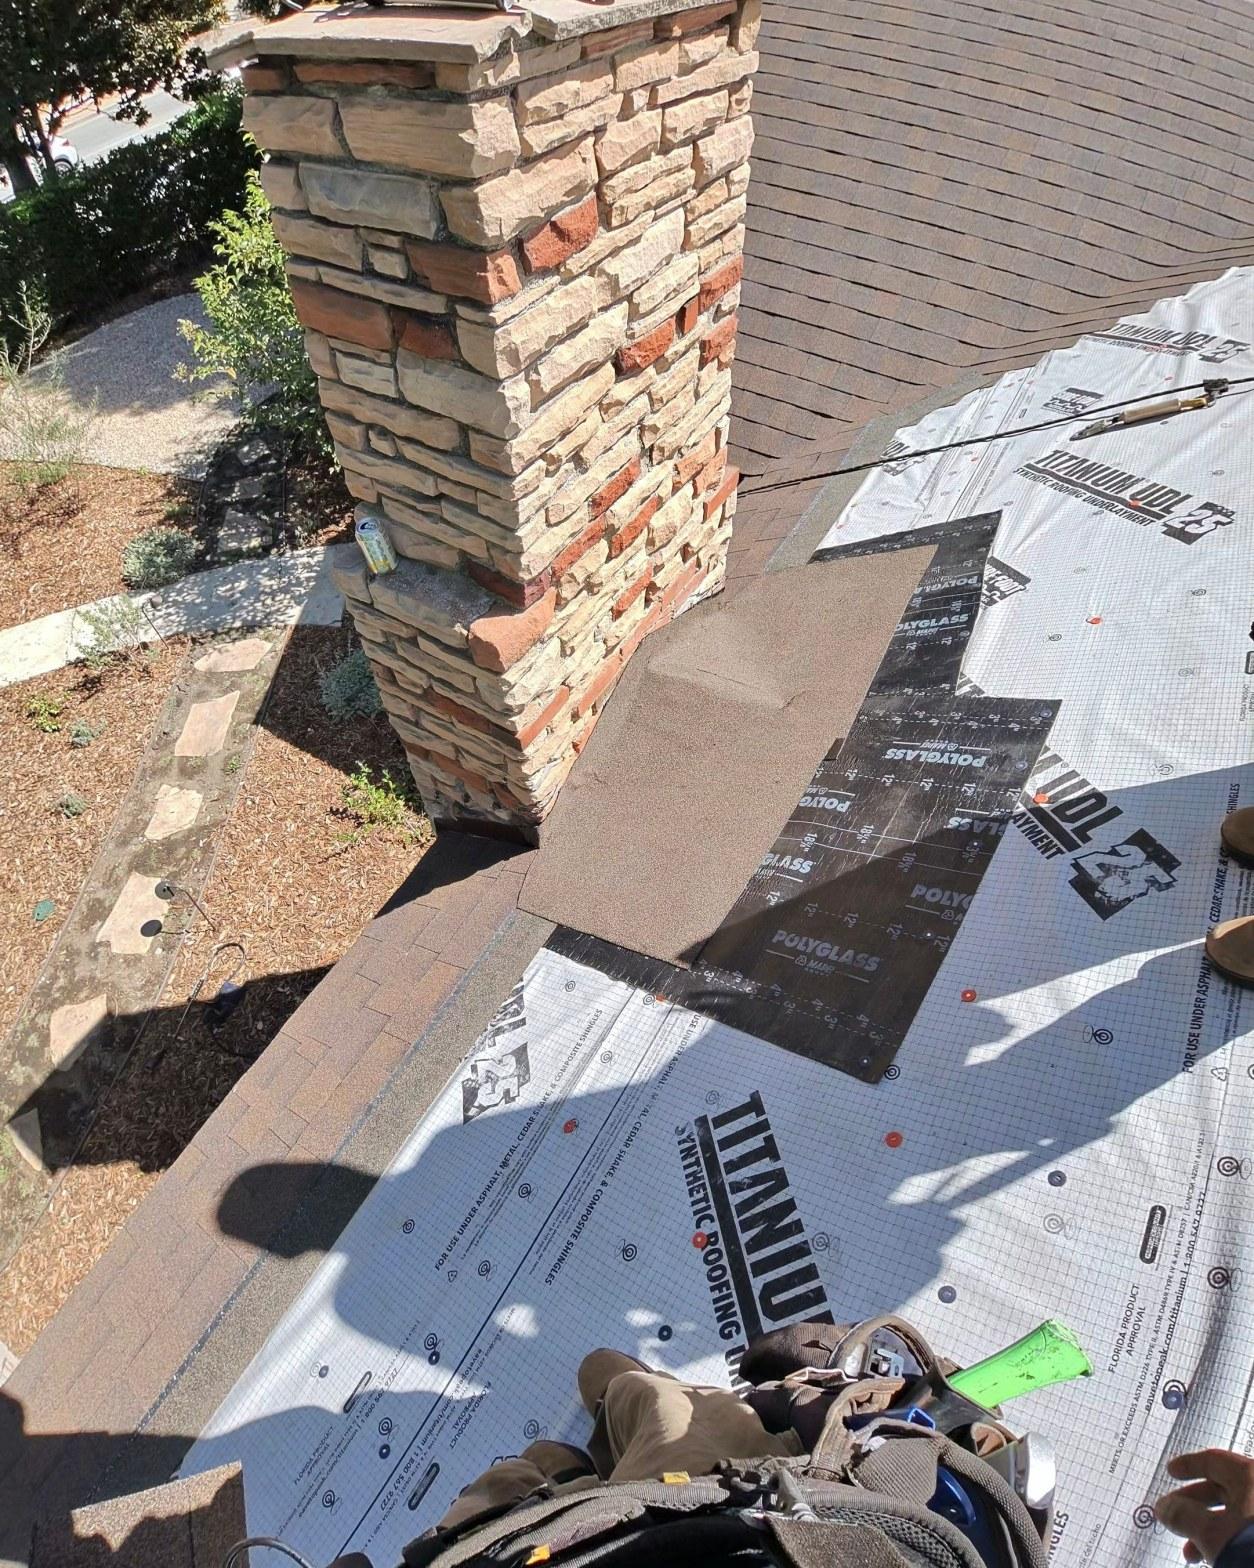
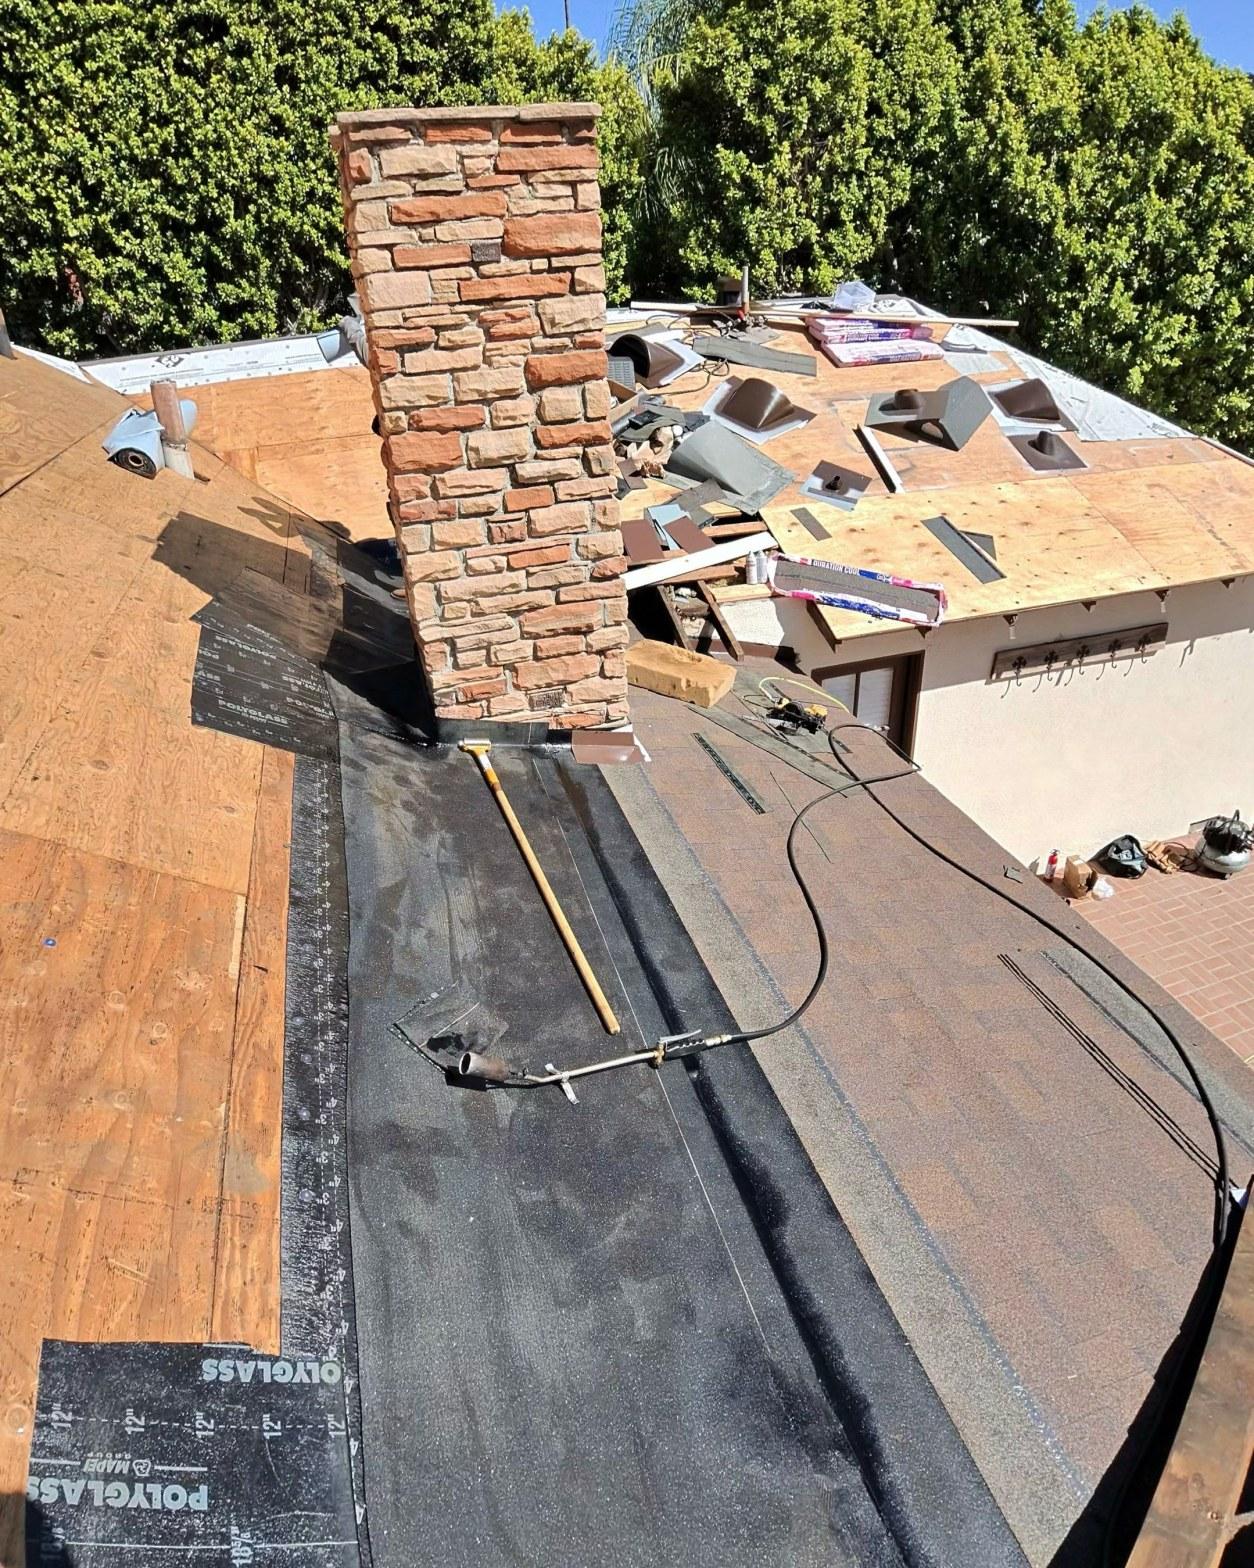
Chimney flashing on a stone-faced chimney is more involved than on a standard brick surround because there are no uniform mortar joints to key metal step flashing into. The stone profile creates irregular gaps, and the flashing system has to bridge those irregularities while still providing a continuous seal against wind-driven rain.
The crew worked the Polyglass membrane into the chimney base first, pressing it tight against the stone on all four sides. This establishes a waterproof back-dam before any metal flashing is set. New step flashing and counter-flashing were then fitted and sealed around the full perimeter of the chimney. The flue penetration through the roof plane was fitted with a new boot and collar as well, completing the watertight envelope at every point where the stone-faced structure meets the new shingle field.
According to the International Building Code, chimney flashing must extend a minimum of 4 inches up the vertical face of the chimney and 4 inches onto the roof deck. Meeting that minimum is the starting point; on a stone chimney of this height and mass, extending beyond those minimums at the uphill side provides meaningful additional protection against wind-driven rain that channels down the stone face.
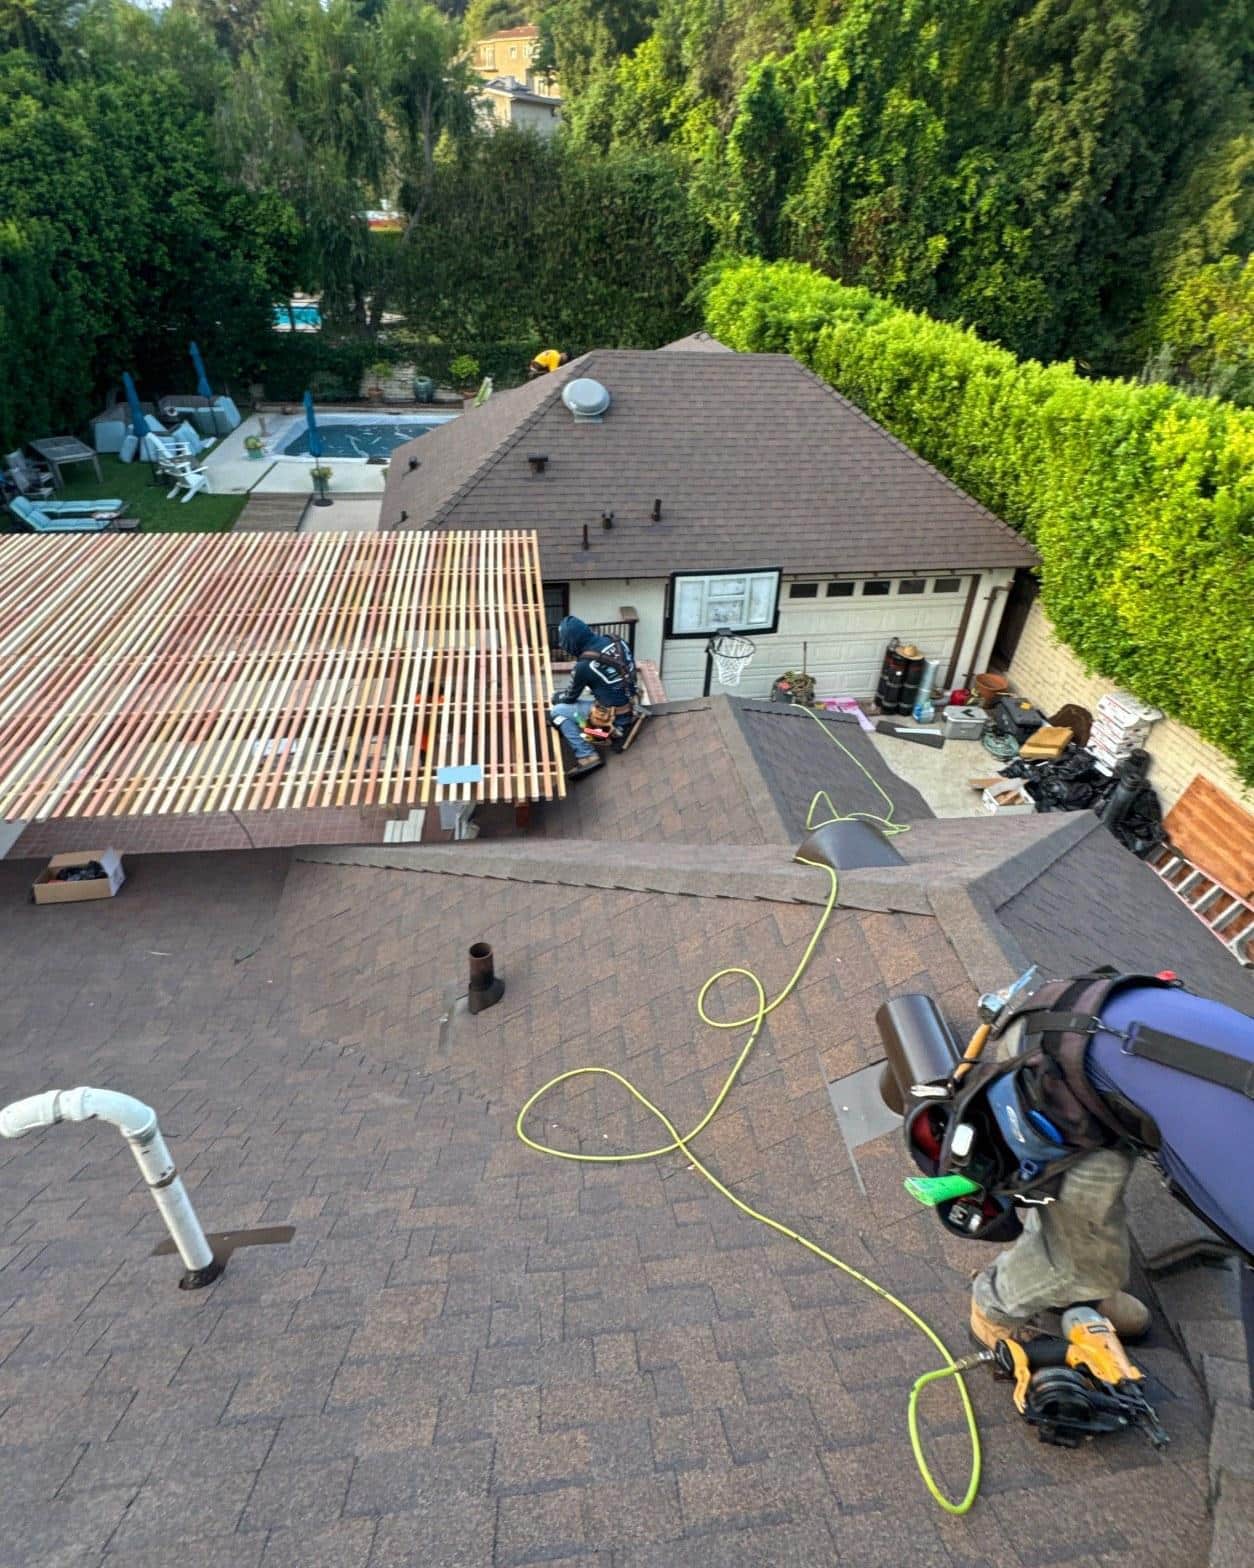
Once the membrane and flashing were fully set, the shingle field advanced to meet the chimney on all sides. The hip geometry of this roof meant the shingle courses had to be cut and raked at multiple angles as they approached the chimney, requiring careful layout to keep the exposure consistent and the lines straight. The completed installation shows a uniform brown shingle field wrapping the full roof, with all ridges and hip caps finished cleanly.
The Rear Pergola: Re-Slat as Part of the Same Visit
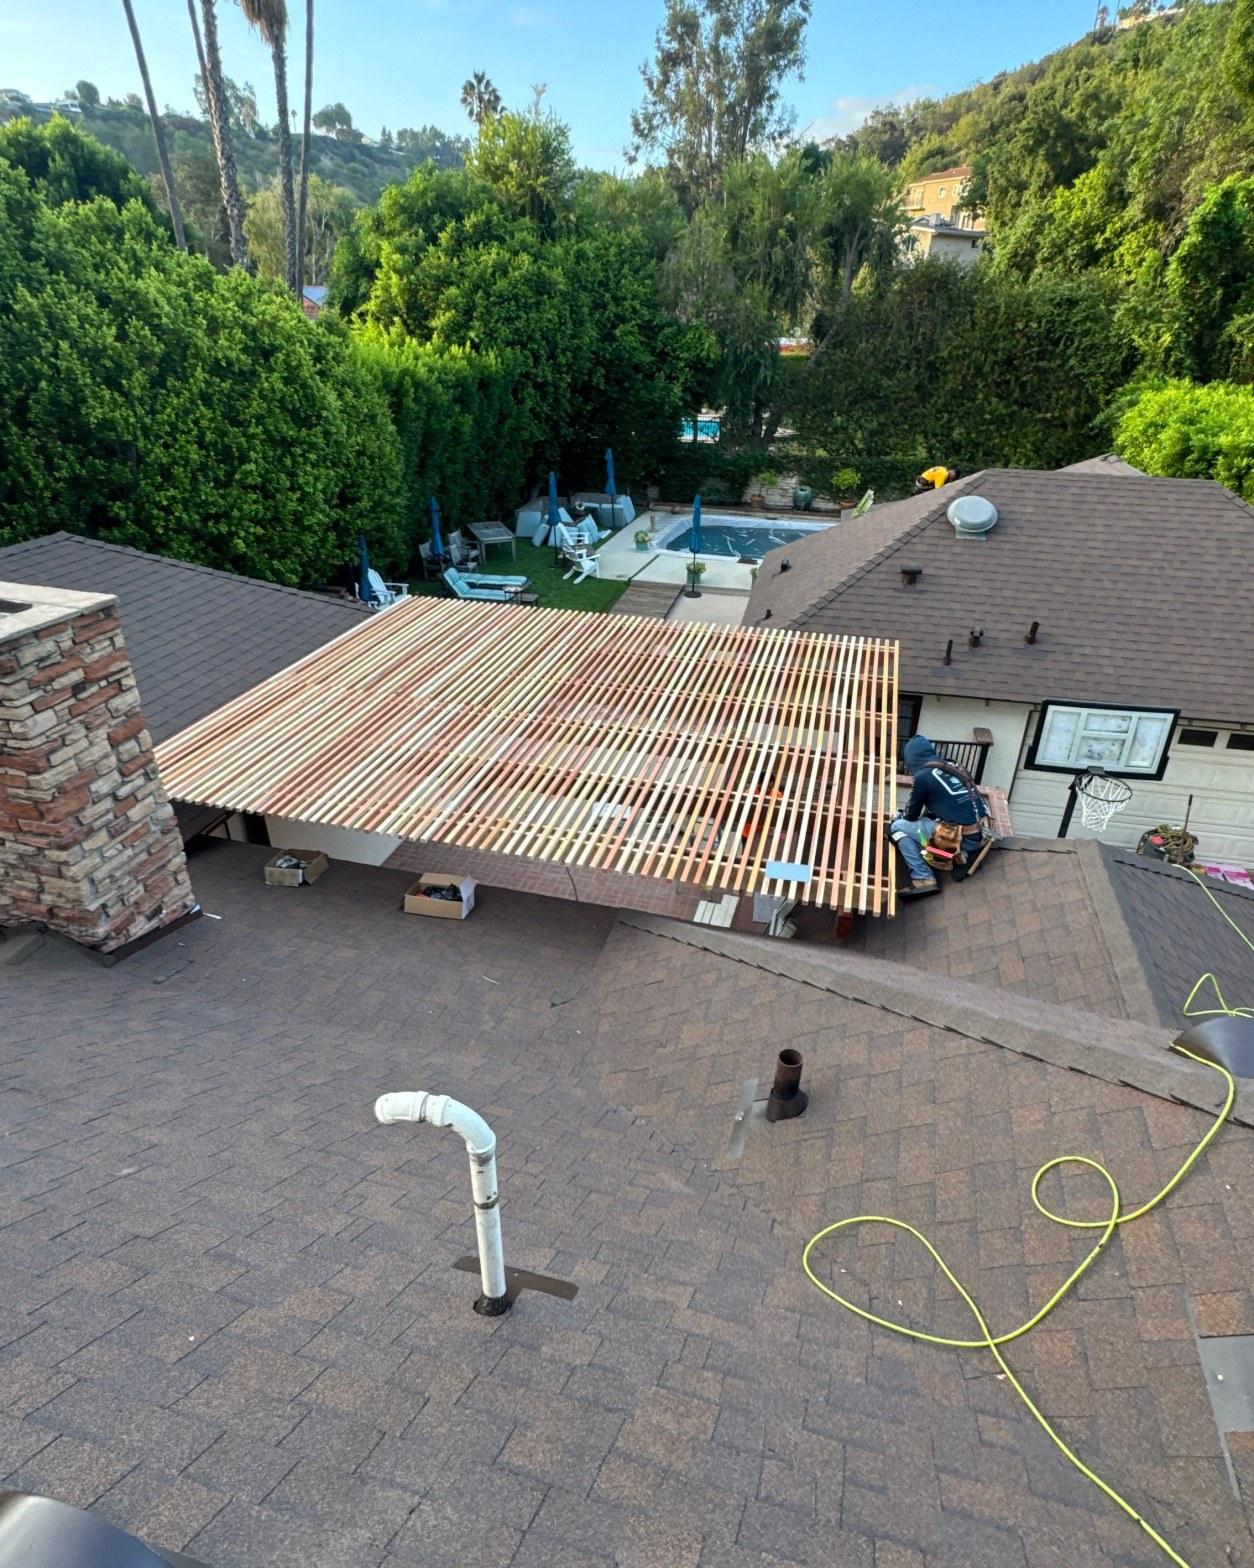
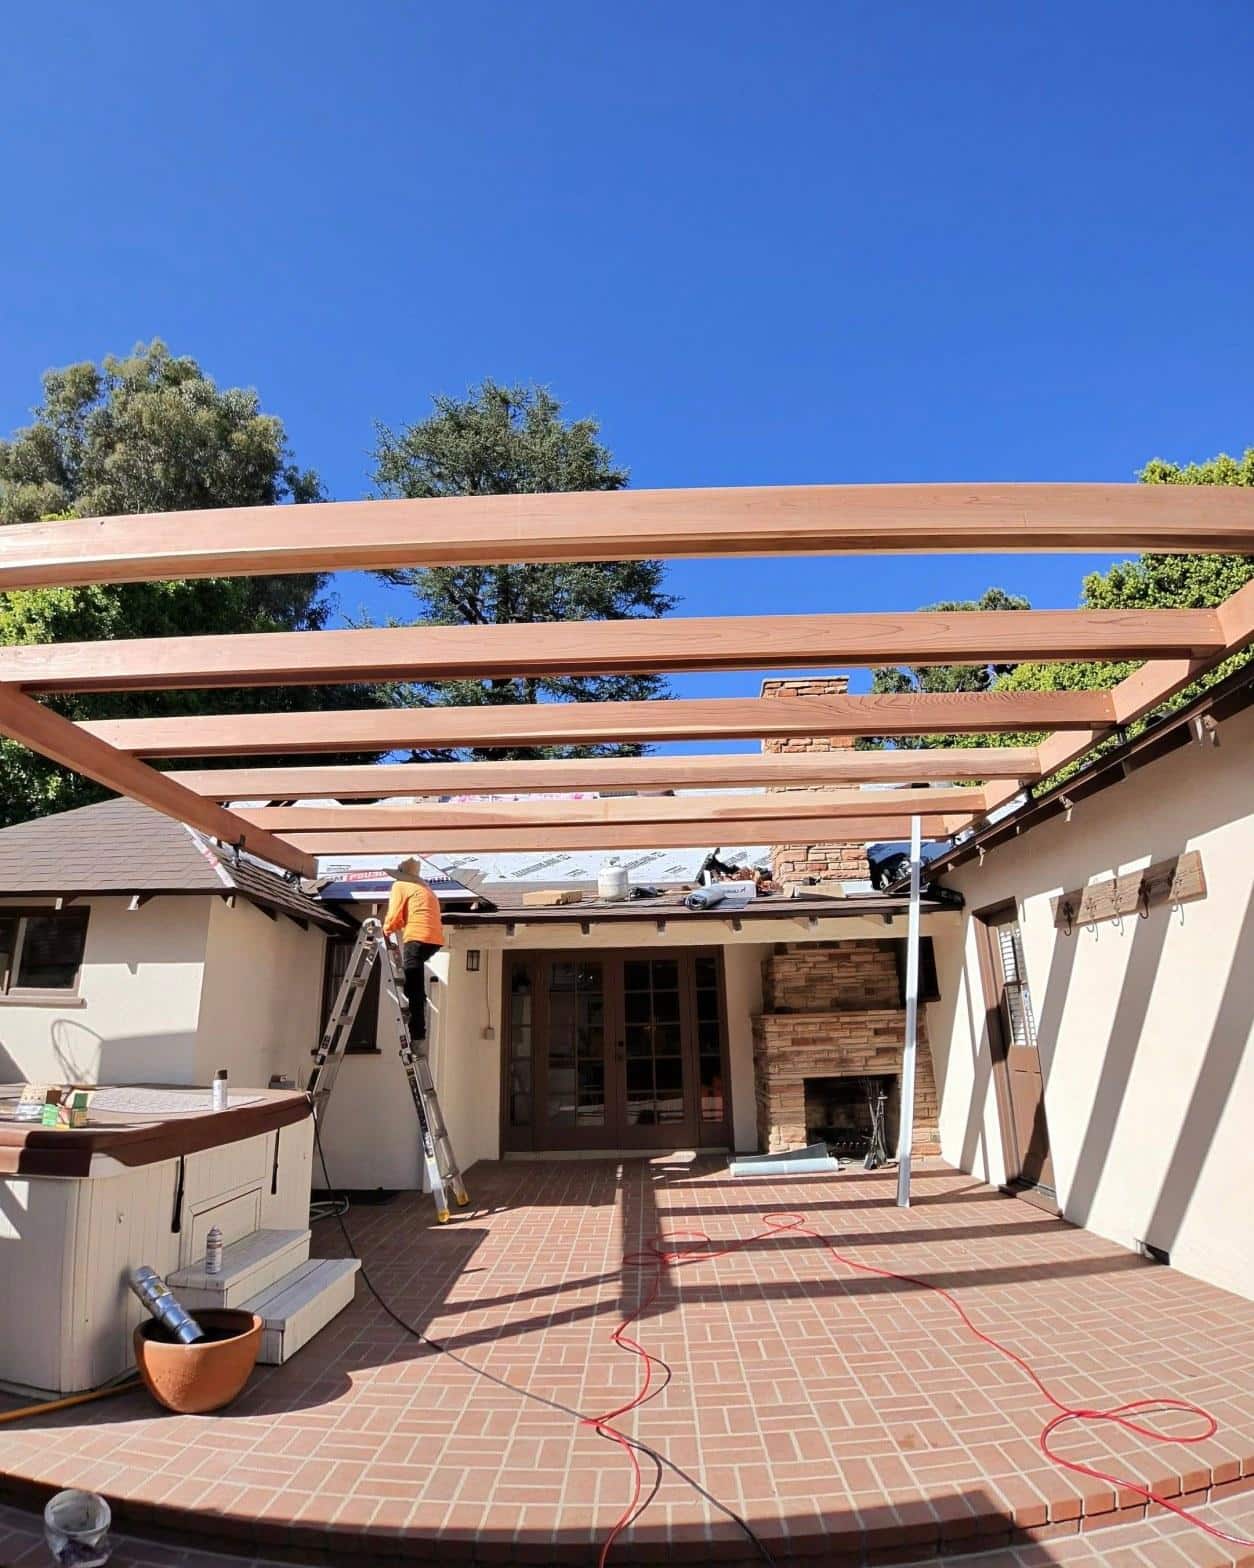
The rear covered patio pergola was re-slatted with new wood as part of the same project visit, so the homeowner could wrap both the roof and the outdoor structure in a single mobilization. The original lattice slats had weathered over the years and no longer presented cleanly alongside a new roof.
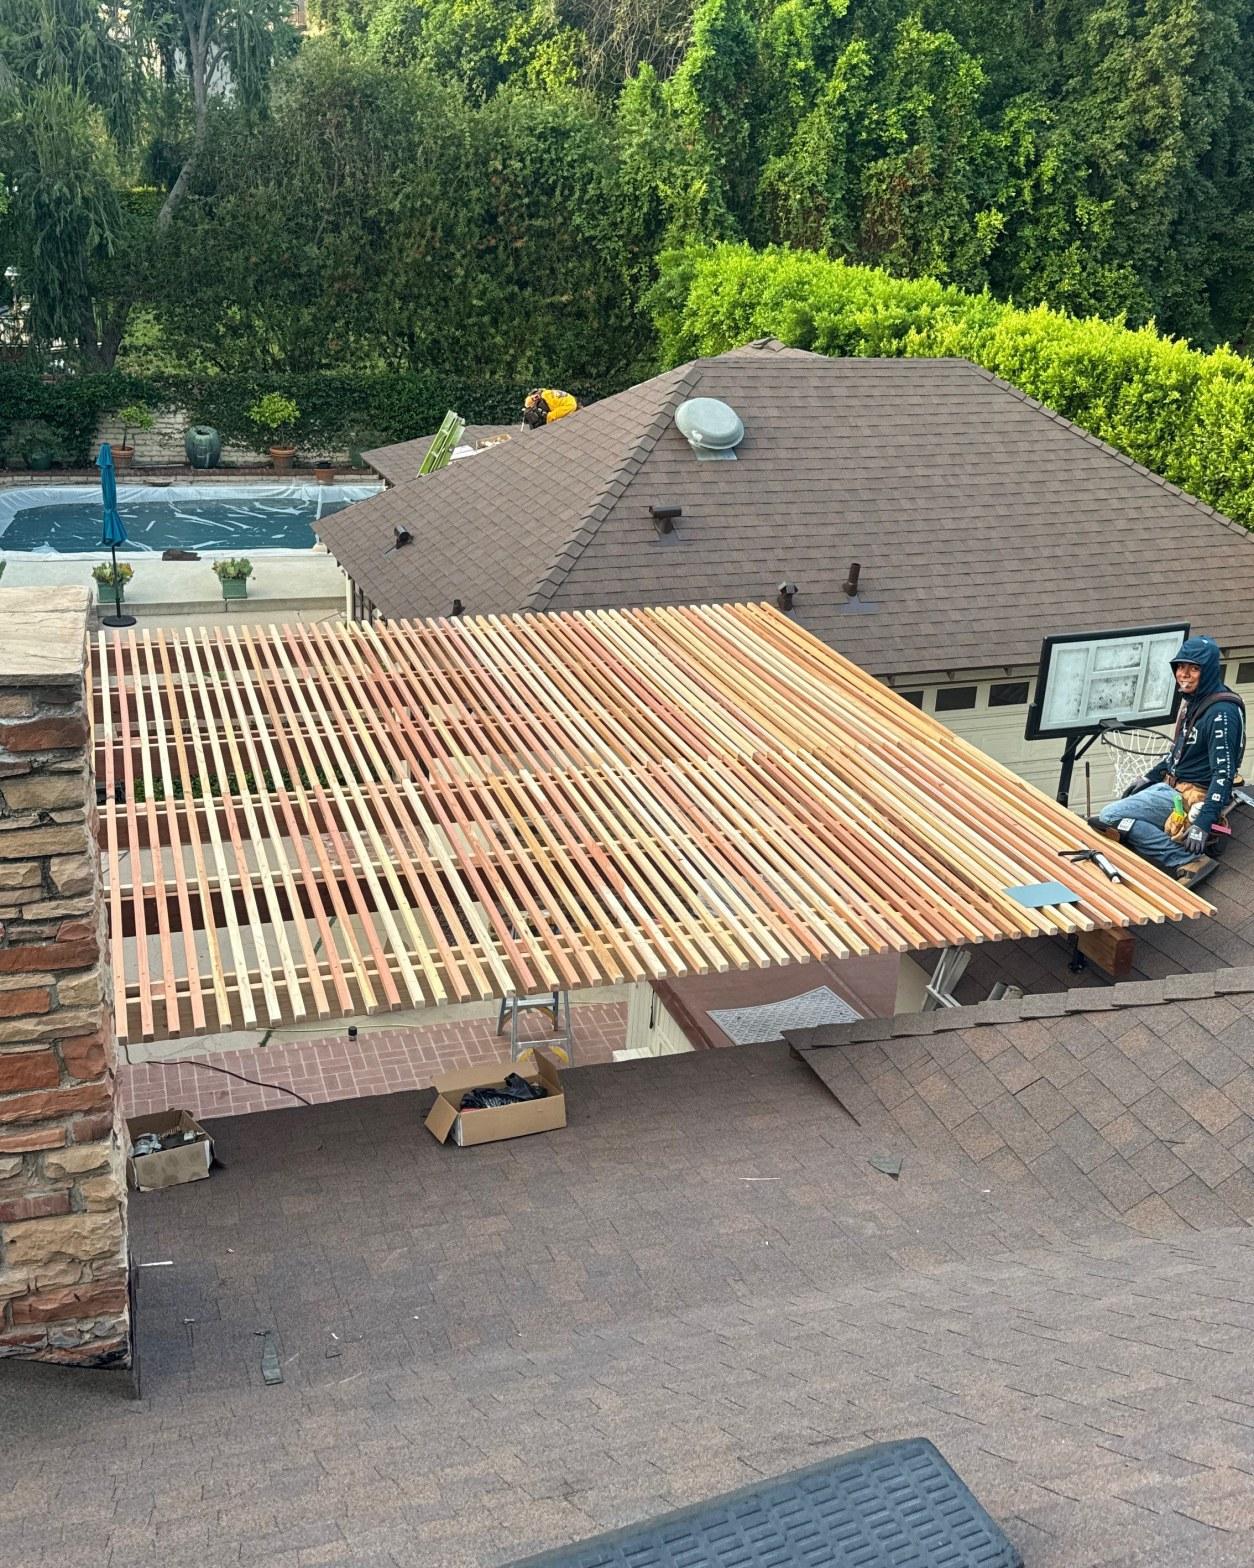
New wood slats were installed across the pergola frame in an open lattice pattern, maintaining the same visual rhythm as the original while giving the patio cover a fresh, solid surface. From the rooftop vantage point in the photo, the relationship between the new shingle field and the new pergola timber work is clear: both materials are fresh and consistent, and the rear elevation of the home reads as a coherent, well-maintained property again.
Bundling the pergola re-slat into the roofing visit is a practical choice for homeowners: the crew and equipment are already on site, staging is already set, and there is no second mobilization cost or scheduling delay. The rear pool and yard, visible in the background of the pergola photo, illustrate why the homeowner wanted the patio cover refreshed alongside the roof: the outdoor living area is a primary feature of the property, and a weathered pergola would have undercut the investment in the new roof.
Project Timeline and Completion
The attic inspection took place on June 19, 2026, giving the homeowner a clear picture of conditions before committing to scope. Roof work ran from September 12 through September 17, 2026, with the project completed and the site cleared by the end of that week.
September is a sensible window for roof work in Sherman Oaks. NOAA climate data for the San Fernando Valley shows September as a reliably dry month, with average rainfall near zero, which keeps tear-off and underlayment installation from being interrupted by rain events. The homeowner had the new roof fully in place well before the Southern California rainy season, which typically arrives in November and December.
The finished result is a clean, brown asphalt shingle roof with hip ridge caps, a properly flashed stone chimney, booted penetrations, and a refreshed pergola at the rear. The house carries the same character it had before, the stone chimney and the timber porch details read exactly as they should, with the reassurance of a fully waterproof system underneath.
Get a Quote for Your Shingle Roof Replacement
If your home has an aging shingle roof, a stone or masonry chimney that you suspect isn’t flashed correctly, or a wood patio structure that needs refreshing, contact Roof Replacement Inc for a thorough on-site assessment. The process starts with an attic inspection to understand what’s actually happening at the deck before any scope is written.
Call or submit a request online to schedule your inspection. We serve Sherman Oaks and the surrounding San Fernando Valley communities.


