

What This Project Actually Required
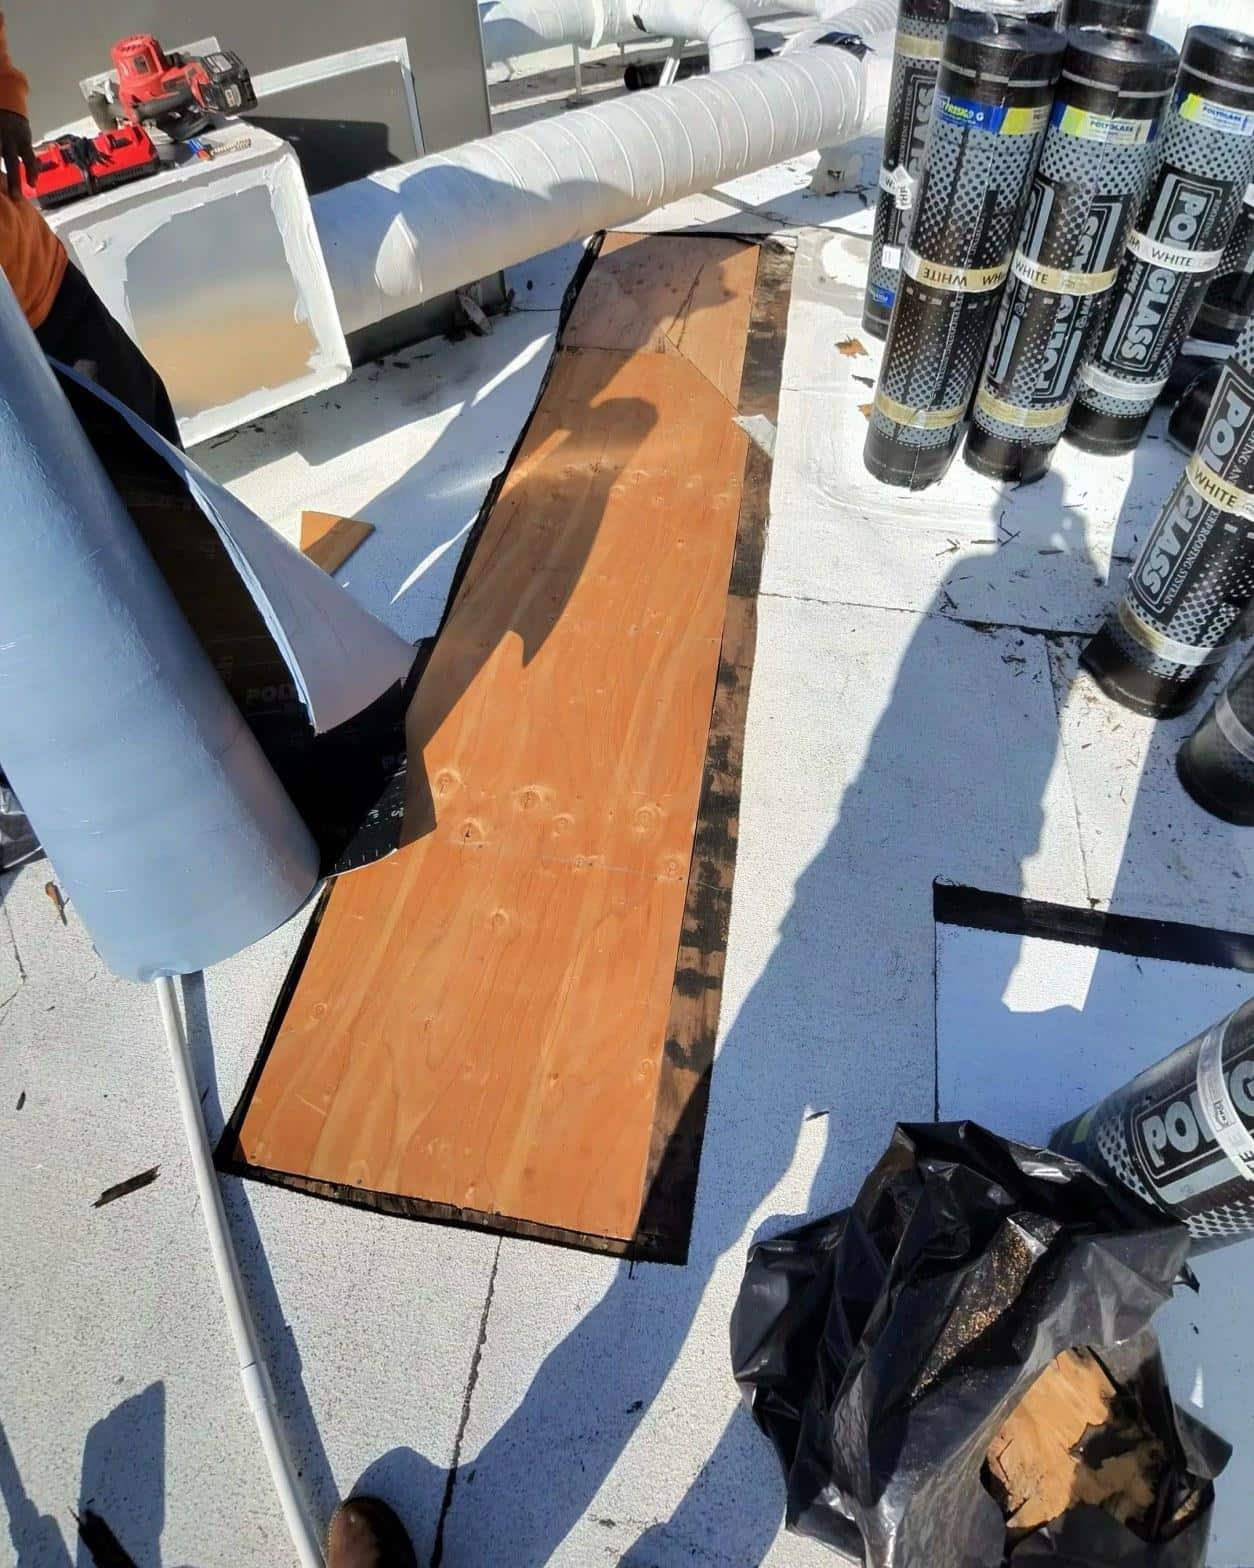
This job started as a flat roof replacement and quickly became a full structural deck rebuild. The home at 3966 Cloverdale Ave in Los Angeles is a modern hillside property with a large low-slope roof sitting behind parapet walls, served by roof drains and crossed by several insulated duct runs and pipe penetrations. The owners knew the existing coated membrane was aging, but no one knew how far the damage had spread until the crew made the first cuts.
Work ran from April 22 through May 4, 2026, a 13-day project that covered every phase: demolition, deck replacement, membrane installation, and final reflective coating. What made the schedule workable was treating the deck and the membrane as a single continuous operation rather than two separate subcontracts.
Project Gallery
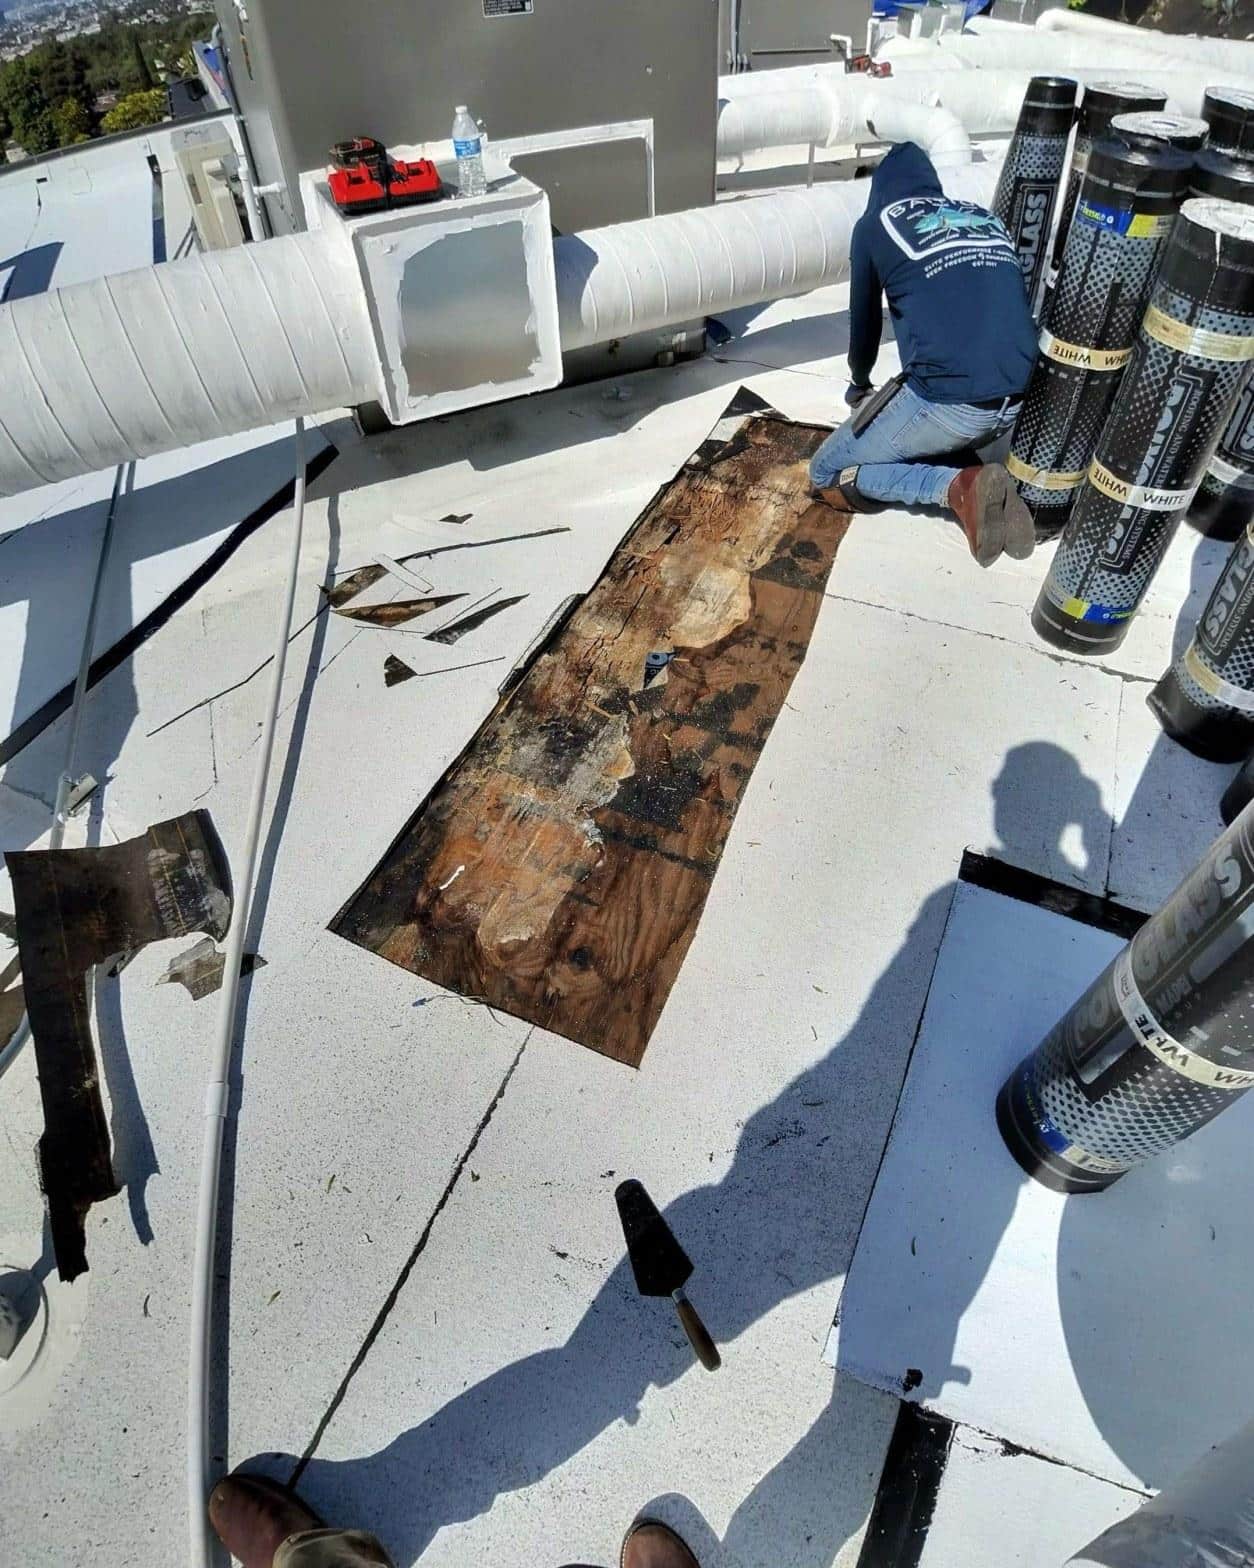
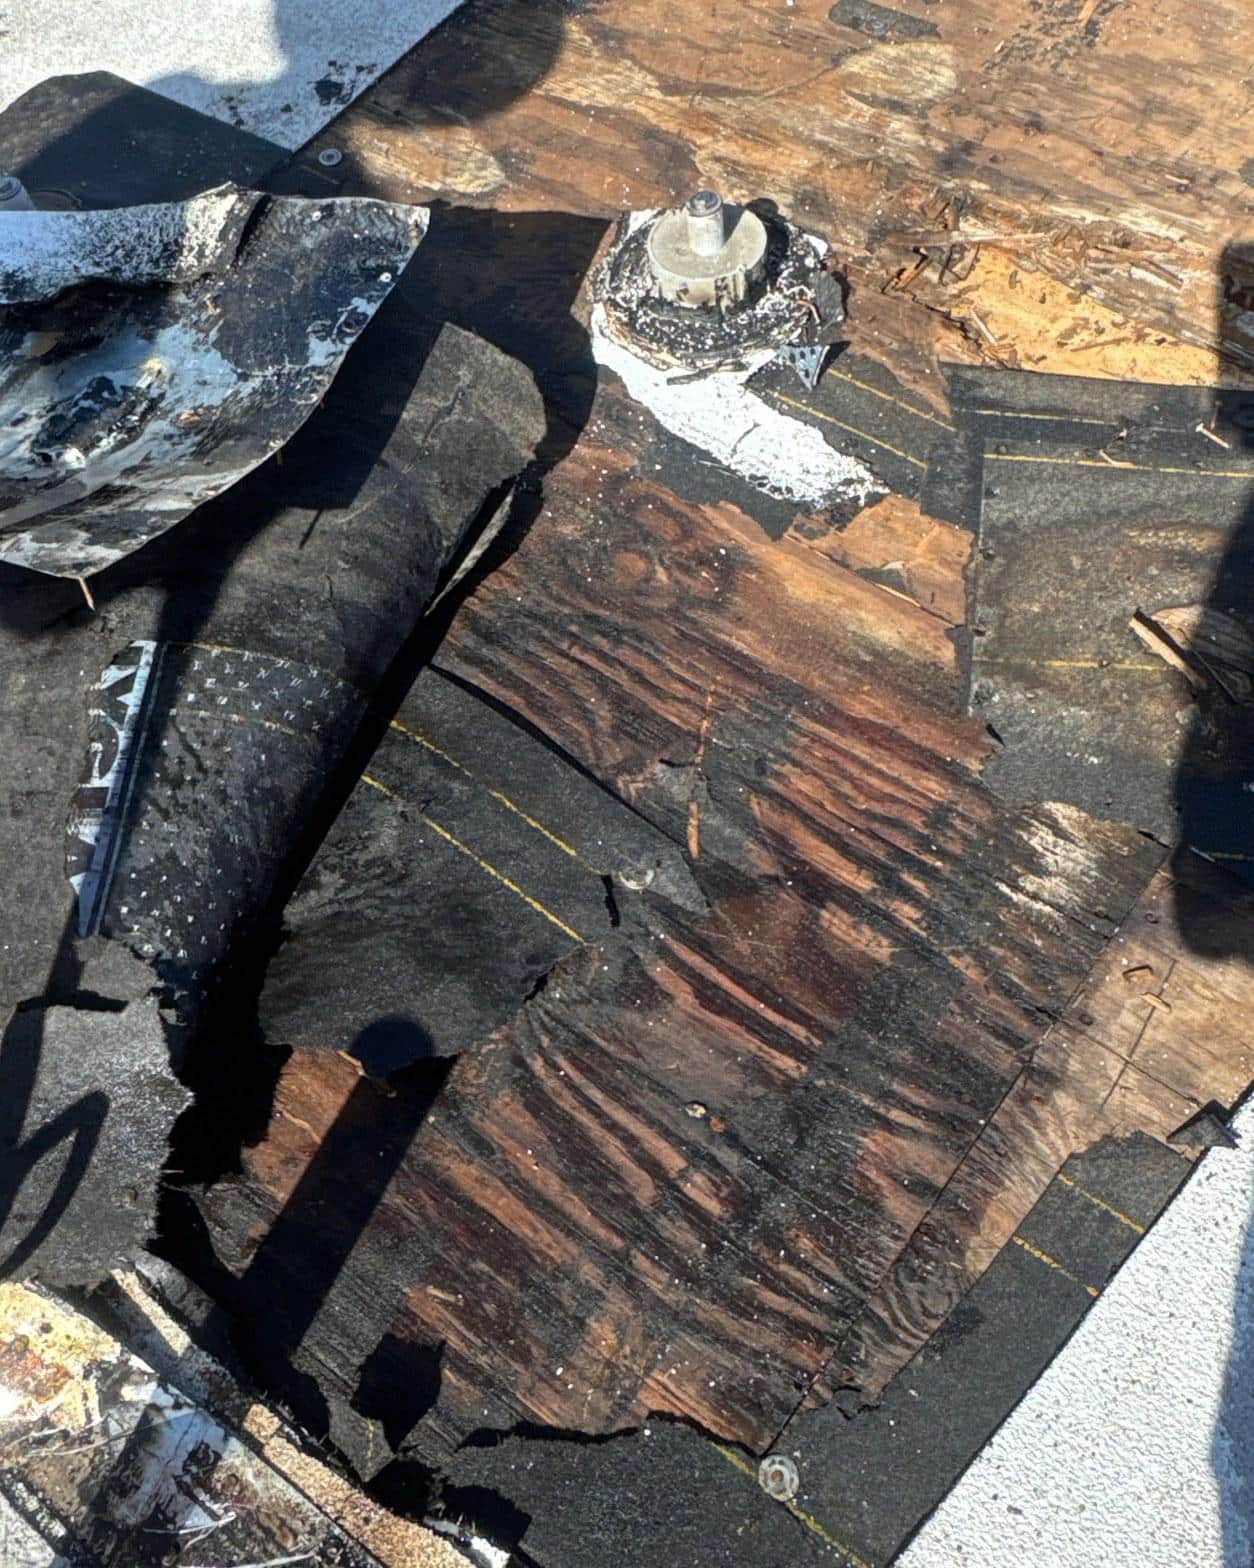
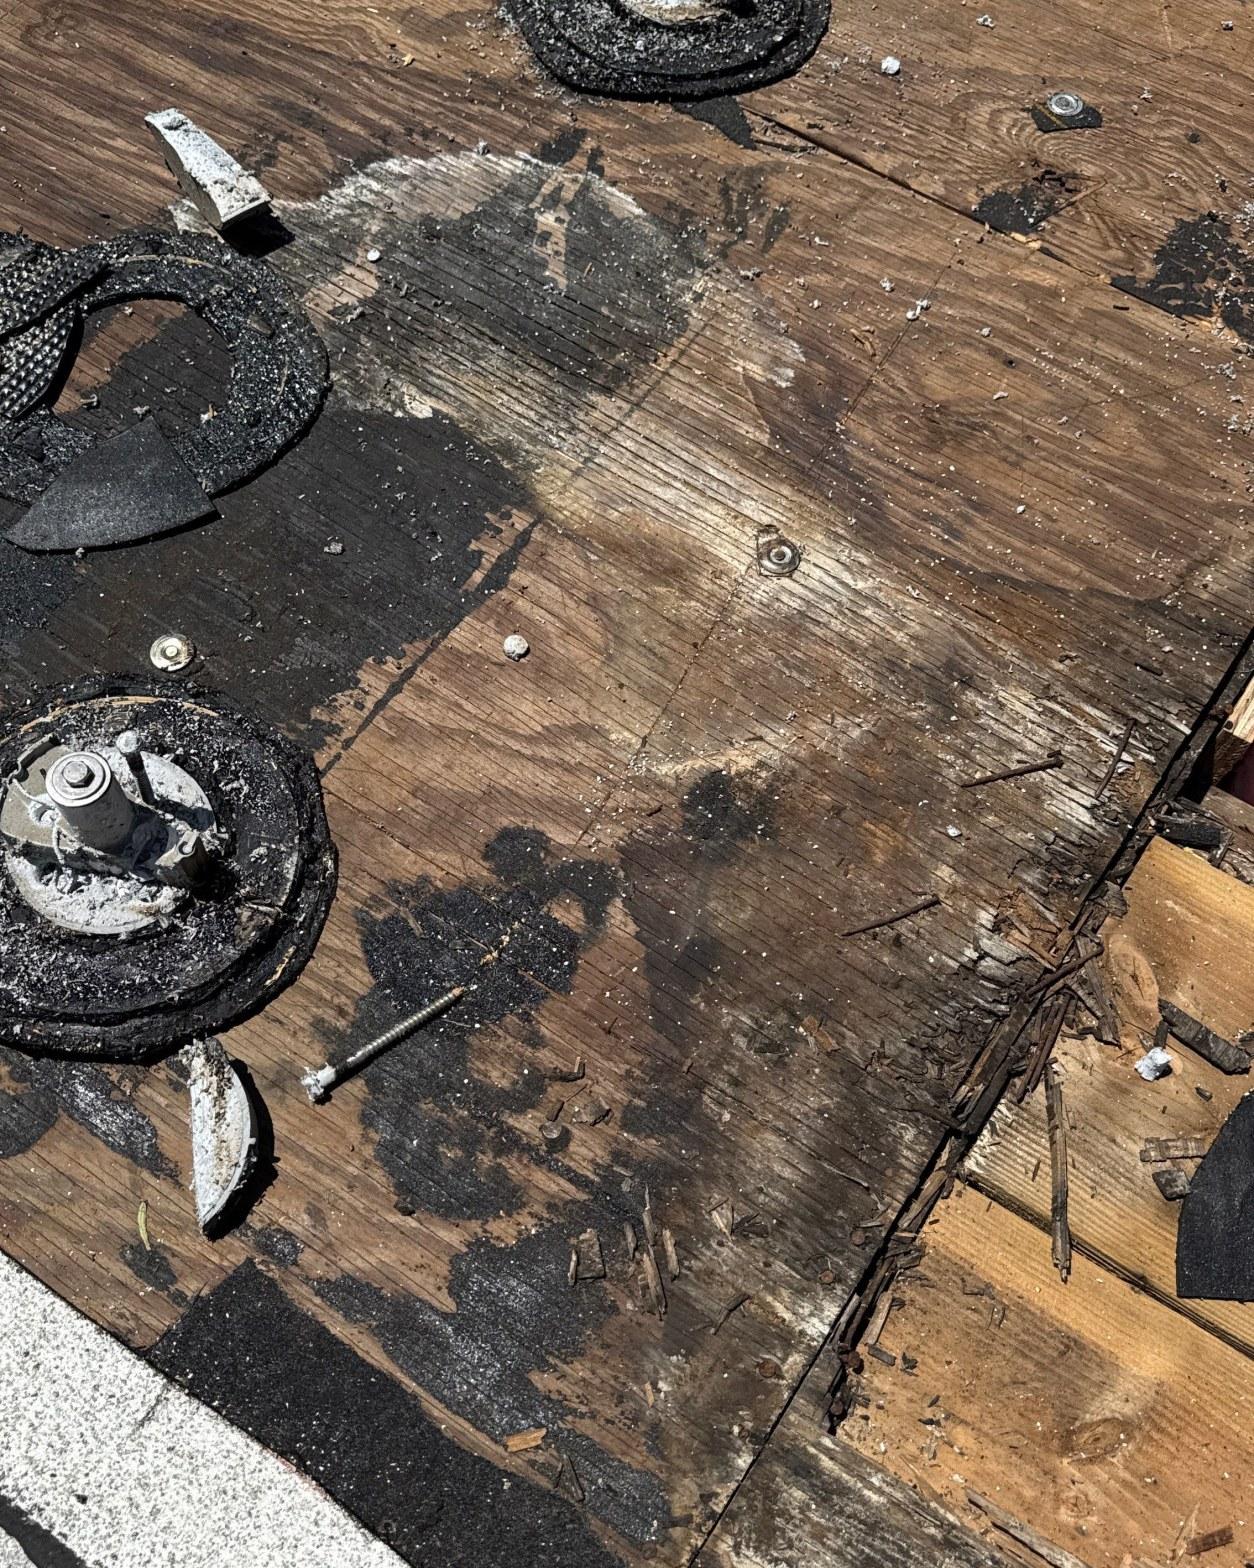
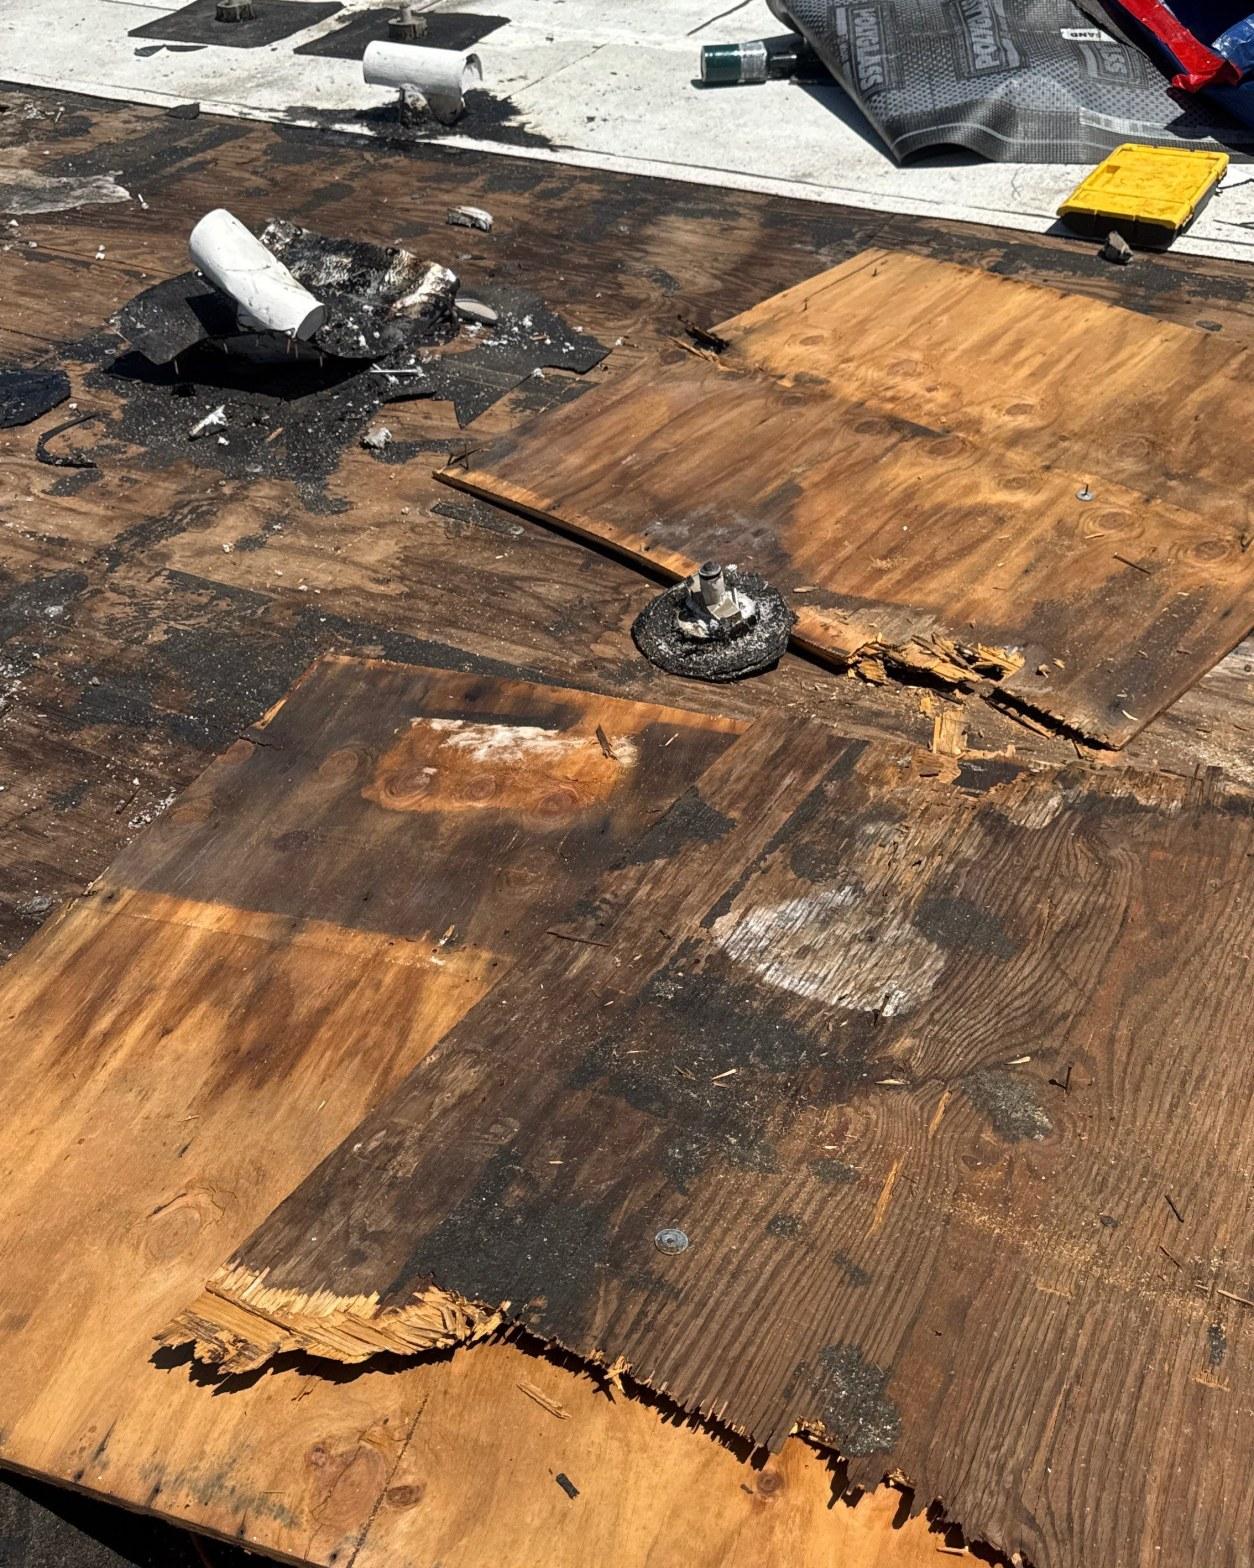
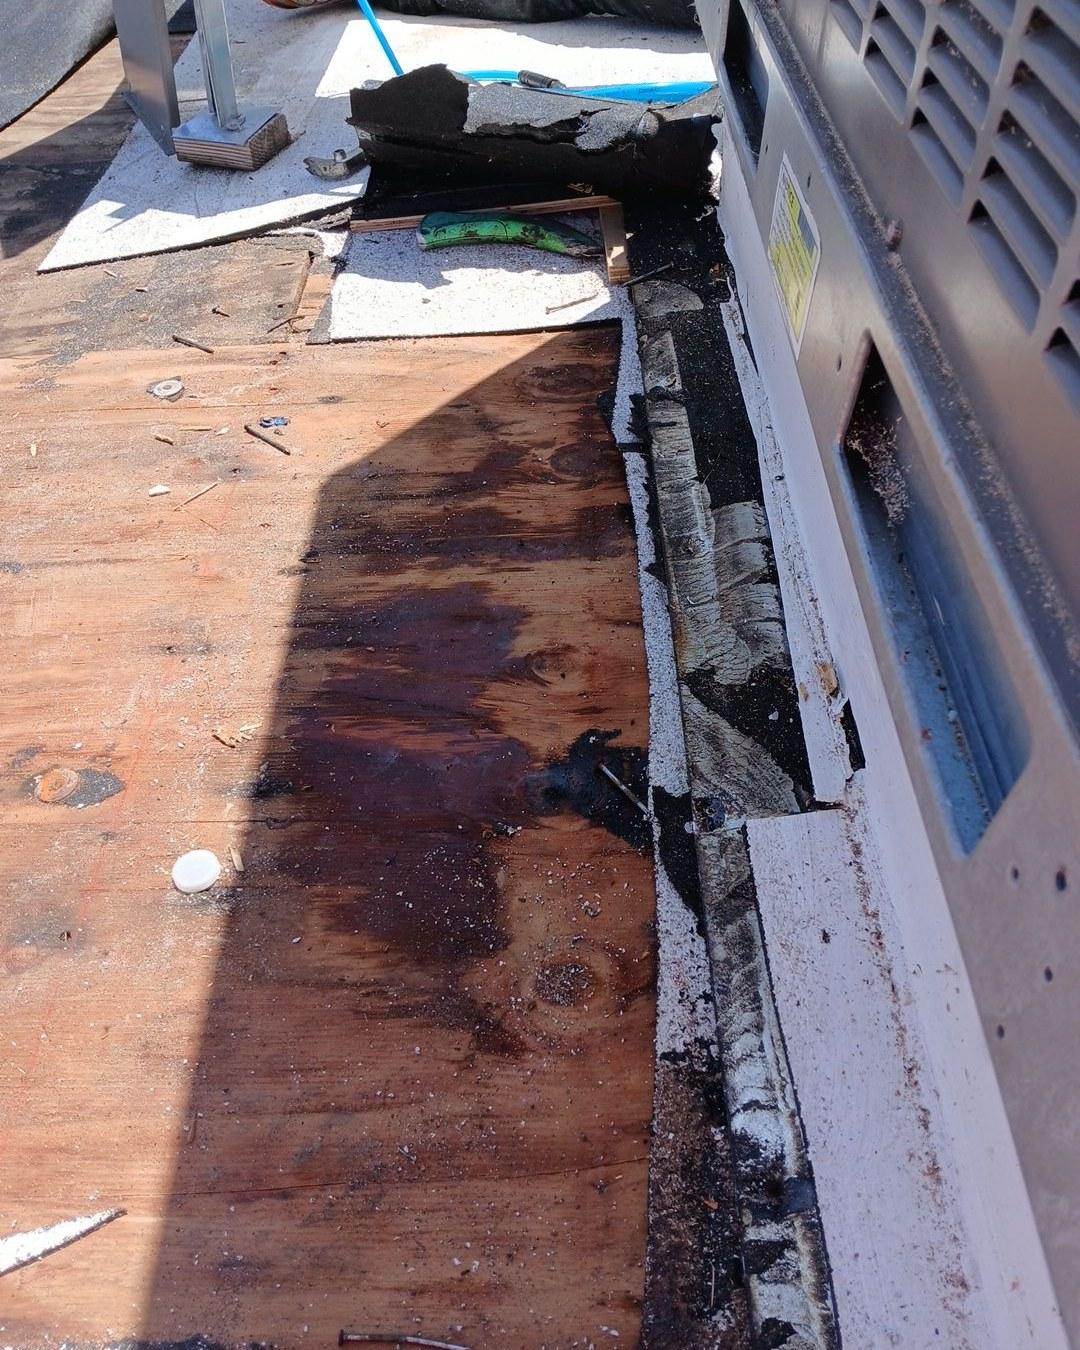
When the crew cut through the old membrane and peeled it back, the plywood underneath was dark, waterlogged, and separating. The photo above shows what that looked like in real time: the wood had soaked through its full thickness, pulling away in sheets along the grain. The blackening was not surface staining. It ran all the way through the panel. That condition was not confined to one corner or one seam. It was general across the deck, which meant partial patching was not an option. Every sheet had to come off.
Long-term water intrusion through a failed membrane is exactly what causes this kind of damage. Los Angeles receives the bulk of its rainfall between November and March, and a low-slope roof holds water on its surface far longer than a pitched roof does after each storm event. Once a coated membrane develops even small failures at seams or penetrations, moisture works its way down to the deck and stays there.
What We Found When the Deck Came Off
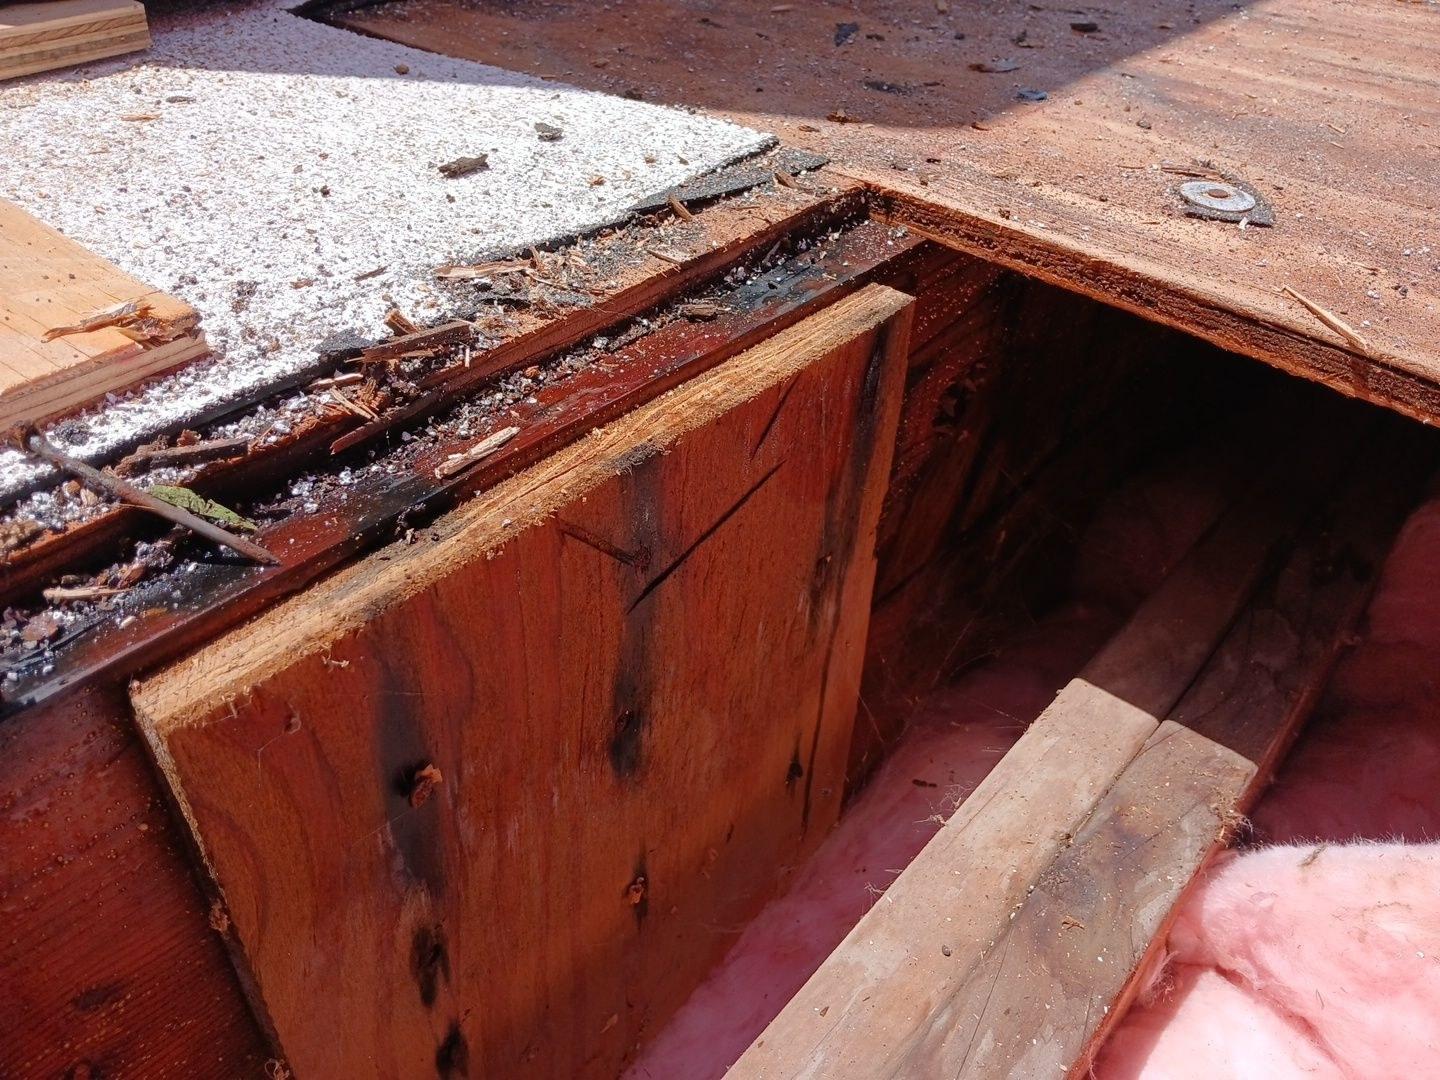
Below the failed plywood, the roof cavity held batt insulation that was still largely intact, which confirmed that the structural framing below the deck had not yet been compromised. That was an important finding. It meant the scope could stop at re-sheathing rather than extending into the framing itself.
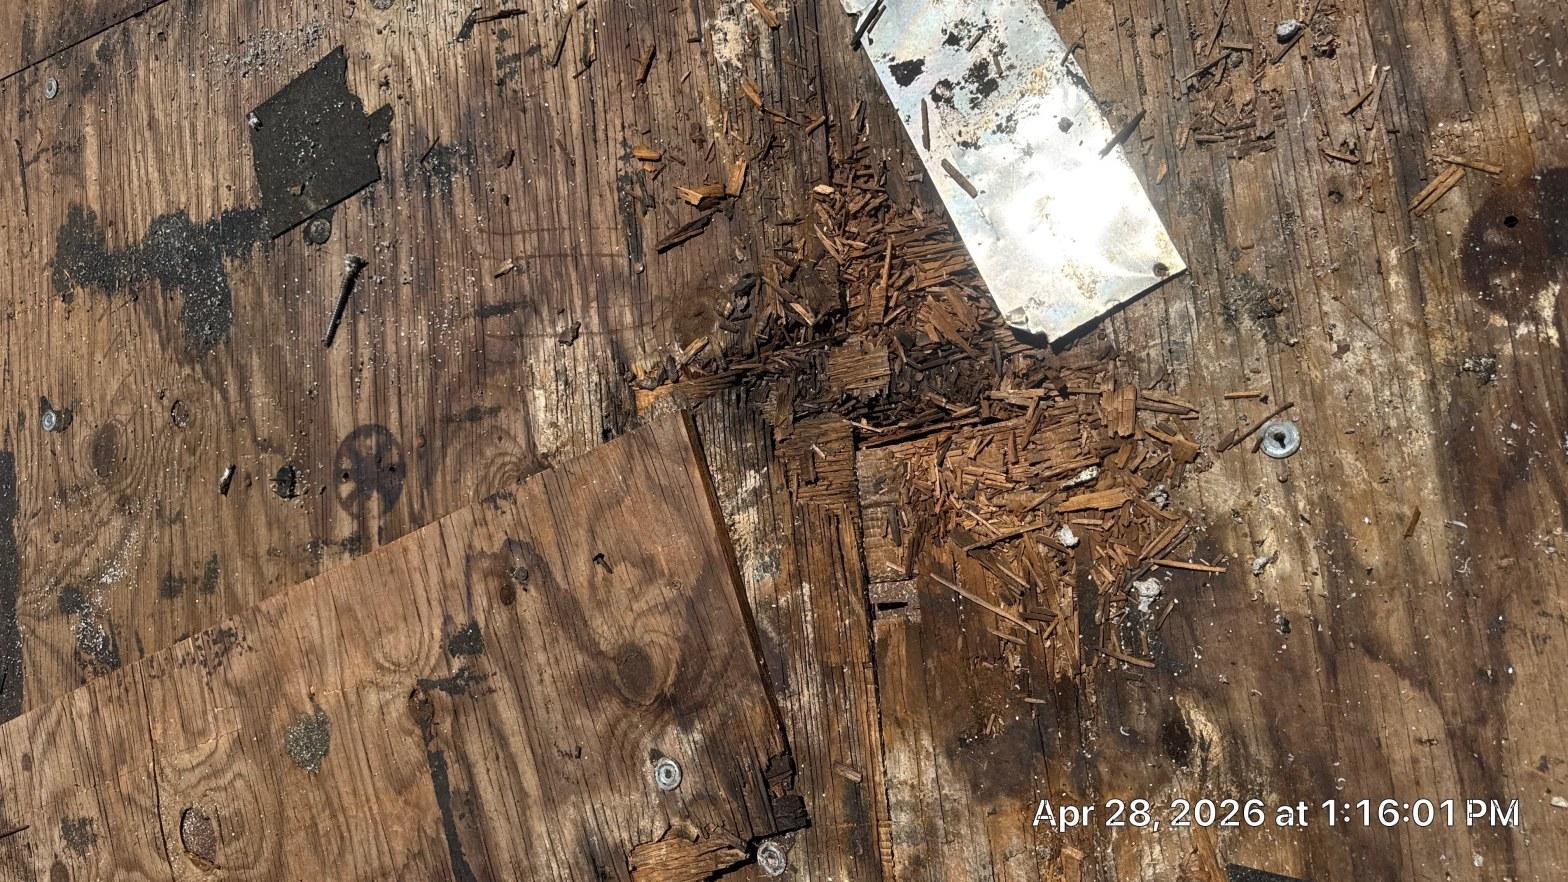
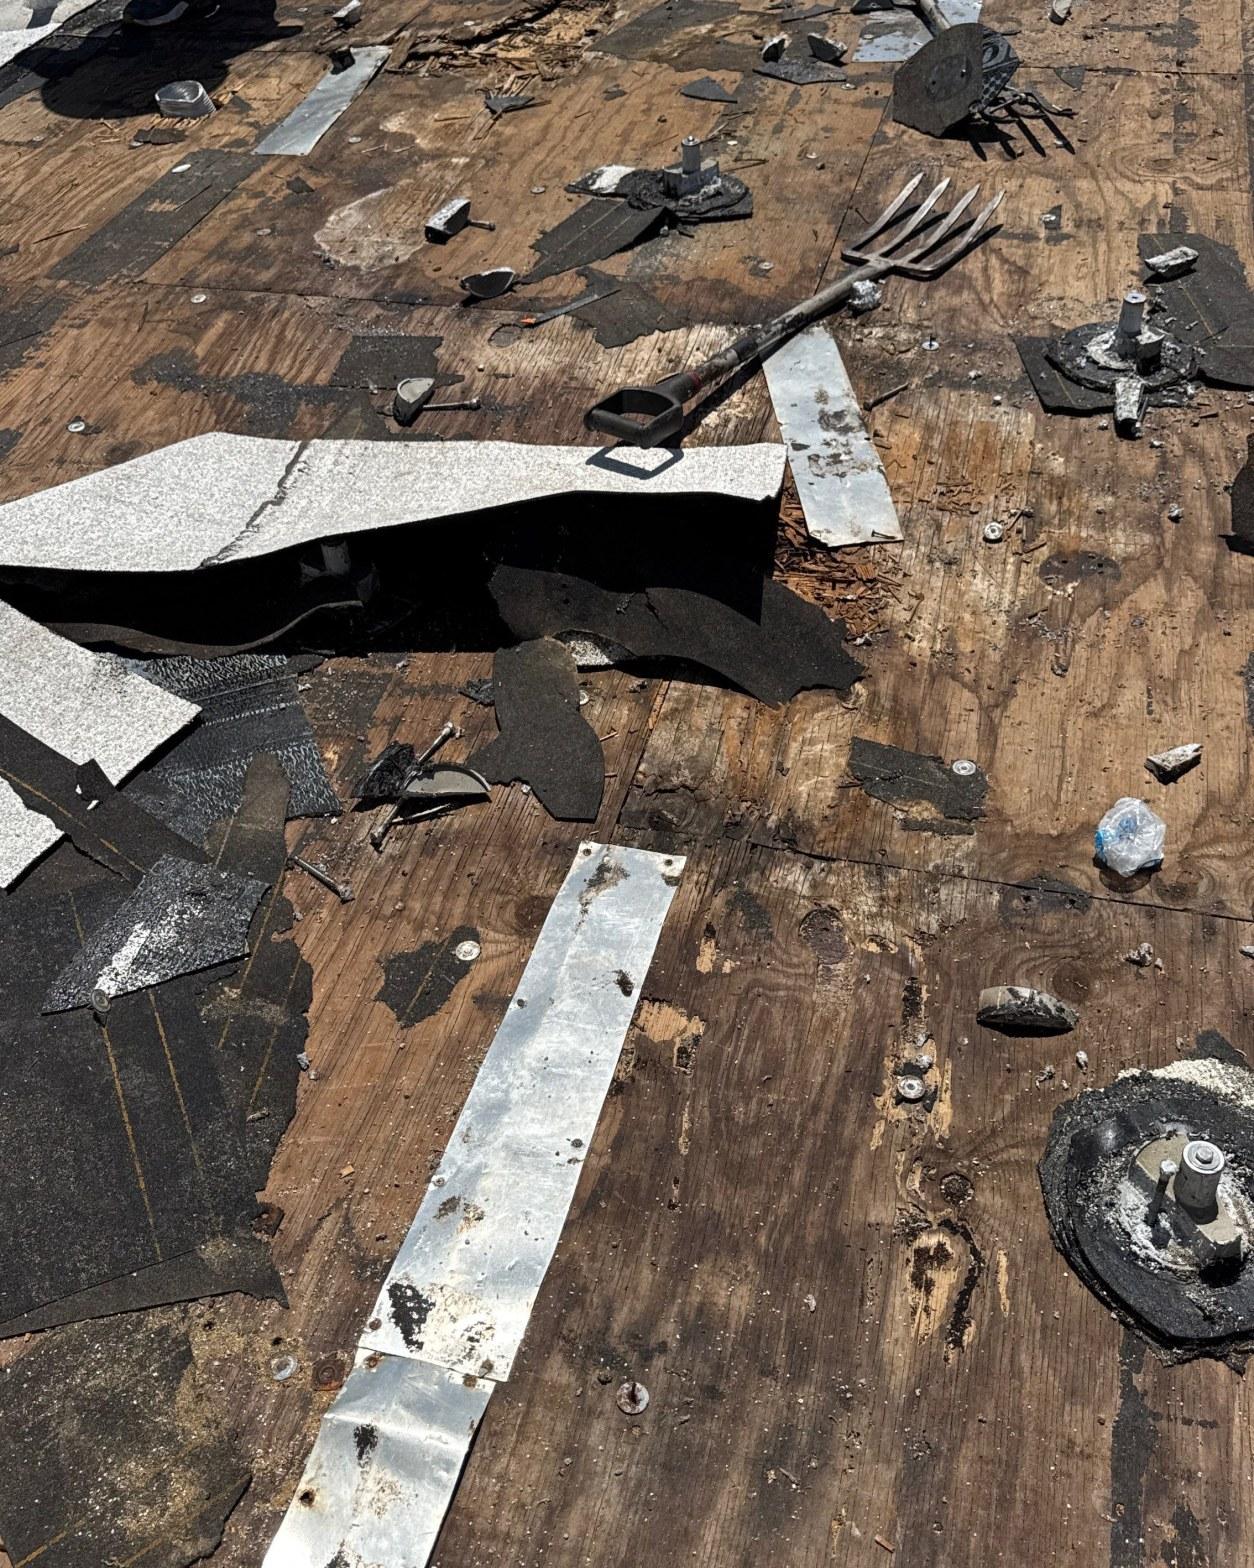
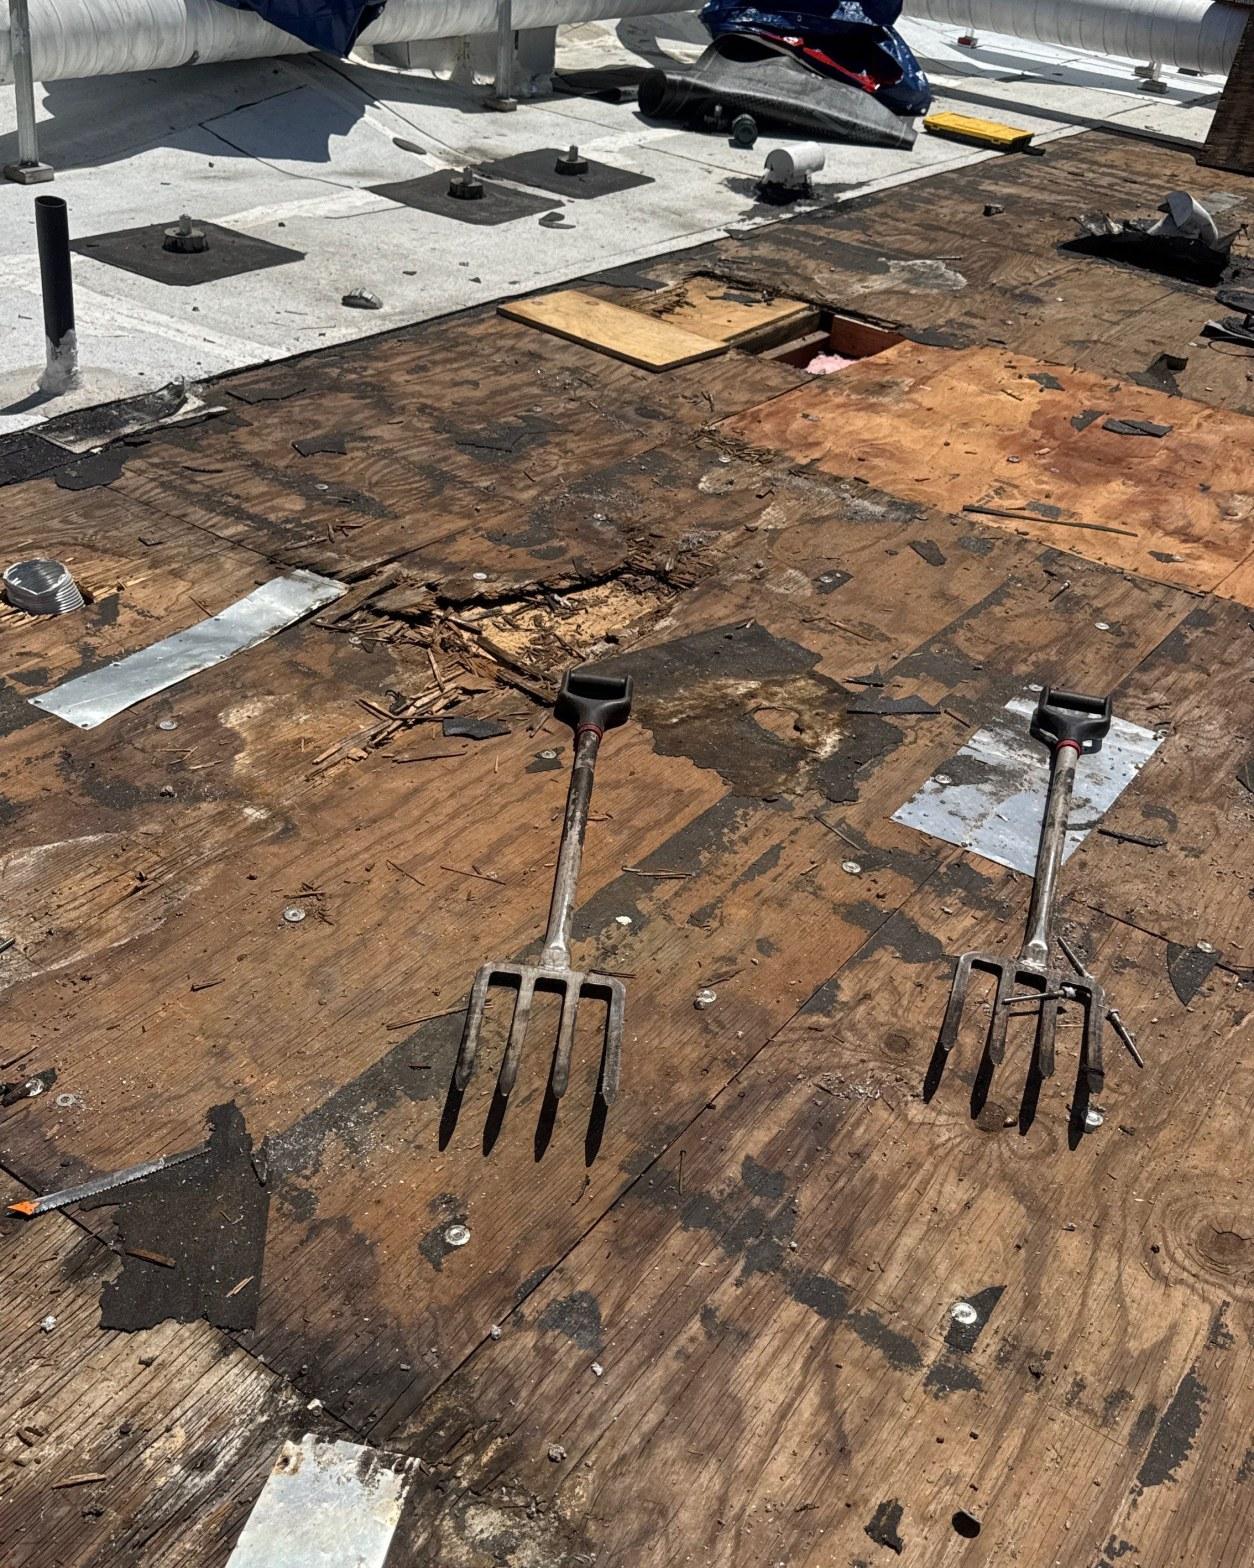
The teardown phase revealed the full extent of the damage across every panel. The photo above documents the deck surface after the membrane was stripped: the wood is fragmented and crumbling around the old drain boots and penetration sleeves, with scattered metal flashing pieces that had long since lost their bond. Displaced hardware, broken fasteners, and debris covered the surface. All of it had to be removed and hauled before a single new sheet could go down.
Flat roofs with heavy mechanical equipment present a specific teardown challenge. This roof carried multiple HVAC condenser units and an extensive network of insulated ductwork supported on standoffs above the surface. That equipment belongs to a separate trade and was not touched, but the deck work had to be sequenced carefully around every support point, pipe penetration, and drain location. Detailing those transitions correctly is where membrane failures most often begin on a re-roof, so each one was treated as its own task rather than an afterthought at the end.
Our crew routinely finds that the worst decay on a water-damaged flat deck concentrates around the drain collars and penetration sleeves, because those are the lowest points where standing water has the longest contact time with the wood. This roof followed that pattern precisely, with the most severe crumbling visible within 12 to 18 inches of each drain boot.
Re-Sheathing the Deck
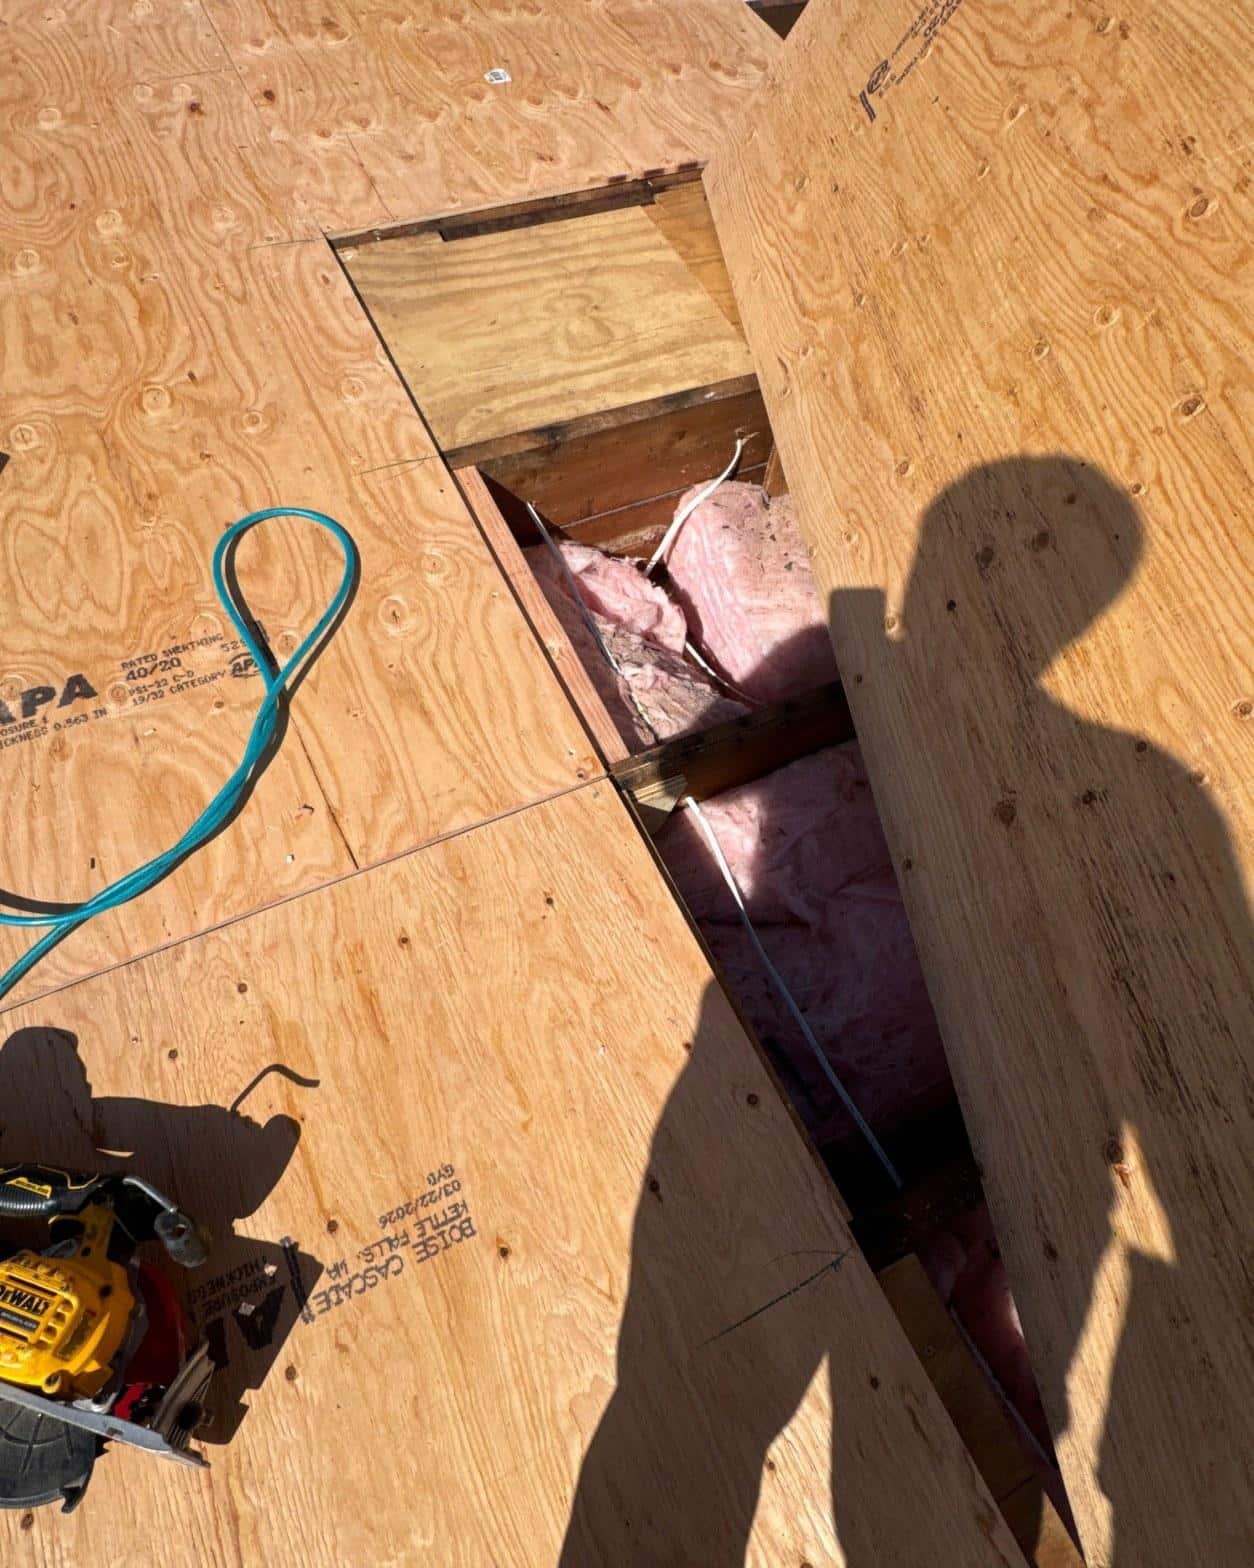
Once the old material was completely stripped and the framing surface was clean, the entire deck was re-sheathed with new plywood panels laid tight and fastened into the framing below. The re-sheathing covered the full footprint of the roof in a single pass, from the parapet walls on all sides to each penetration opening.
The photo above, taken during the deck work, shows a cut-out section in a new plywood panel where a penetration was being fitted. Through the opening you can see the pink batt insulation in the cavity below, undisturbed. That view was useful on the job because it confirmed that the insulation was dry and structurally sound and that no additional work was needed in the cavity. The circular saw visible at the lower left is a DeWalt unit; that kind of precise plunge cut lets the crew fit panels tight around existing penetration sleeves without leaving gaps that could telegraph through the finished membrane.
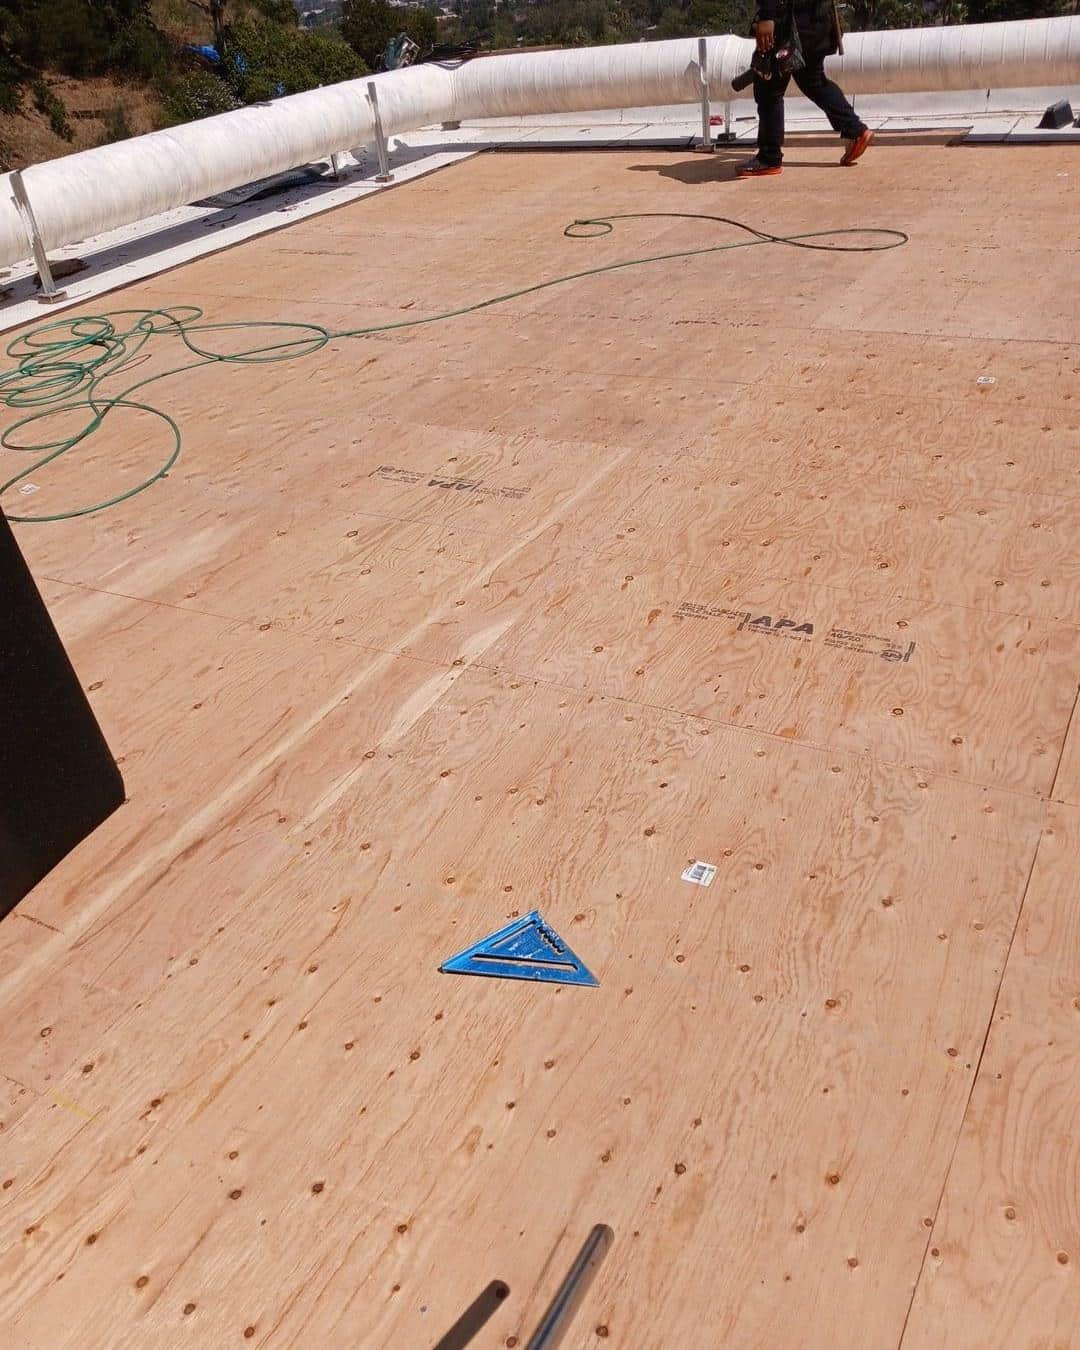
The International Building Code requires wood roof sheathing to be rated for the exposure category of the application, and low-slope roofs in California are classified as a high-moisture exposure context. The panels used here carry an APA Rated Sheathing stamp visible in the photo, confirming the grade meets that requirement. California’s Title 24 building energy standards also govern the thermal performance of the roof assembly, and the reflective coating specified for the finish layer was selected to satisfy the cool-roof requirements that apply to low-slope residential roofs as of the 2022 code cycle.
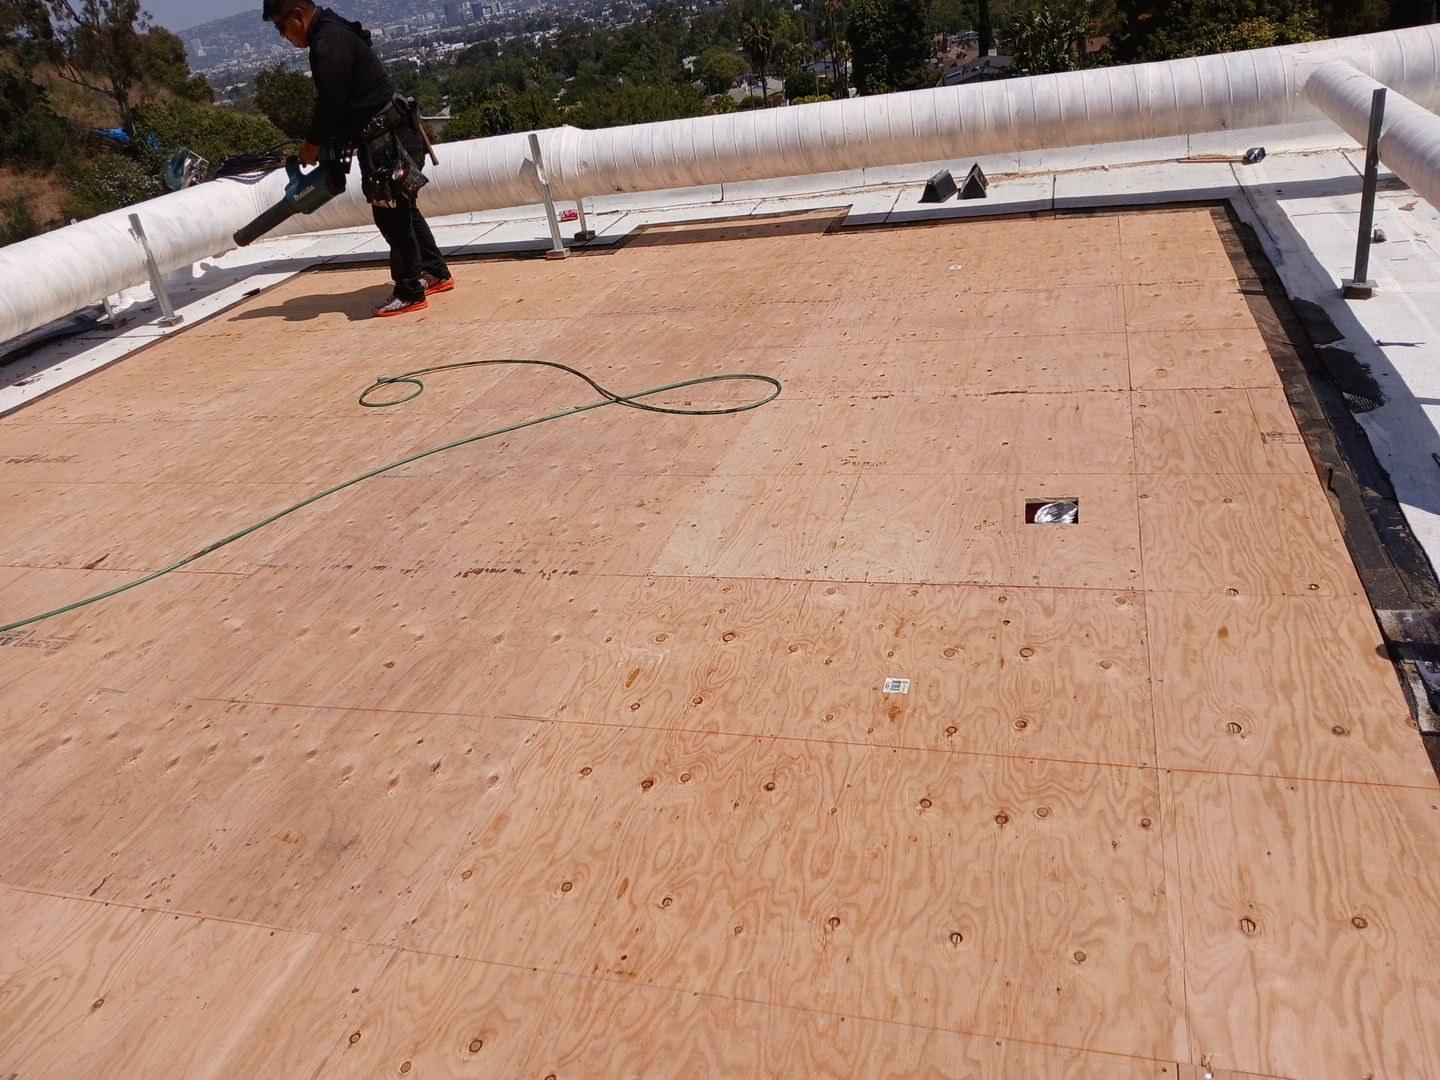
With the full deck re-sheathed and blown clean of sawdust and debris, the surface was ready for the membrane. The photo above shows the completed plywood field with a crew member using a blower at the far edge, the LA basin visible in the background. At that stage the perimeter detailing and drain collars had already been rough-fitted, so the membrane crew could start immediately.
Installing the Polyglass Membrane
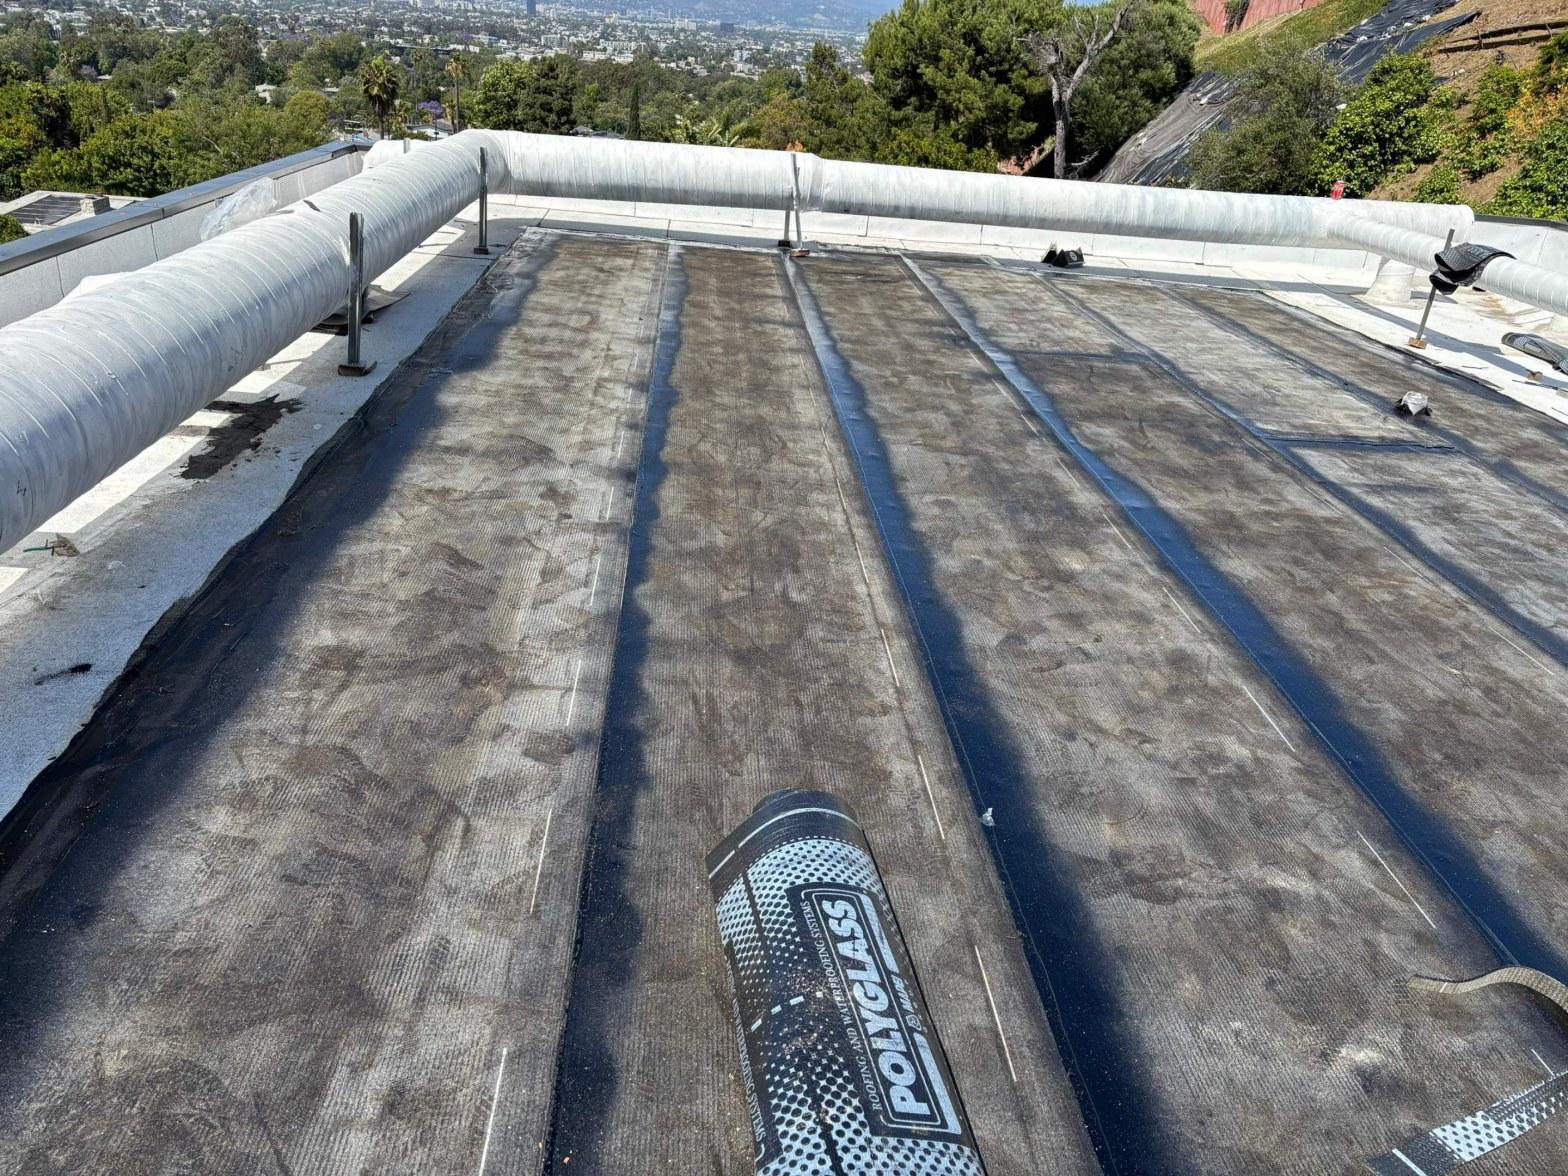
The membrane chosen for this project was Polyglass modified bitumen, rolled out in full-width strips across the new plywood deck and bonded in place. Polyglass is a modified bitumen system that bonds to the substrate and to adjacent strips along overlapping seams, producing a continuous waterproof field without exposed fasteners in the field area.
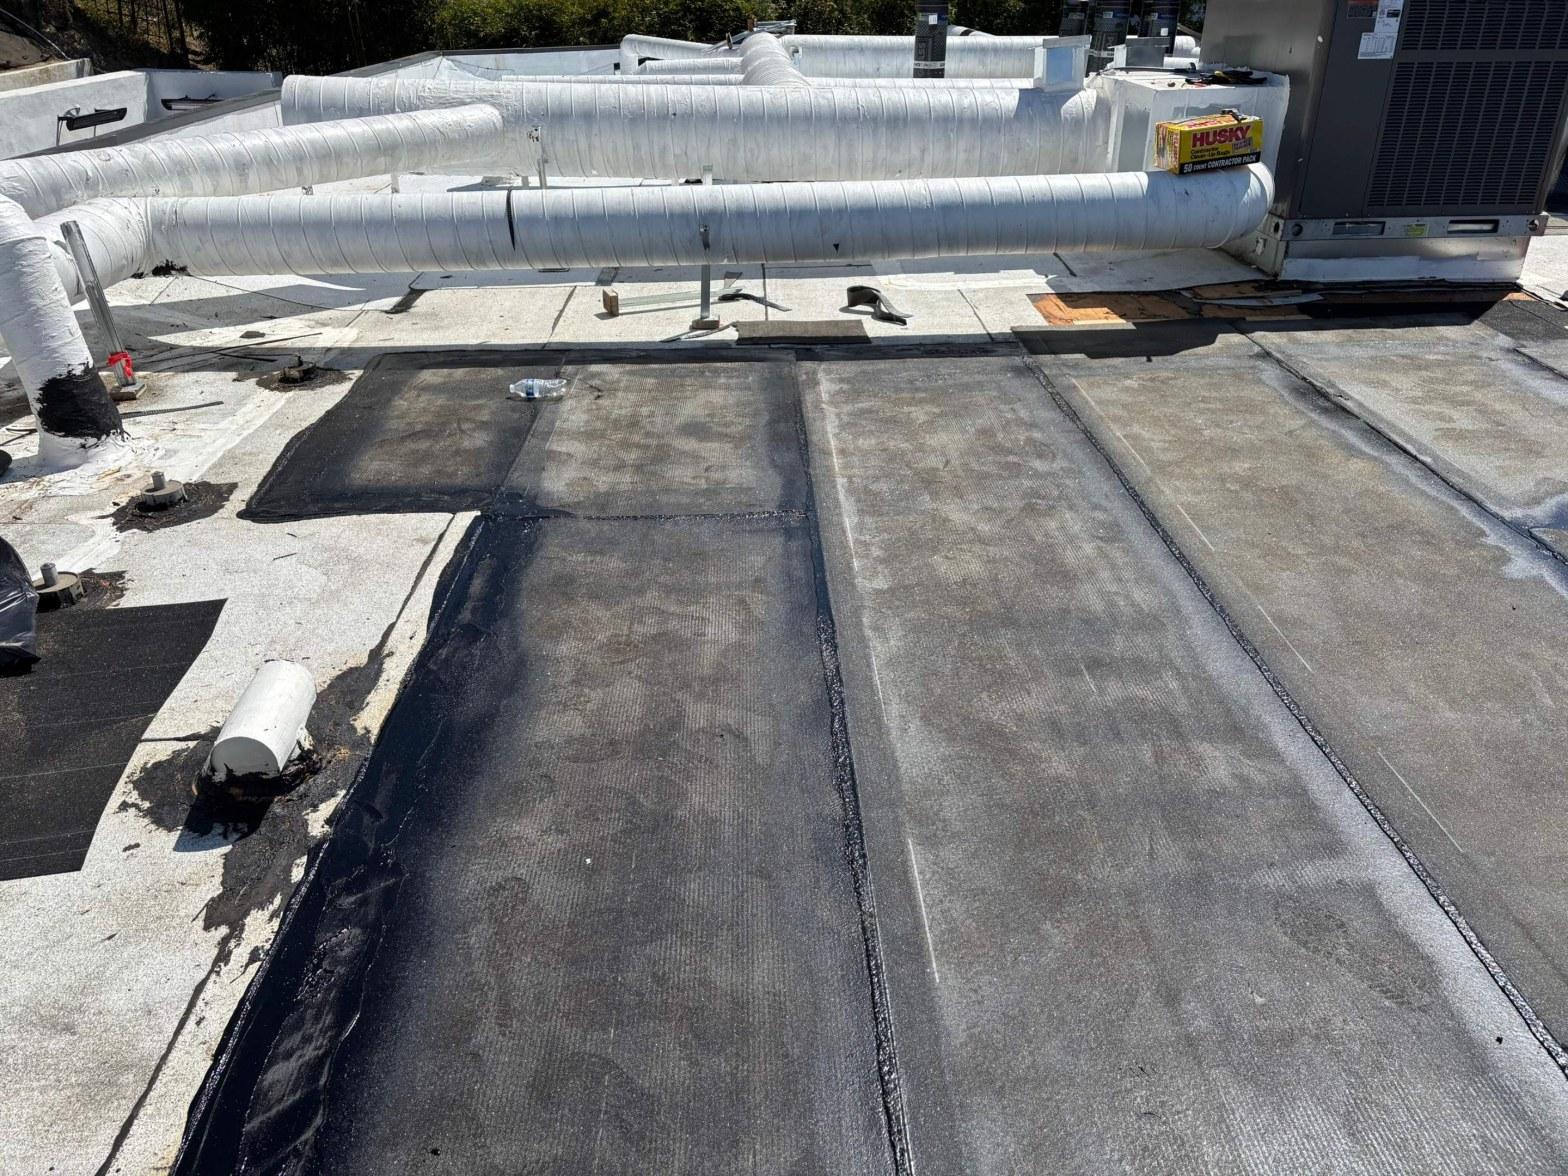
The photo above shows the membrane installation in progress: three strips are already down across the repaired section, with a fresh Polyglass roll staged at the lower edge ready for the next run. The seams between strips are visible as clean, straight lines, each one lapped and bonded. At the left edge the transition from the new section to the existing membrane on the unrepaired portion of the roof is also visible, showing how the new field was integrated into the surrounding surface without leaving a raised edge.
Detailing around the existing pipe penetrations and duct support legs required cutting and fitting individual pieces of membrane around each obstacle rather than running strips past them. Each penetration received its own wrap of membrane material bonded to the sleeve, then the field strip was cut to meet it. That sequence, field first then detail, is reversed from how some crews work, but it ensures the detail piece always laps over the field piece in the direction water travels rather than against it.
By the time the membrane phase was complete, the full deck surface was covered, all drain collars were integrated into the field, and every penetration was wrapped and bonded. The roof was then ready for the final coating.
The Finished Roof: White Reflective Coating
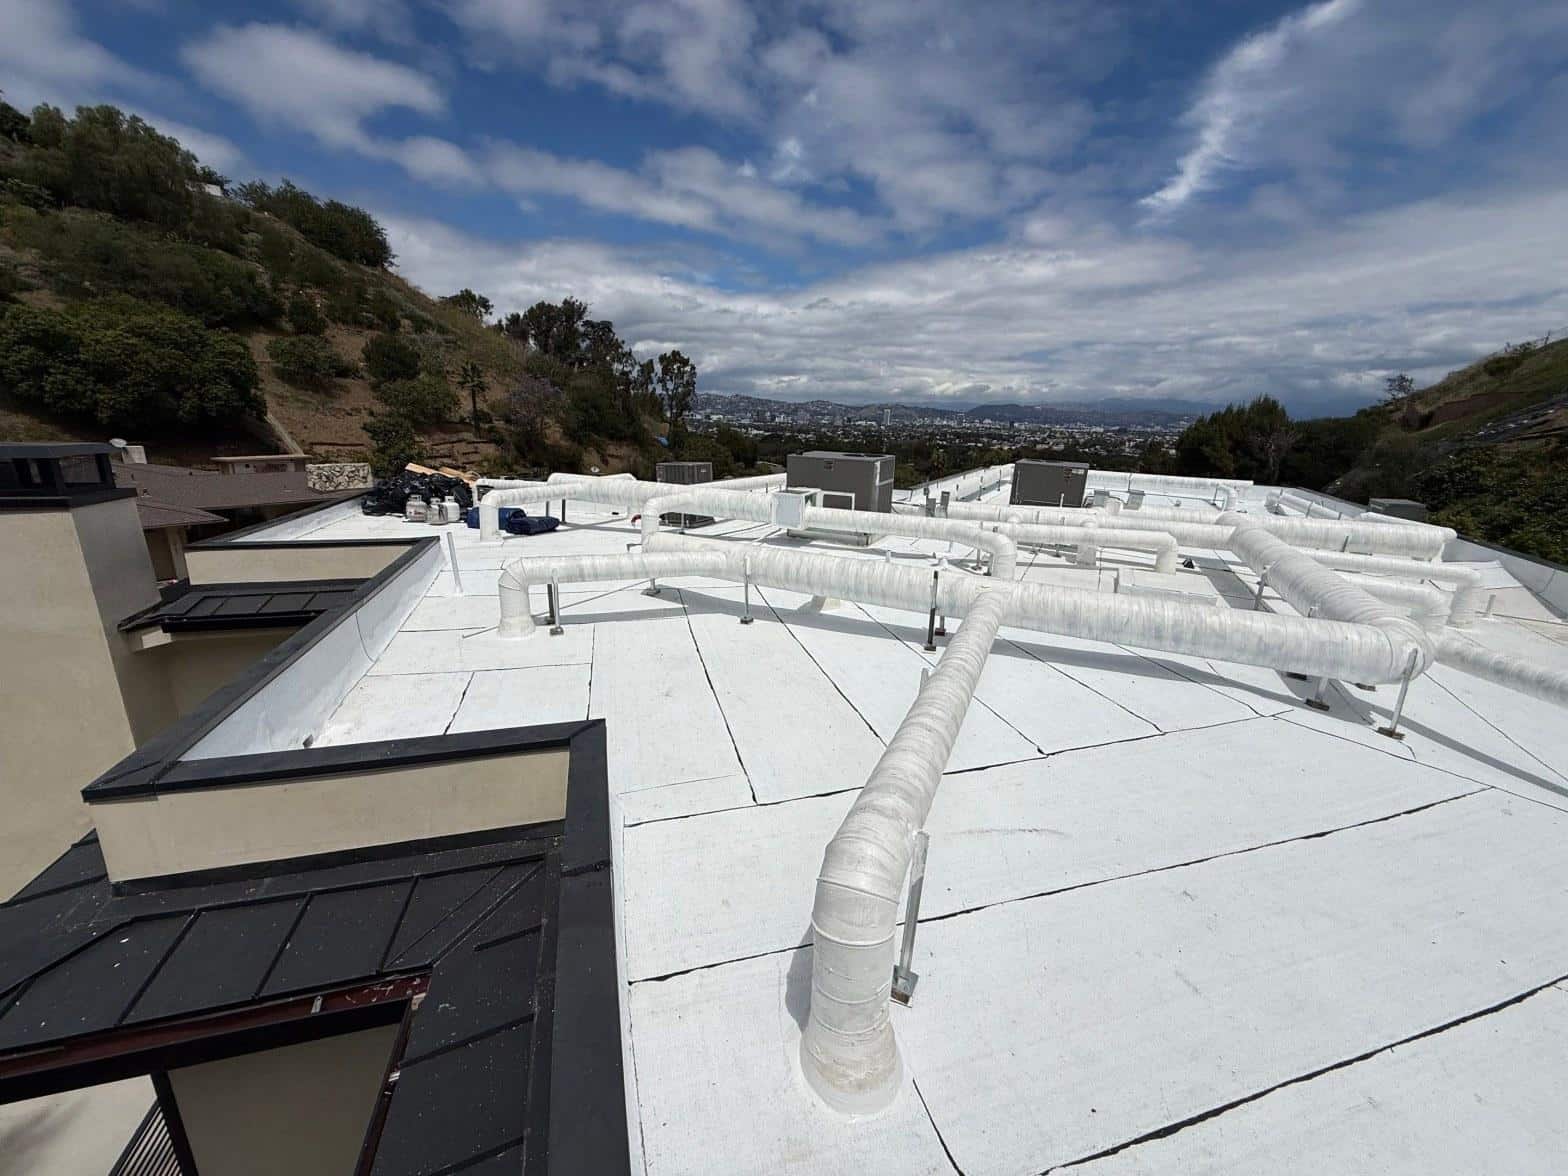
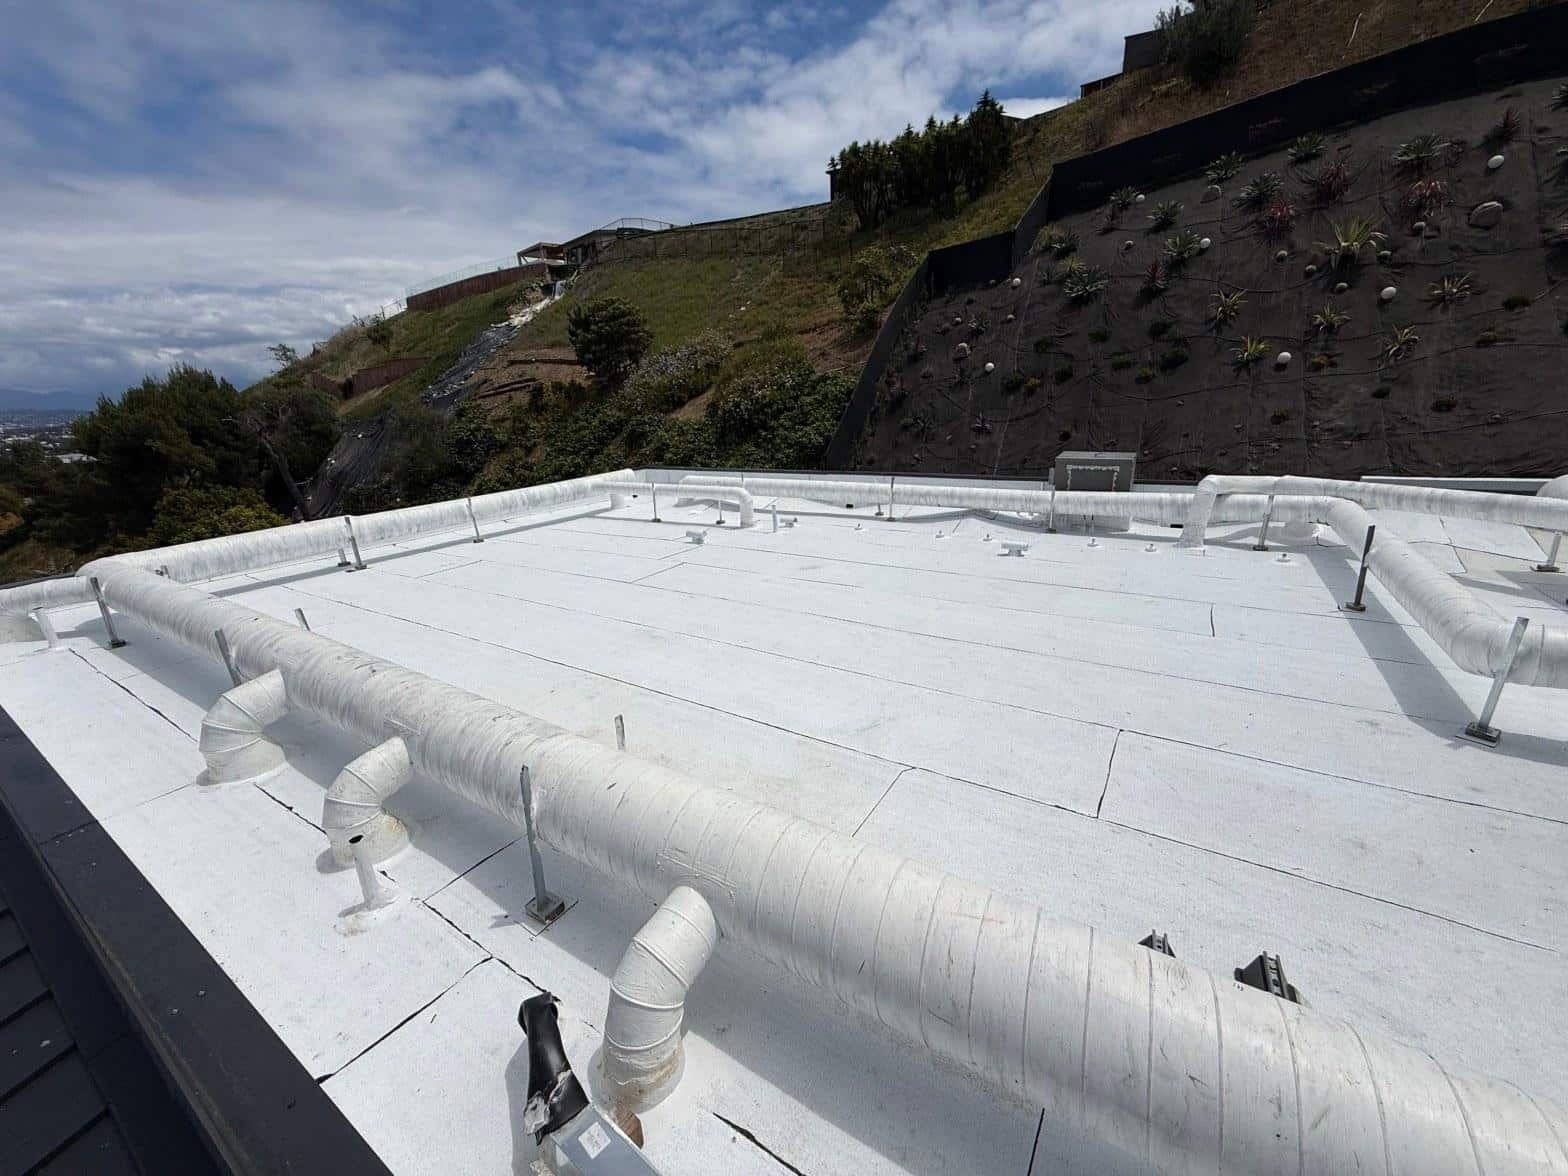
The completed roof received a white reflective coating applied across the entire membrane field and carried up the face of the parapet walls on all sides. The white finish serves two functions: it protects the membrane surface from UV degradation, which is the primary cause of membrane cracking on California flat roofs, and it reflects solar heat rather than absorbing it.
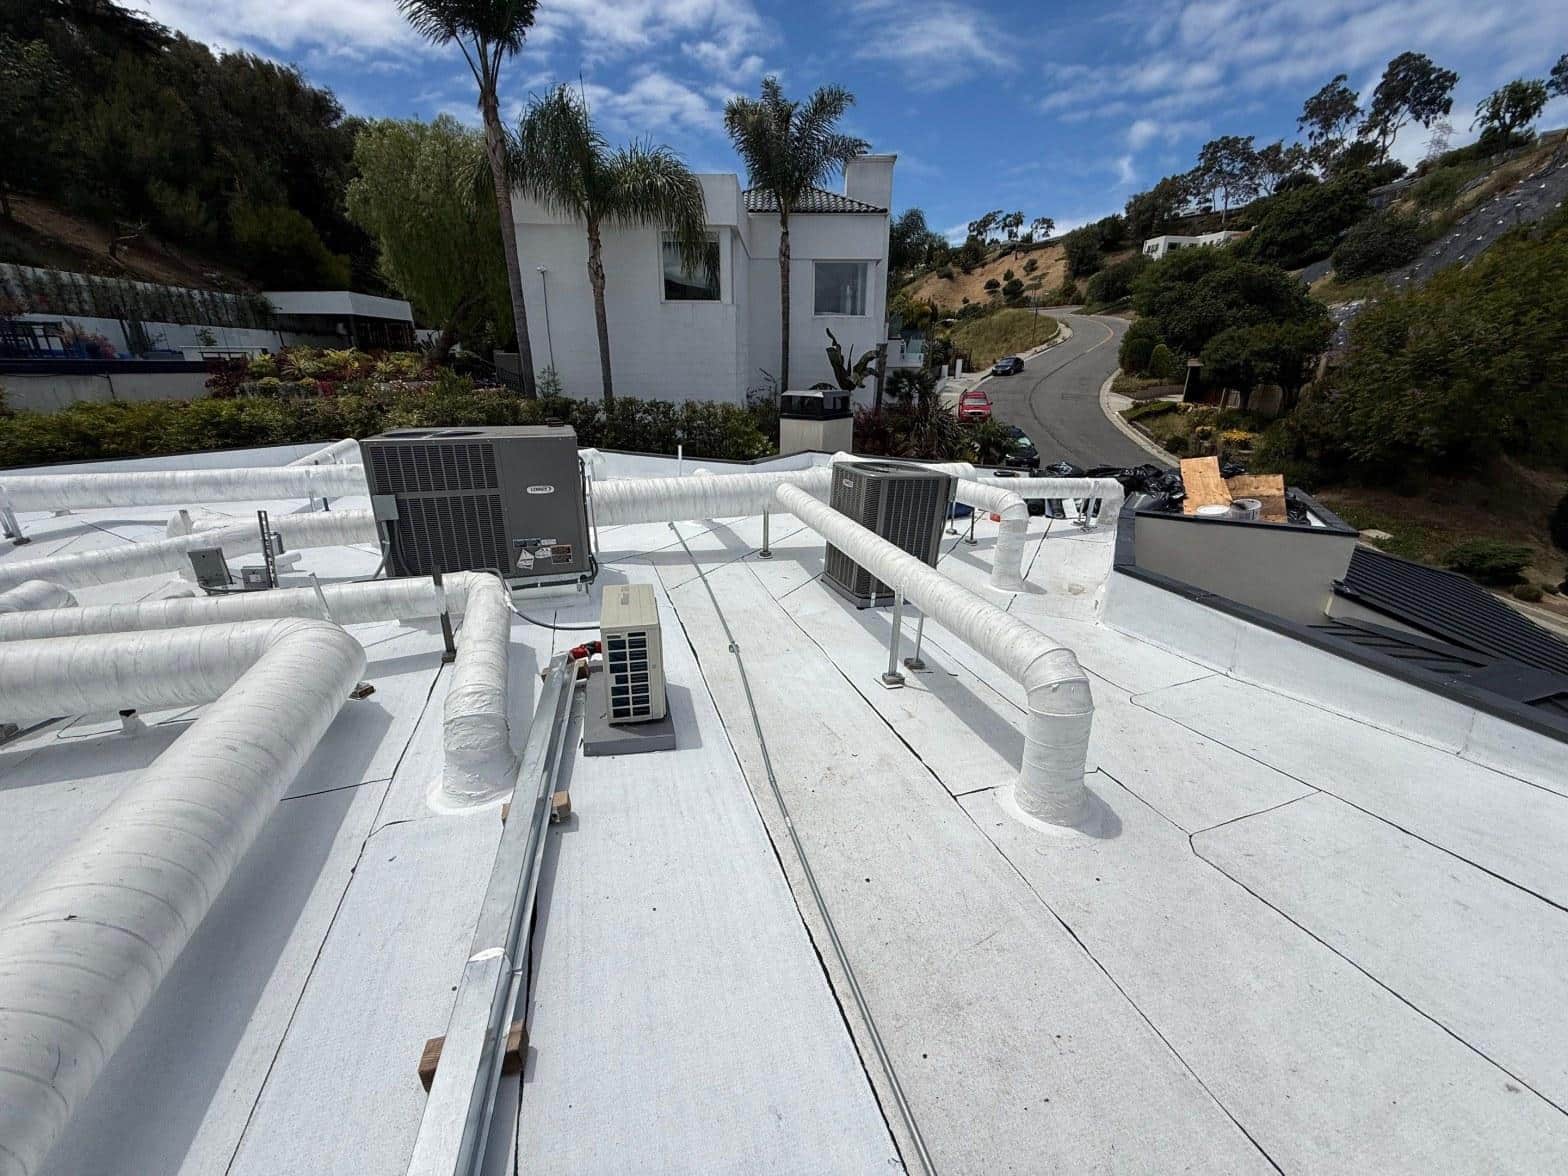
The photo above shows the finished roof from the parapet level, looking across the coated field toward the neighboring hillside. The white surface is uniform end to end, with the membrane seam lines still faintly visible beneath the coating as a record of the strip pattern. Each duct support standoff, pipe penetration, and drain collar has been detailed with coating carried up and around the transition. No raw membrane surface is exposed anywhere on the deck.
For a hillside home in Los Angeles, where summer roof surface temperatures on a dark membrane can exceed 150 degrees Fahrenheit on a clear July afternoon according to NOAA surface temperature data, a white reflective coating meaningfully reduces the thermal load on the membrane and on the building below. That matters most on a low-slope roof where the membrane is horizontal and receives direct solar radiation at the highest angle for the longest duration each day.
The project was completed on May 4, 2026, delivering a fully re-sheathed deck and a new membrane system properly detailed at every penetration, drain, and parapet transition.
Get a Quote for Your Flat Roof
If your flat or low-slope roof is showing signs of pooling water, bubbling membrane, or staining at the ceiling inside, the deck below may be further along than the surface suggests. Roof Replacement Inc handles projects of this scope throughout Los Angeles, from initial inspection through final coating.
Call us or submit a request online to schedule a roof inspection. Get a written scope and quote before any work begins.


