

A Landmark Home in Cheviot Hills Needed a New Roof
This project involved replacing a fully worn-out wood shake roof on one of the more architecturally complex homes in the Cheviot Hills neighborhood of Los Angeles. The two-story stucco house at 10315 Lorenzo Dr sits on a hillside lot and carries a steep, multi-plane roof with at least 4 distinct hip-and-valley intersections, 2 gabled dormers, a bay-window sub-roof, a turret-like corner element, and 2 chimneys. At the rear and sides, the main pitched roof transitions into a series of low-slope and flat sections that call for a completely different waterproofing strategy than the steep slopes above.
The homeowner’s goal was straightforward: replace a wood shake roof that had reached the end of its serviceable life before the next rainy season arrived. Los Angeles receives the bulk of its annual rainfall between November and March, according to NOAA climate data for the region, so a summer completion window was important. Work began in early July 2026 and the project was finished in August 2026, leaving the home fully weathertight well ahead of the fall.
Project Gallery
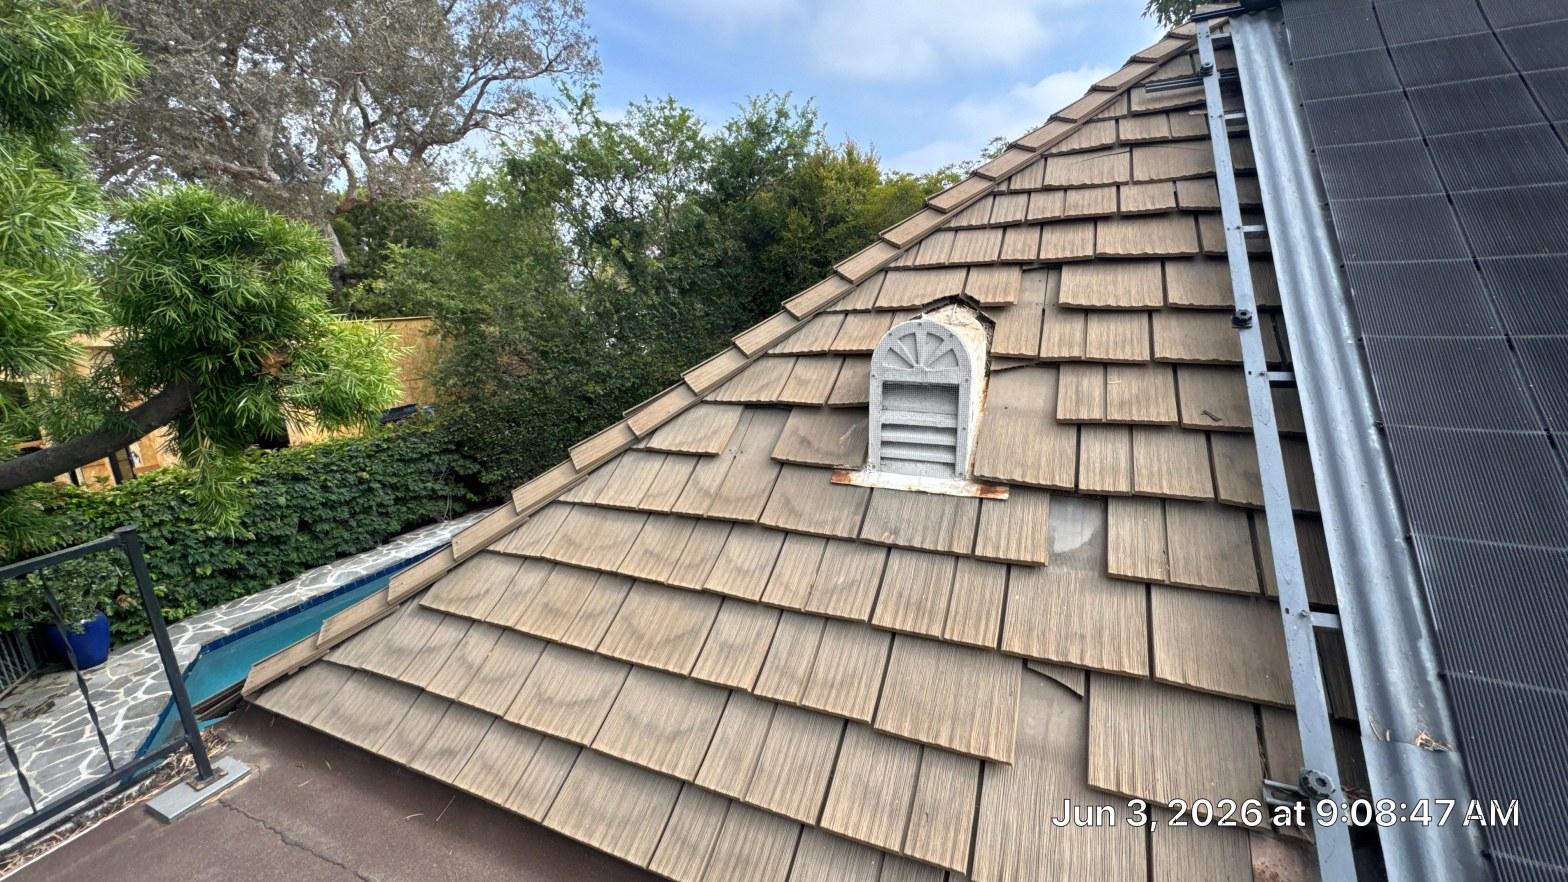
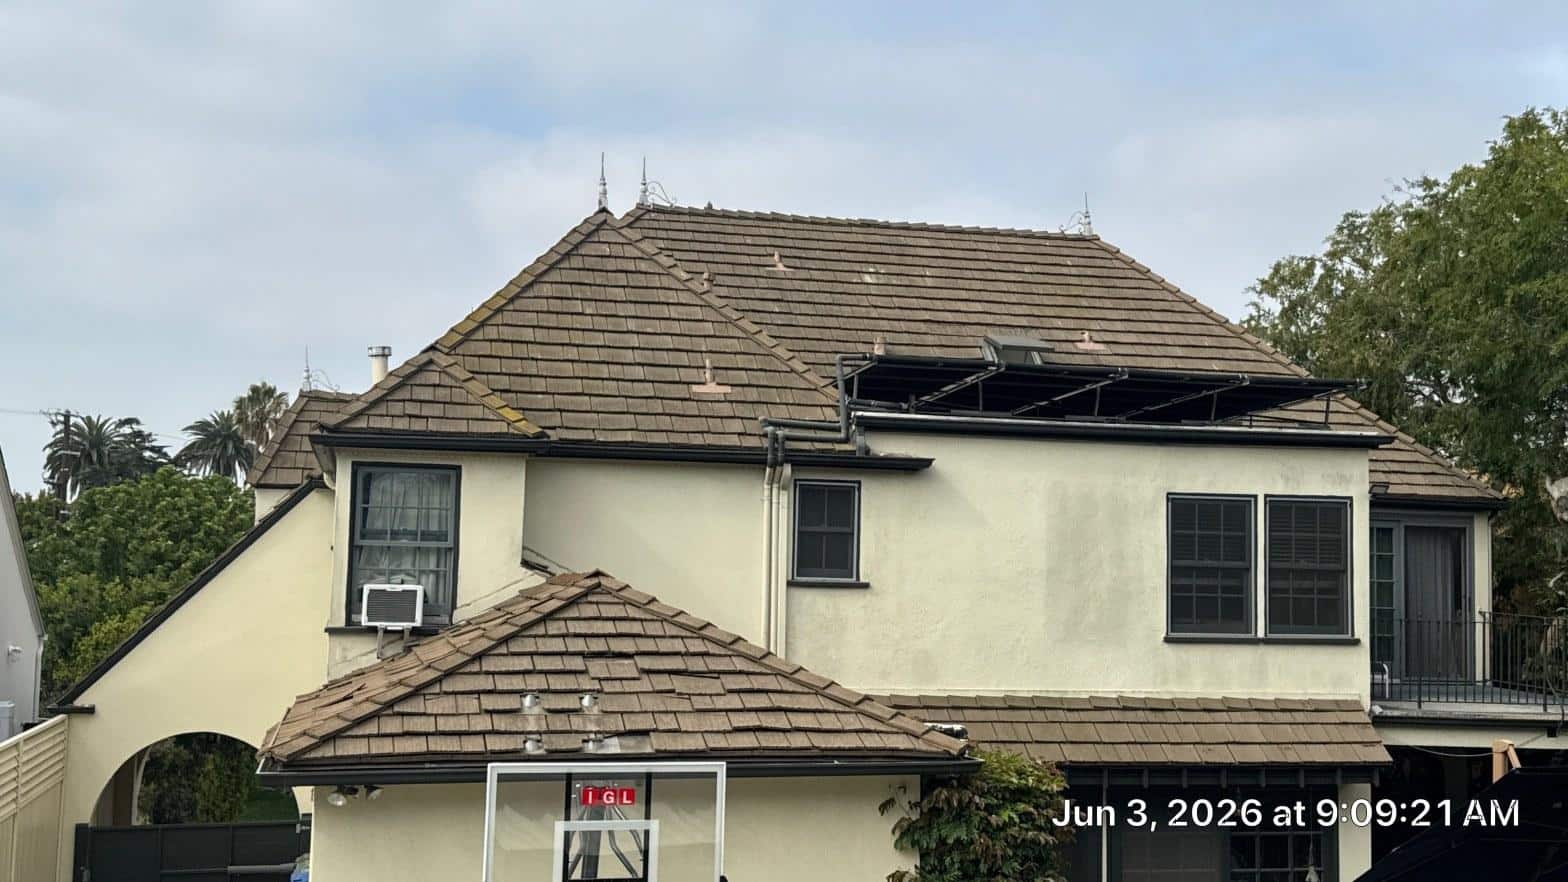
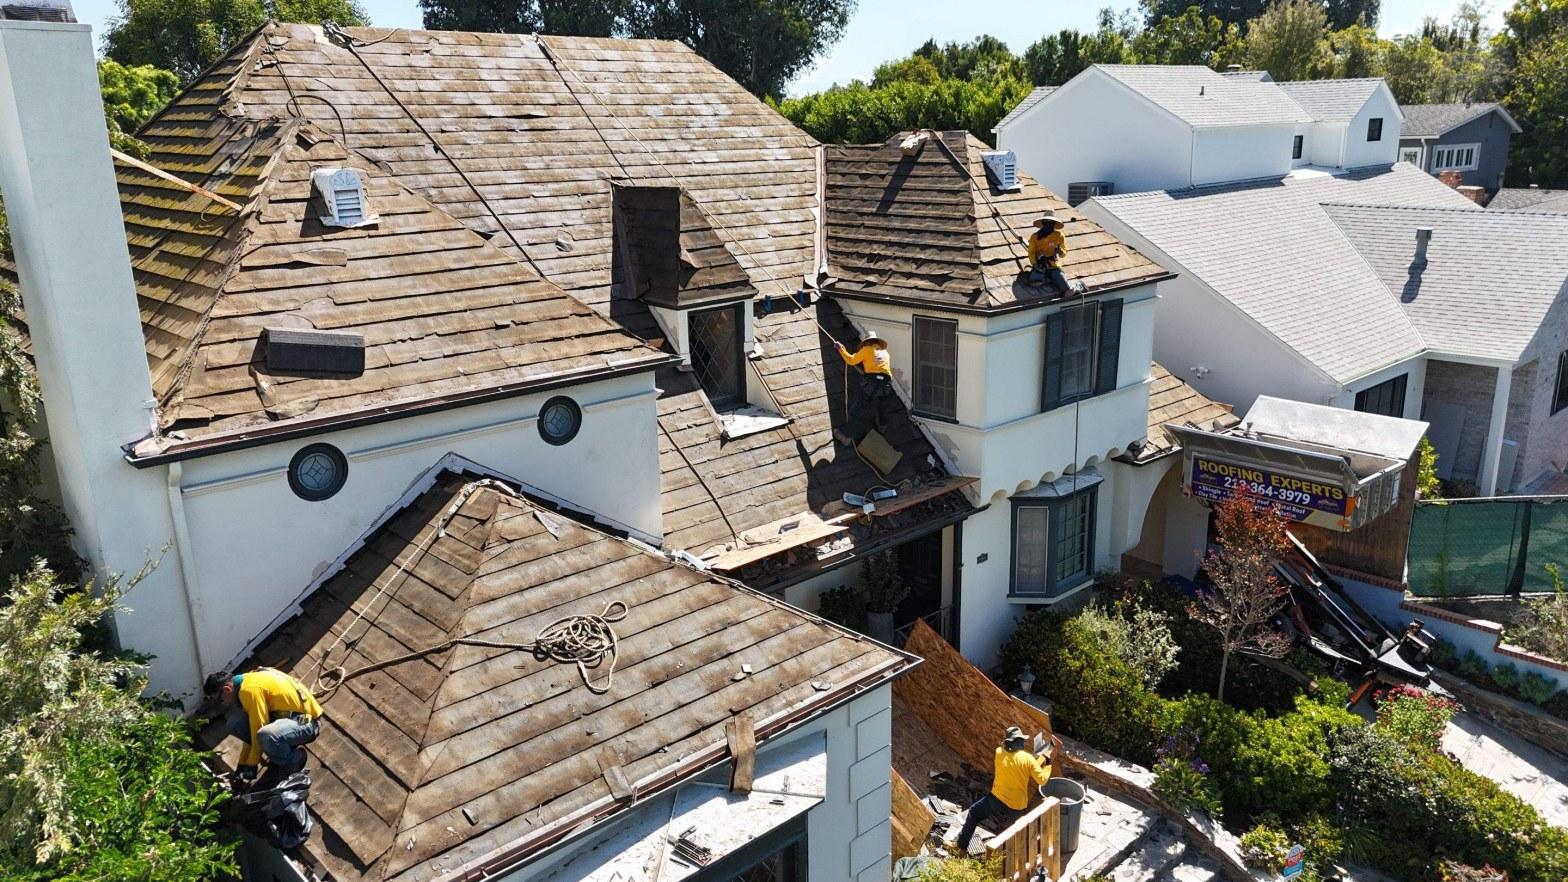
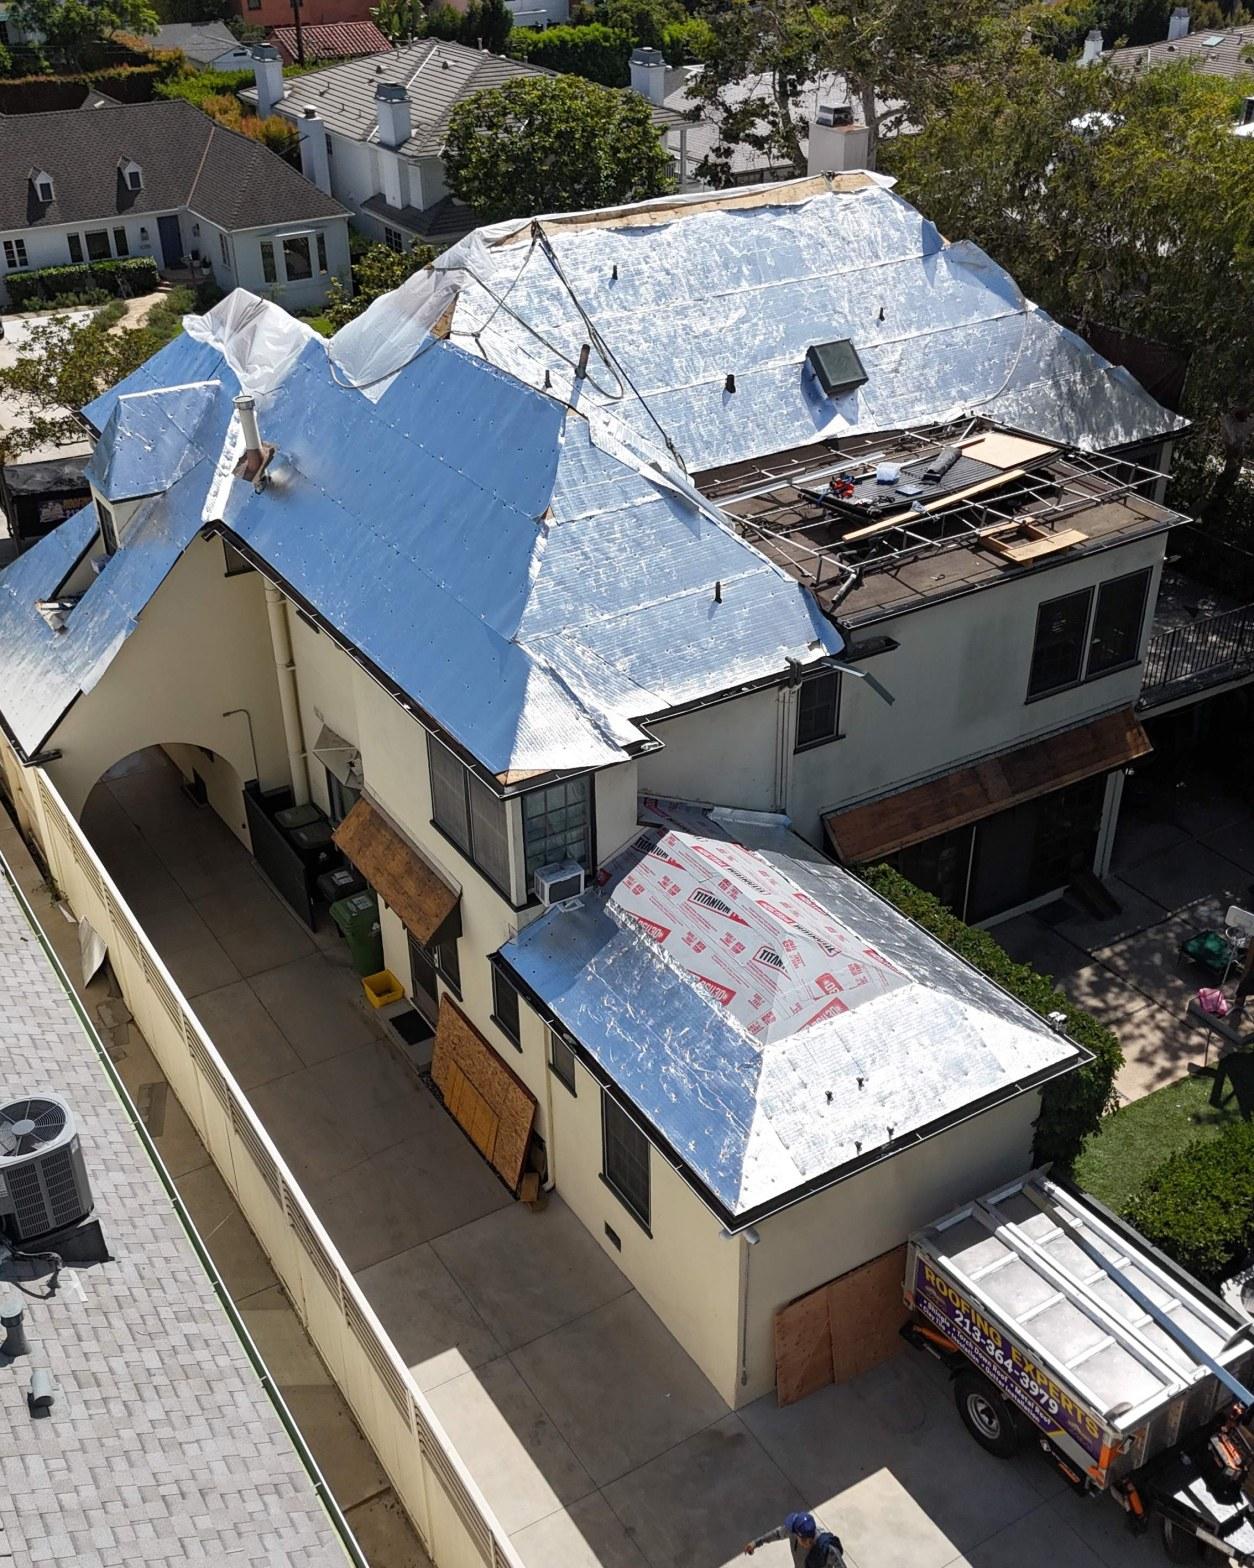
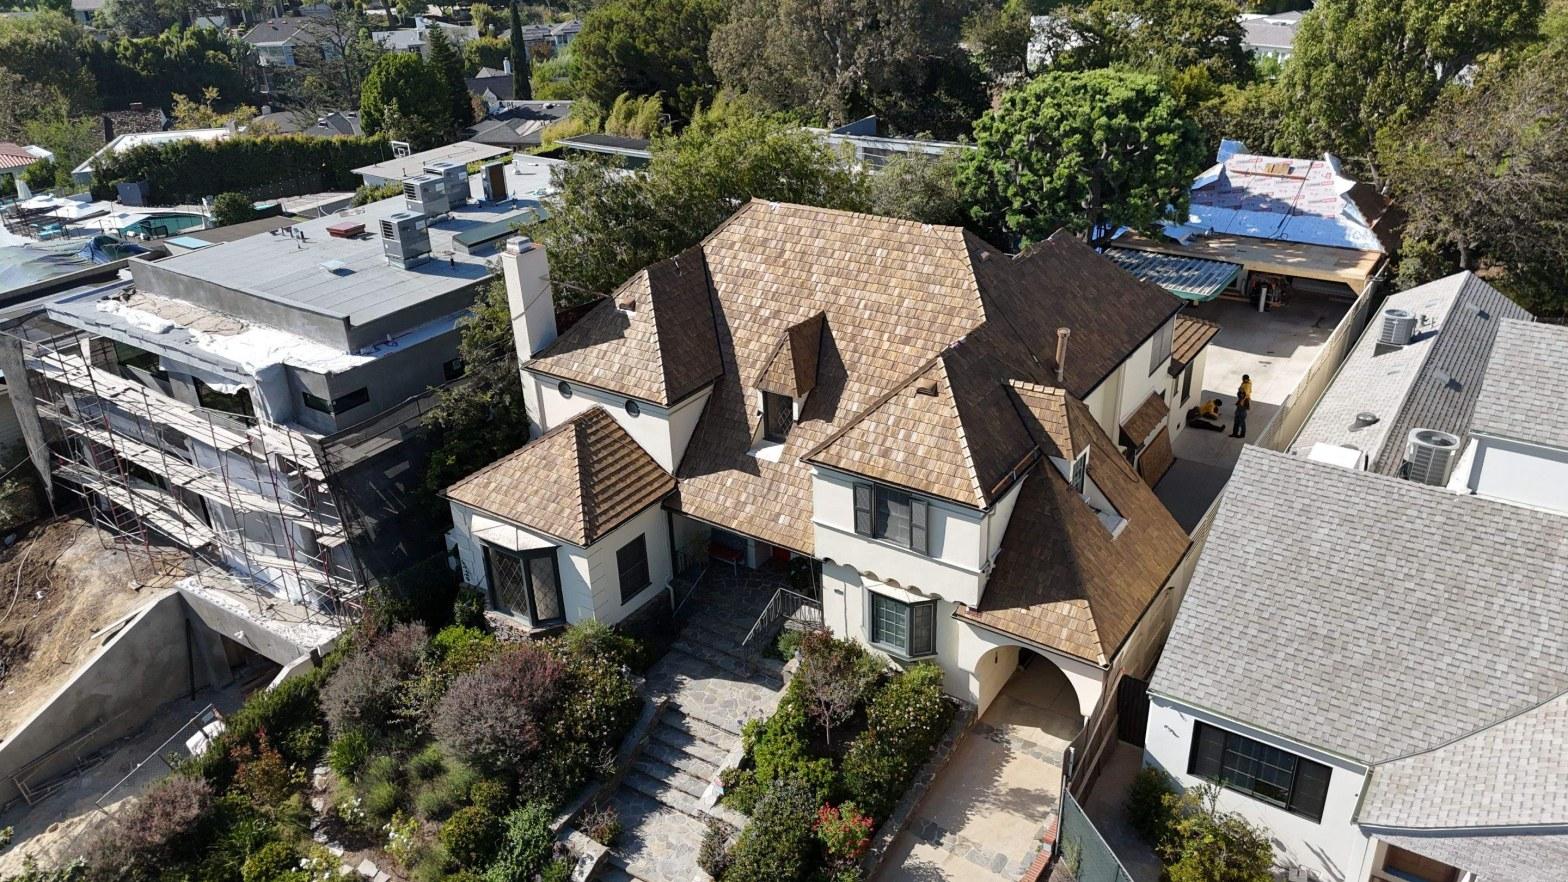
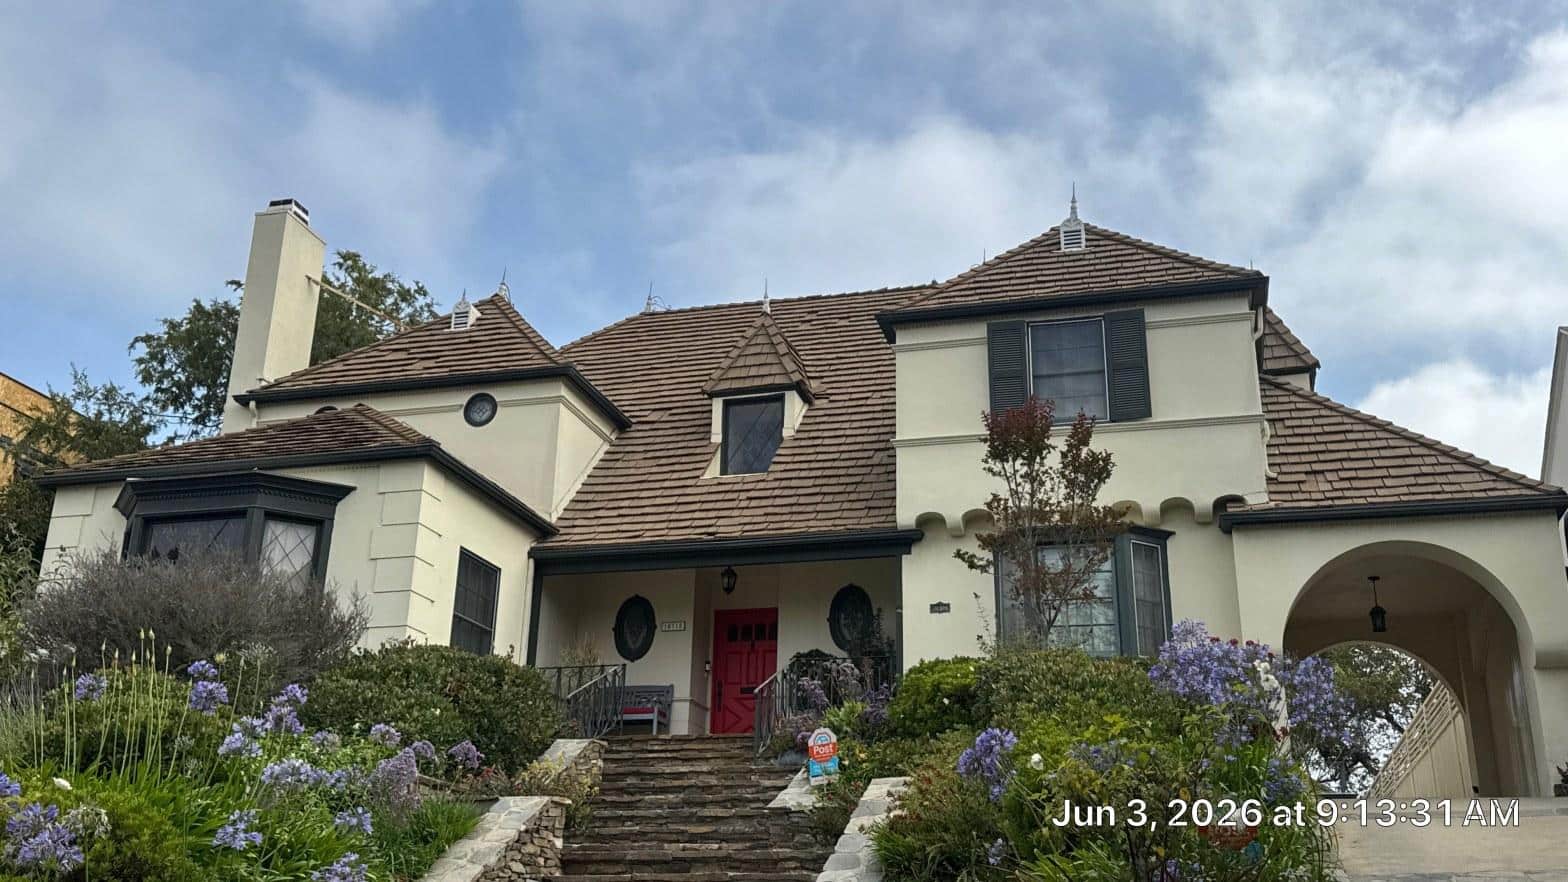
The existing shake surface told a clear story from street level. The shakes had turned a uniform weathered grey-brown, with visible moss staining across multiple slopes. Individual shakes were cracked, cupped, and in several places missing entirely. A roof-mounted solar array occupied one of the main slopes and had to be cleared from that section of deck before tear-off could begin on that plane.
What We Found Once the Old Shakes Came Off
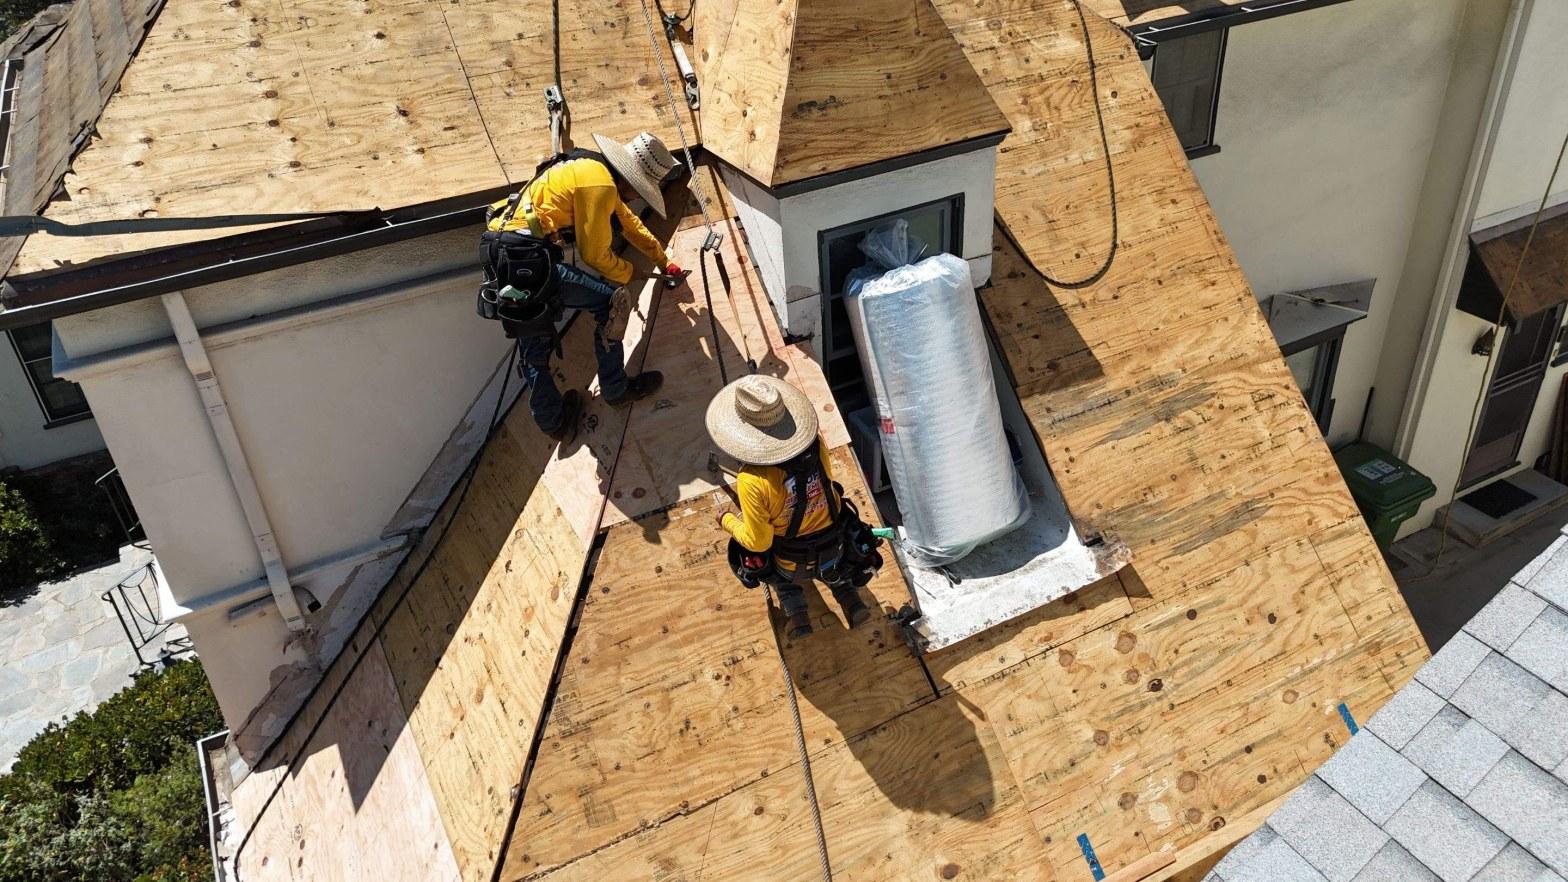
A full tear-off always reveals the true condition of the roof system beneath, and this home was no exception. Once the crew stripped the old shakes down to bare wood, the plywood deck could be inspected panel by panel. Some areas showed the black staining and surface softening that comes from years of moisture intrusion through failed shakes. Those panels were pulled and replaced before any new materials went down. The existing skylight curb was also exposed during tear-off and assessed for integrity before the new underlayment was installed around it.
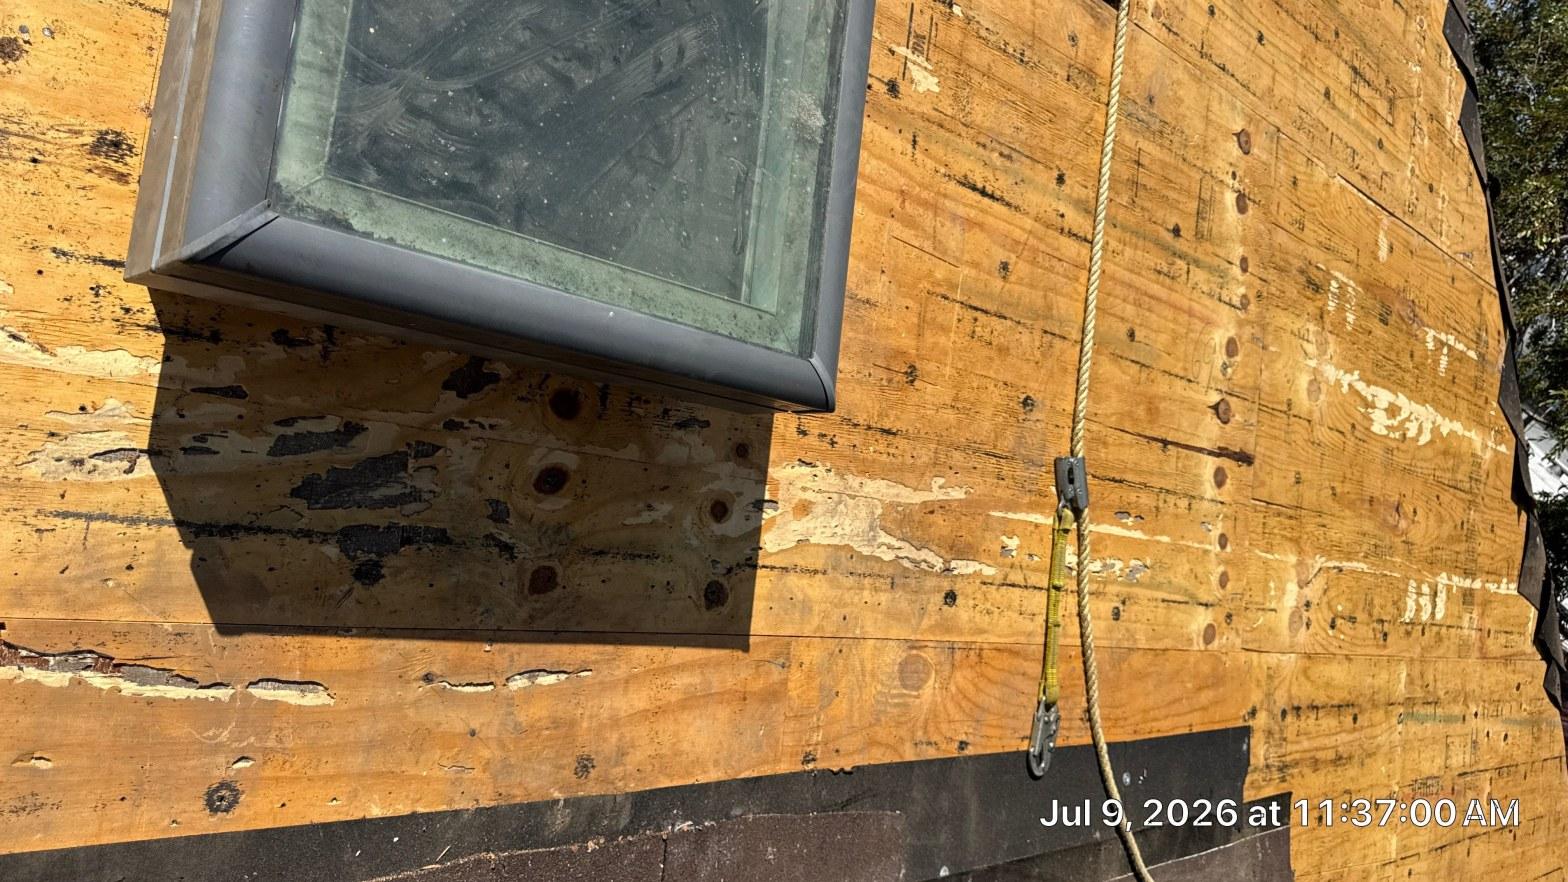
This inspection step matters more on a wood shake roof than on many other systems, because wood shakes shed water through gravity and air space rather than forming a continuous membrane. When individual shakes crack or lift, water migrates laterally under the course above and sits on the felt or deck for extended periods. On re-roofs like this one, we regularly find soft spots concentrated around valleys, dormer sidewalls, and anywhere a cricket or flashing was not maintaining a clean water path. The deck on this home required targeted replacement in those predictable zones, not a wholesale re-sheathing, which kept the project on schedule.
With the deck solid and clean, the crew was ready to build a modern waterproofing assembly from the bottom up.
Titanium PSU30 Underlayment: The Foundation of the New System
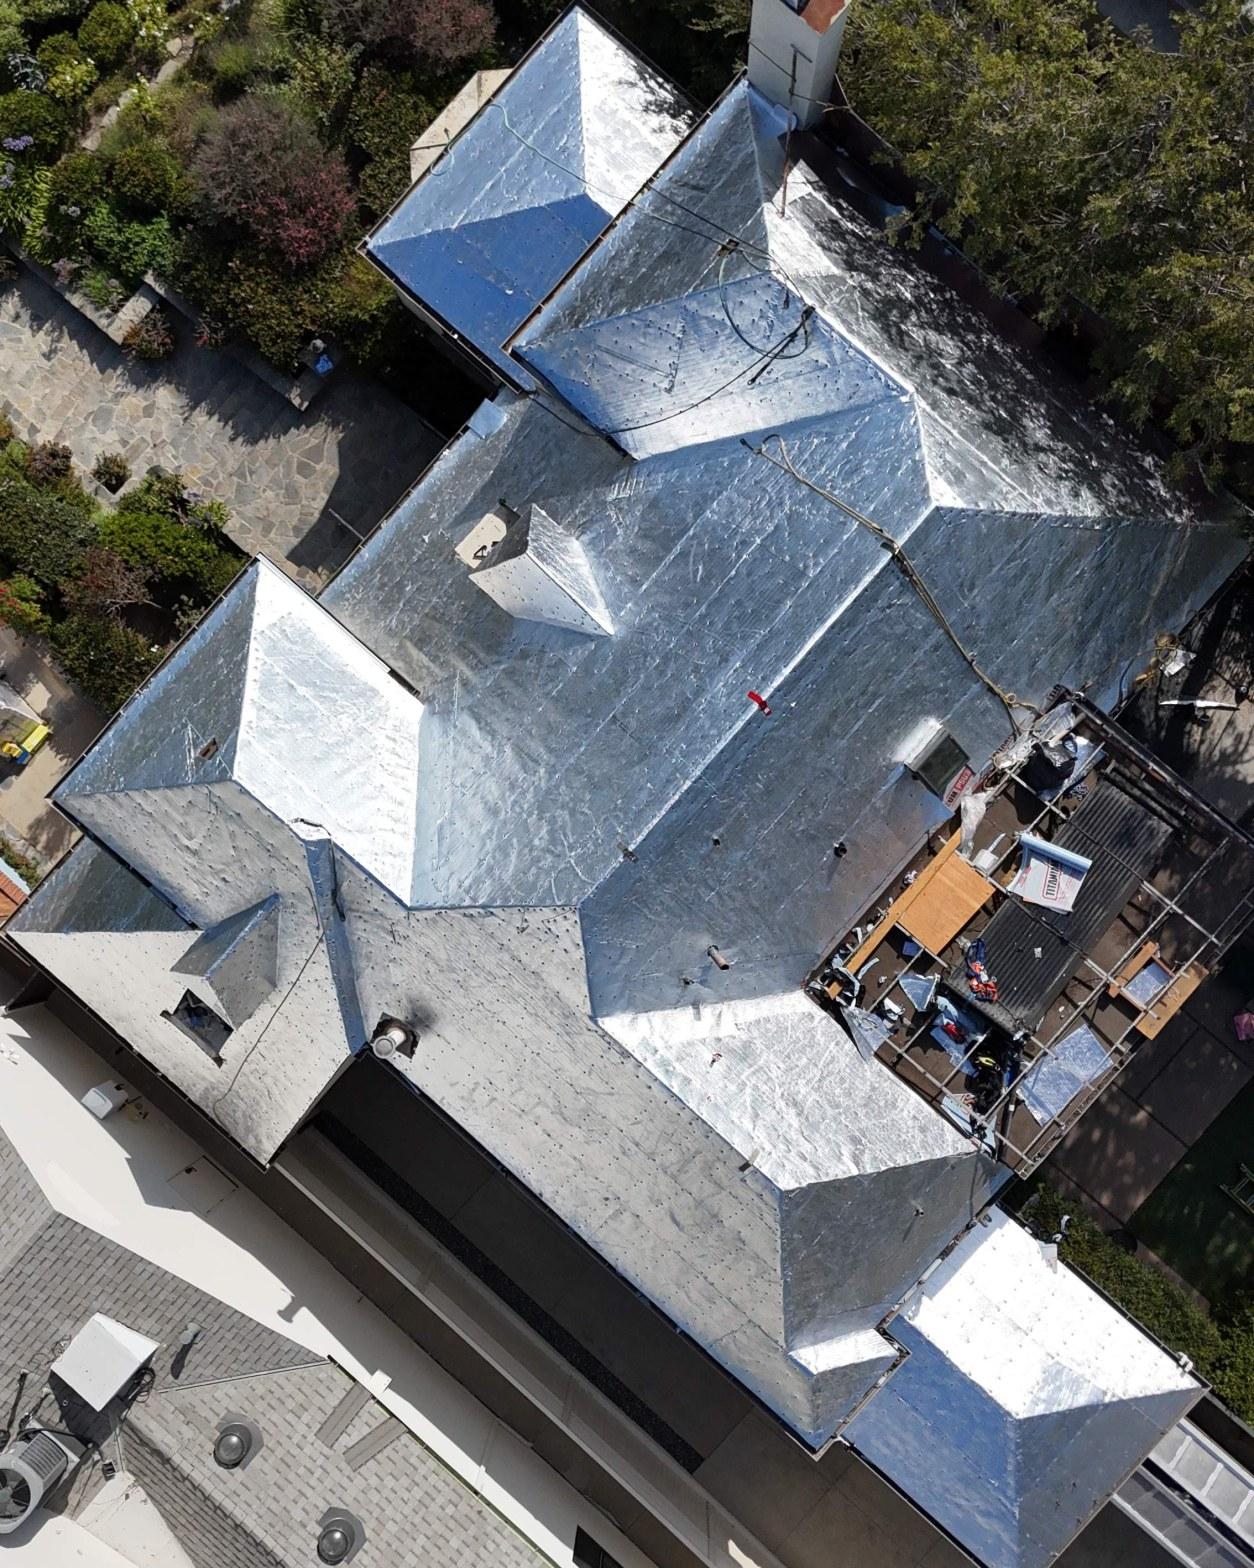
The steep slopes received a full layer of Titanium PSU30 self-adhered underlayment before a single shake was nailed. Titanium PSU30 is a polymer-reinforced, self-adhering product rated for use under mechanically fastened roofing including wood shakes. Its self-adhesive backing bonds directly to the plywood deck and seals around fasteners, so the layer functions as a secondary water barrier rather than simply a slip sheet. That distinction is significant on a roof this steep and this geometrically complex: water driven by wind or concentrated at valley intersections has nowhere to go except back through the shake surface if the underlayment fails.
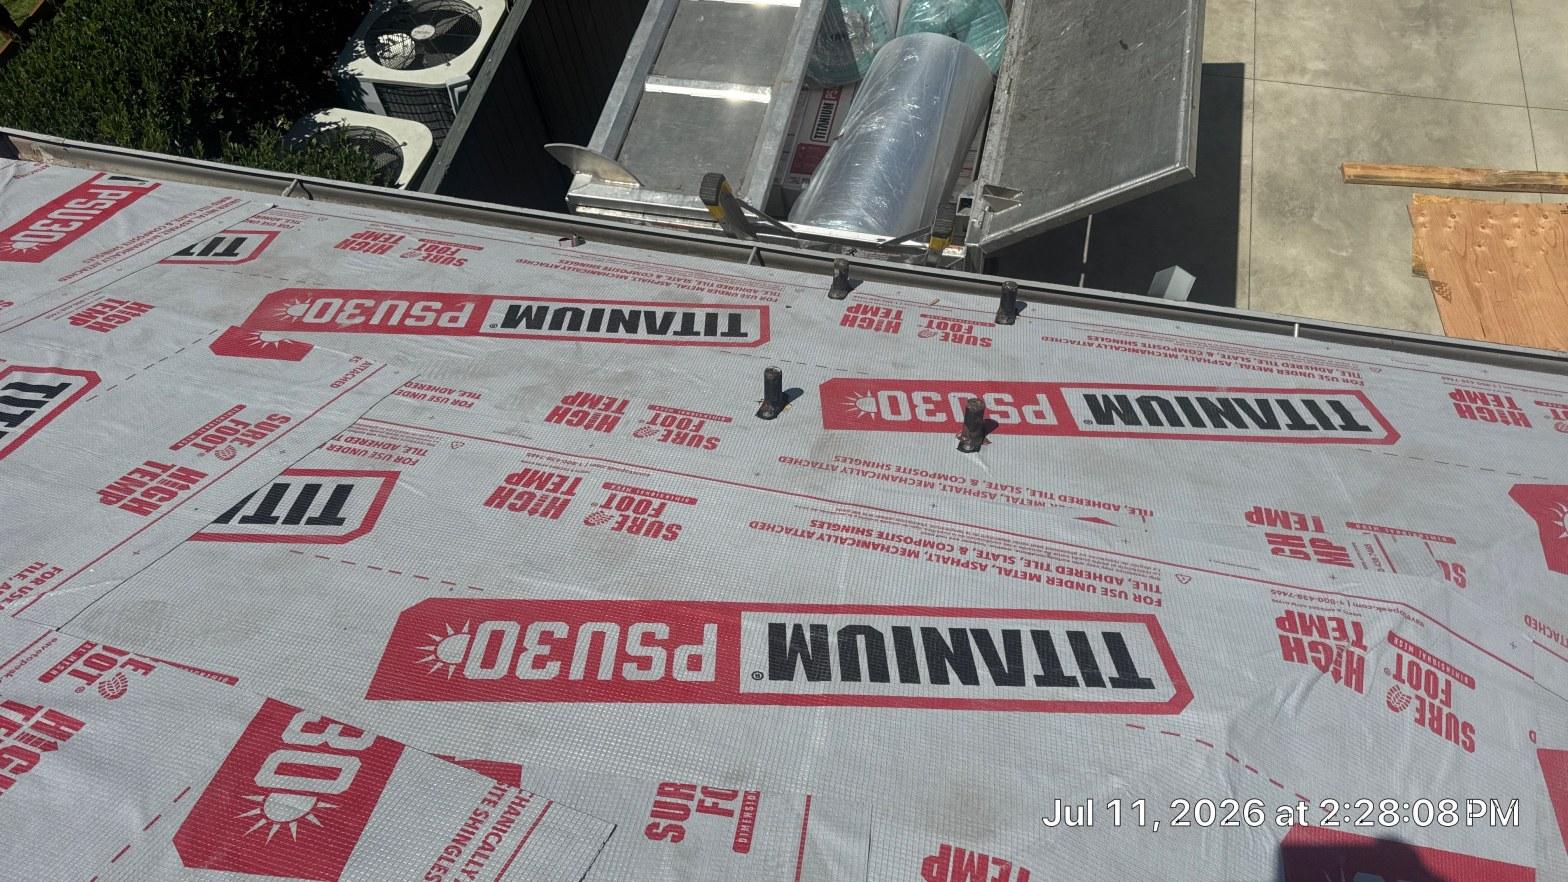
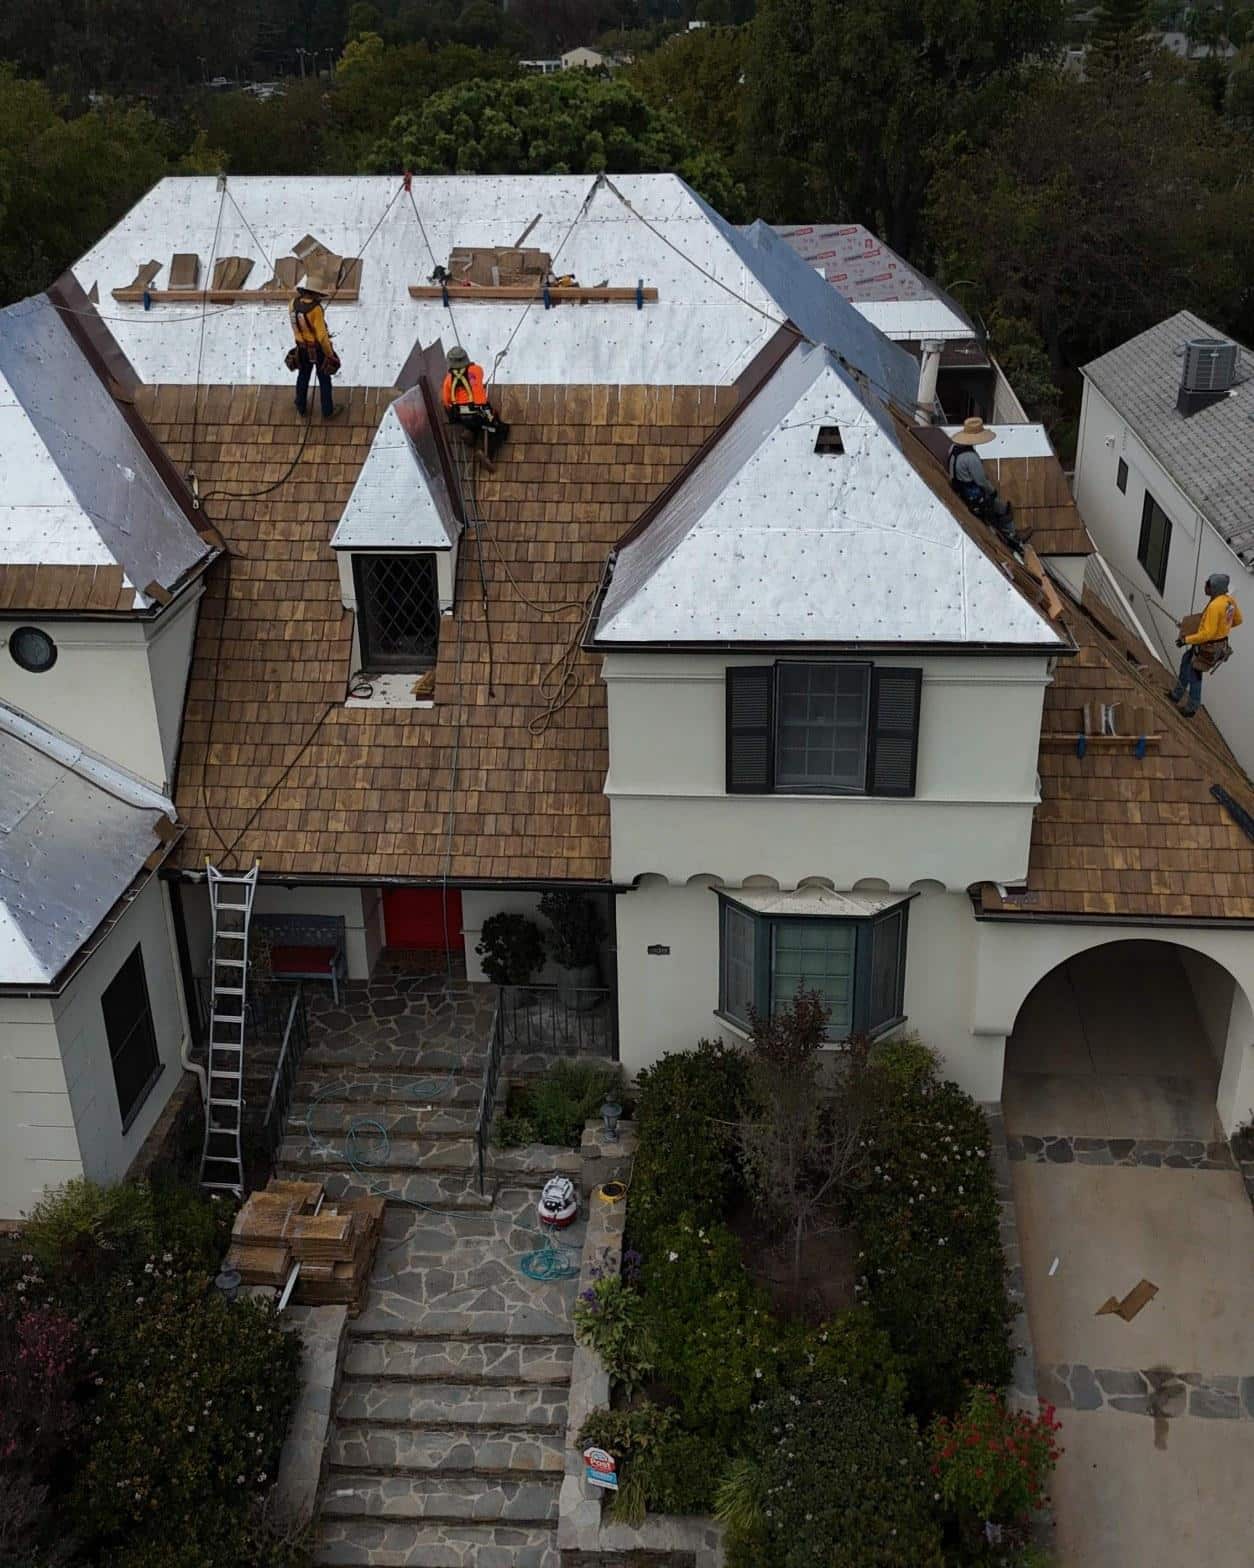
California roofers have moved toward self-adhered underlayments on steep-slope re-roofs because wind-driven rain and complex roof geometry expose the limits of a plain felt slip sheet, and a bonded membrane keeps working even where a mechanical fastener has been driven through it. The PSU30 is also rated for high-temperature exposure, which matters during Southern California summers when a dark-colored roof deck can reach surface temperatures well above 150°F on a clear afternoon. Pipe penetrations visible in the underlayment photos were booted and sealed at the same stage, before the shakes covered them.
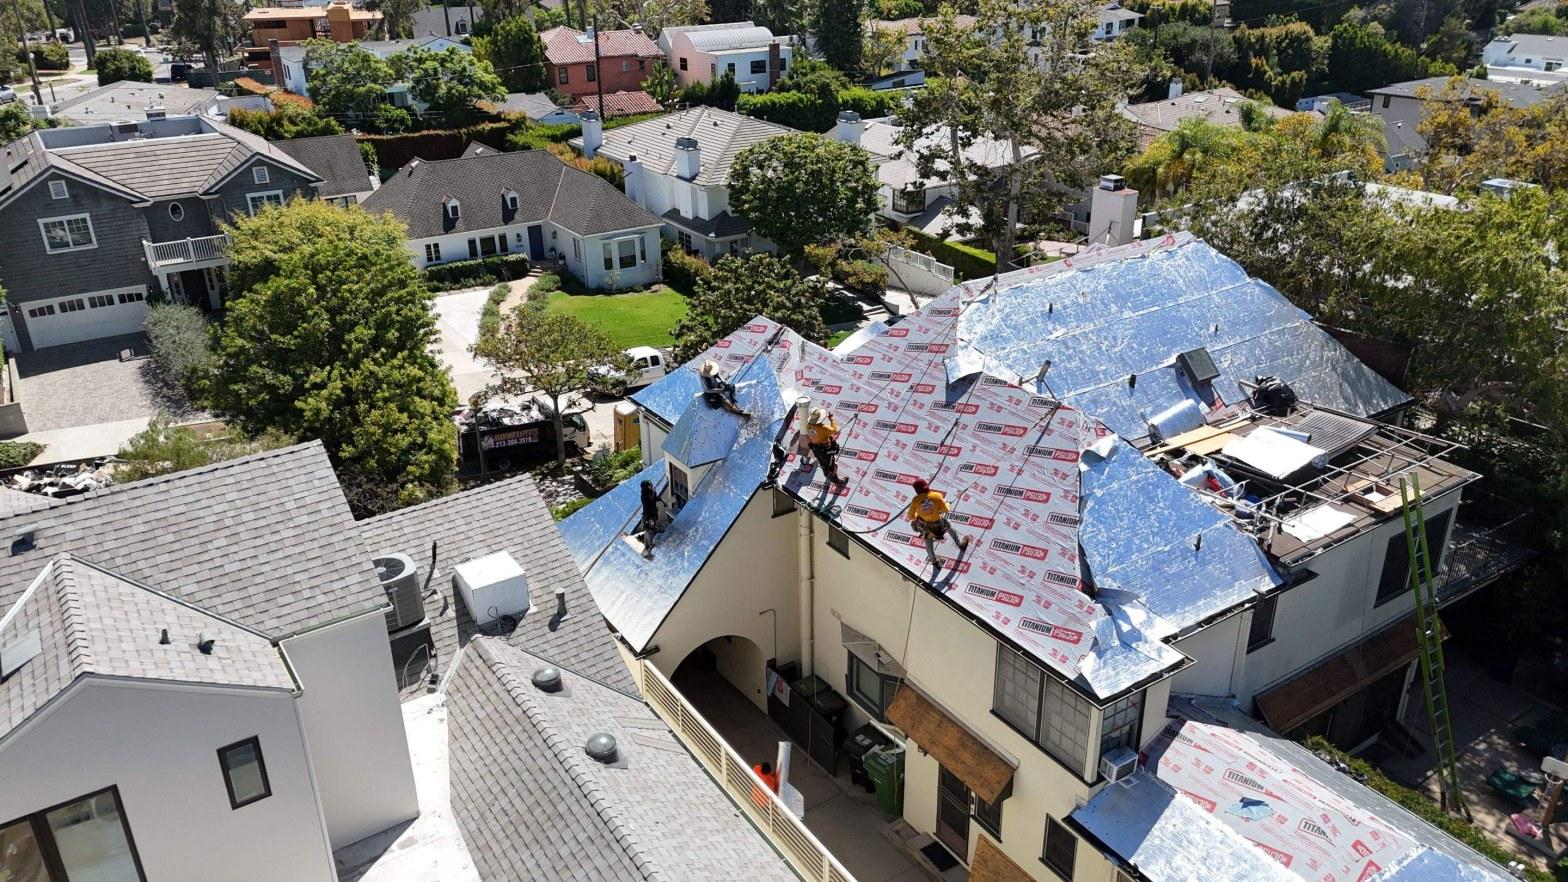
The reflective silver surface of the underlayment, visible across the upper slopes while the crew worked, also served a practical safety function: it gave the team a bright, clean working surface and made it easy to spot any fastener misses or laps that needed correction before the shakes went on.
Installing the New Wood Shake Roof
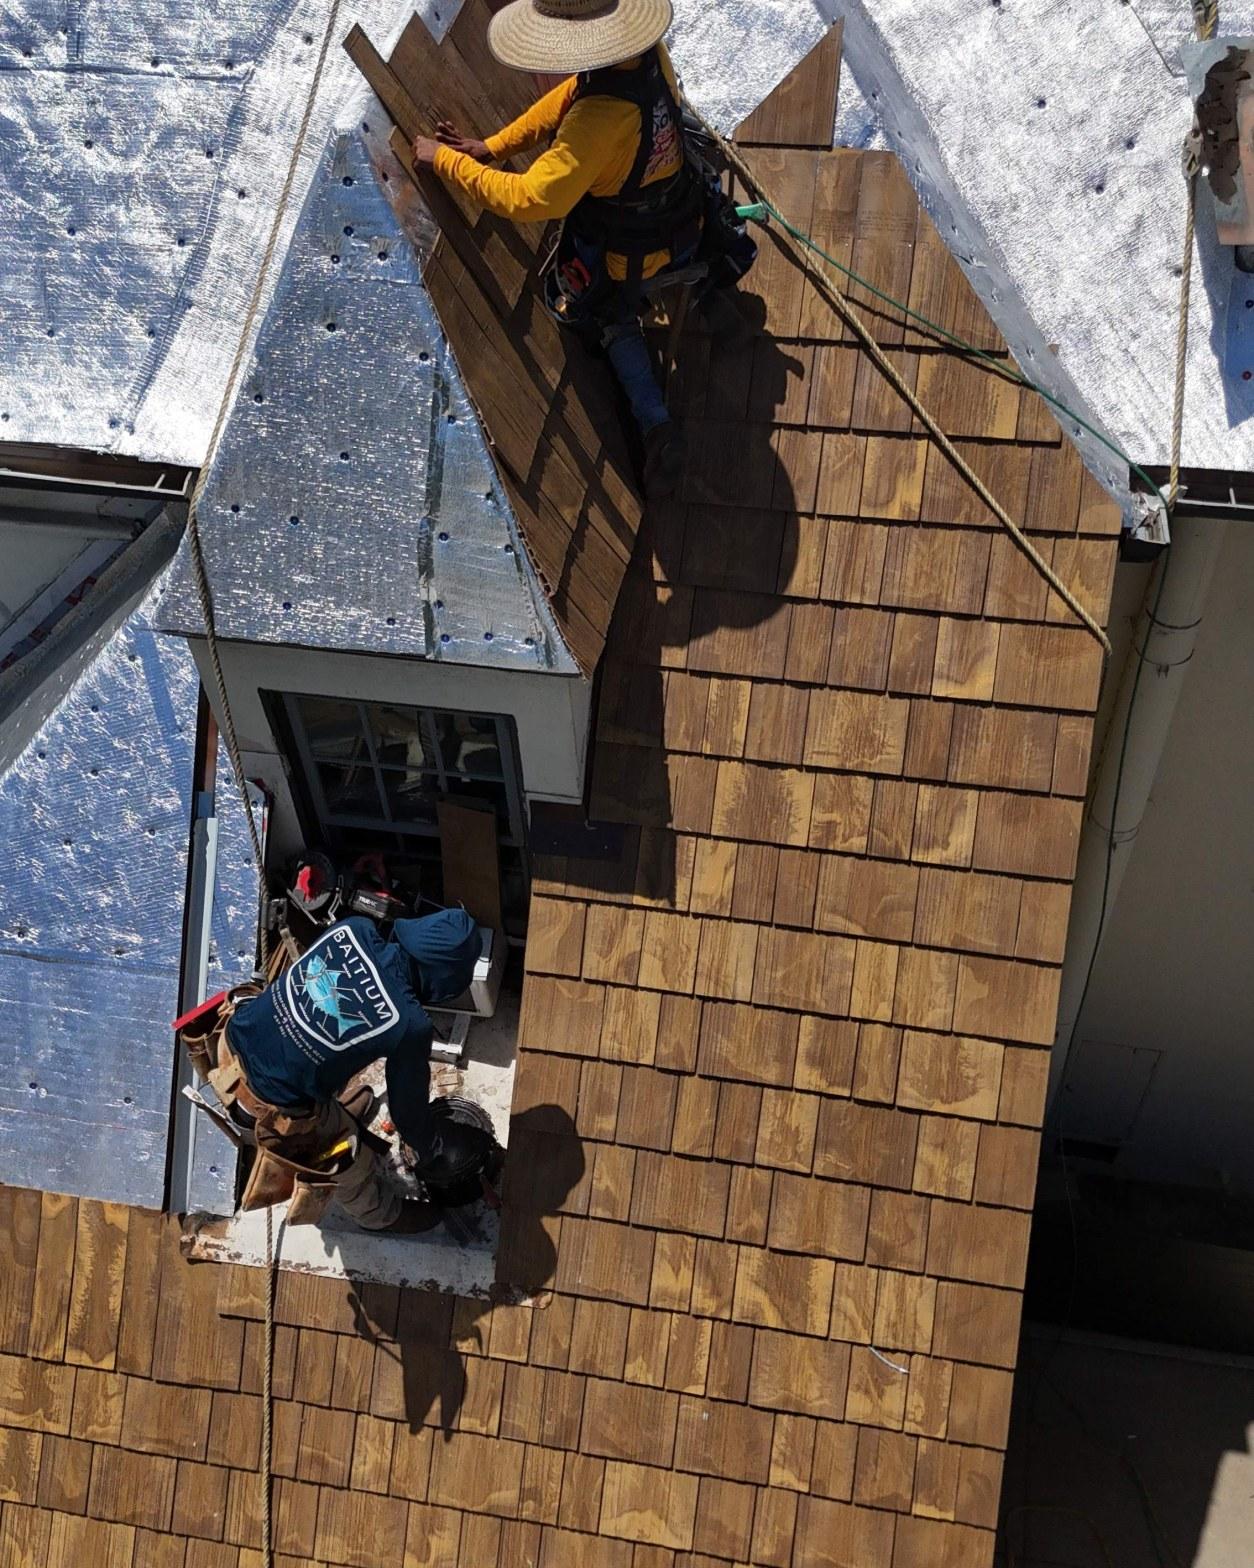
Three crew members worked the steep slopes simultaneously, each harnessed into a fall-protection rope system anchored at the ridge, to lay the new wood shakes course by course from eave to ridge. The pace of a wood shake installation is deliberate by nature. Each shake is individually hand-nailed at the correct exposure, with joints offset from the course below by at least 1.5 inches so no two vertical gaps align. On a roof with this many valleys, dormers, and plane changes, the layout work at every intersection requires careful cutting and fitting to maintain a consistent exposure across the entire field.
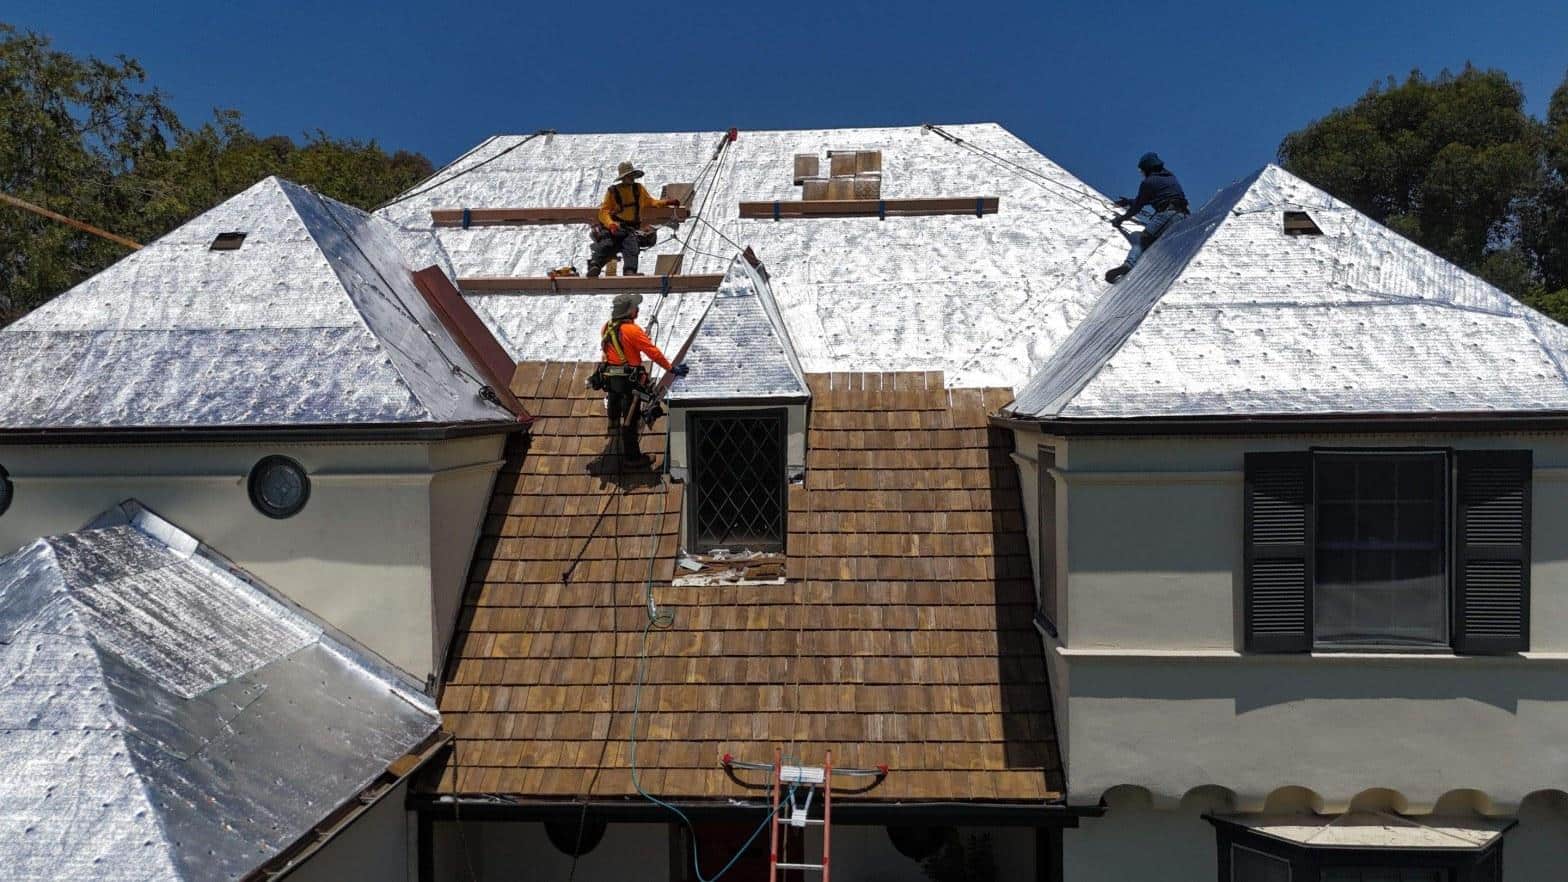
The finished surface takes shape gradually. In the mid-installation drone photo, the lower dormer section and part of the main slope are already covered in fresh, honey-toned shakes while the upper main field still shows the silver underlayment. That color contrast makes the coverage progress easy to read, and it also shows how much surface area a complex roof like this actually contains across its many planes. By the time the ridge caps went on, every steep-slope plane, every dormer, the turret cone, the bay-window sub-roofs, and the two chimney surrounds had been completely re-clad.
The new shakes will weather over the first year or two from their initial warm honey color toward a silver-grey that will eventually blend with the surrounding tree canopy, a natural progression that suits the established character of the Cheviot Hills neighborhood.
Flat and Low-Slope Sections: Torch-Applied Modified Bitumen
The rear and side flat sections required a completely separate waterproofing system: torch-applied modified bitumen, which is the standard of practice for low-slope residential work in Los Angeles. Modified bitumen is a reinforced asphalt membrane that is heat-welded at the laps to form a fully bonded, continuous sheet. Applied in 2 layers, a base sheet and a granule-surfaced cap sheet, it delivers a waterproofing assembly that flexes with the deck through Los Angeles’s temperature swings without cracking at the seams.
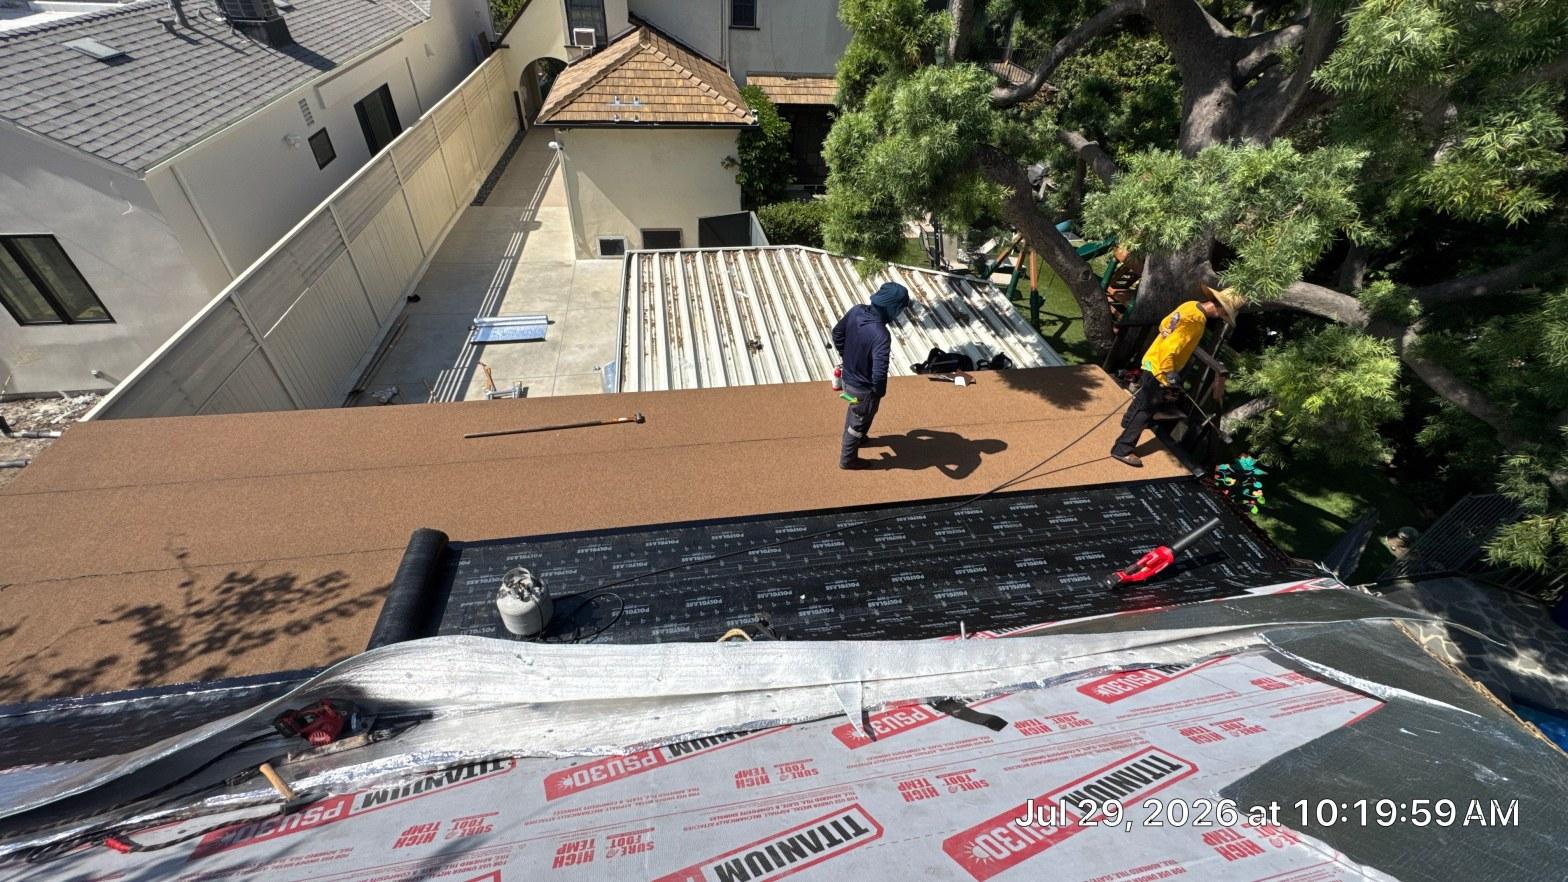
In the work photo, the crew is rolling and bonding the granule cap sheet while the base layer is already in place beneath it. The Titanium PSU30 underlayment is visible on the adjacent steep slope in the same frame, showing how the two systems hand off at the transition between pitches. New sheet-metal edge terminations were installed at the perimeter of each flat section to cap the membrane and direct runoff into the drainage system rather than letting it migrate behind the fascia.
The torch-down application also gave the crew the ability to detail the transitions between the flat sections and the stucco parapet walls with precision, burning the membrane firmly into the base flashing so the wall-to-roof joint is fully sealed rather than relying on lap sealant alone.
Sheet-Metal Flashing: Where the Roof Meets the Walls
Every location where a roof plane meets a vertical stucco wall received new sheet-metal step flashing and counterflashing, fabricated and installed as part of this project. This detail is one of the most consequential on a stucco home. When existing flashing is left in place through a re-roof, any pinhole corrosion or sealant failure in the old metal becomes a water entry point regardless of how well the new shakes above it perform. Reusing aged flashing at a wall or chimney base is a shortcut that tends to show up as a callback leak within a few years.
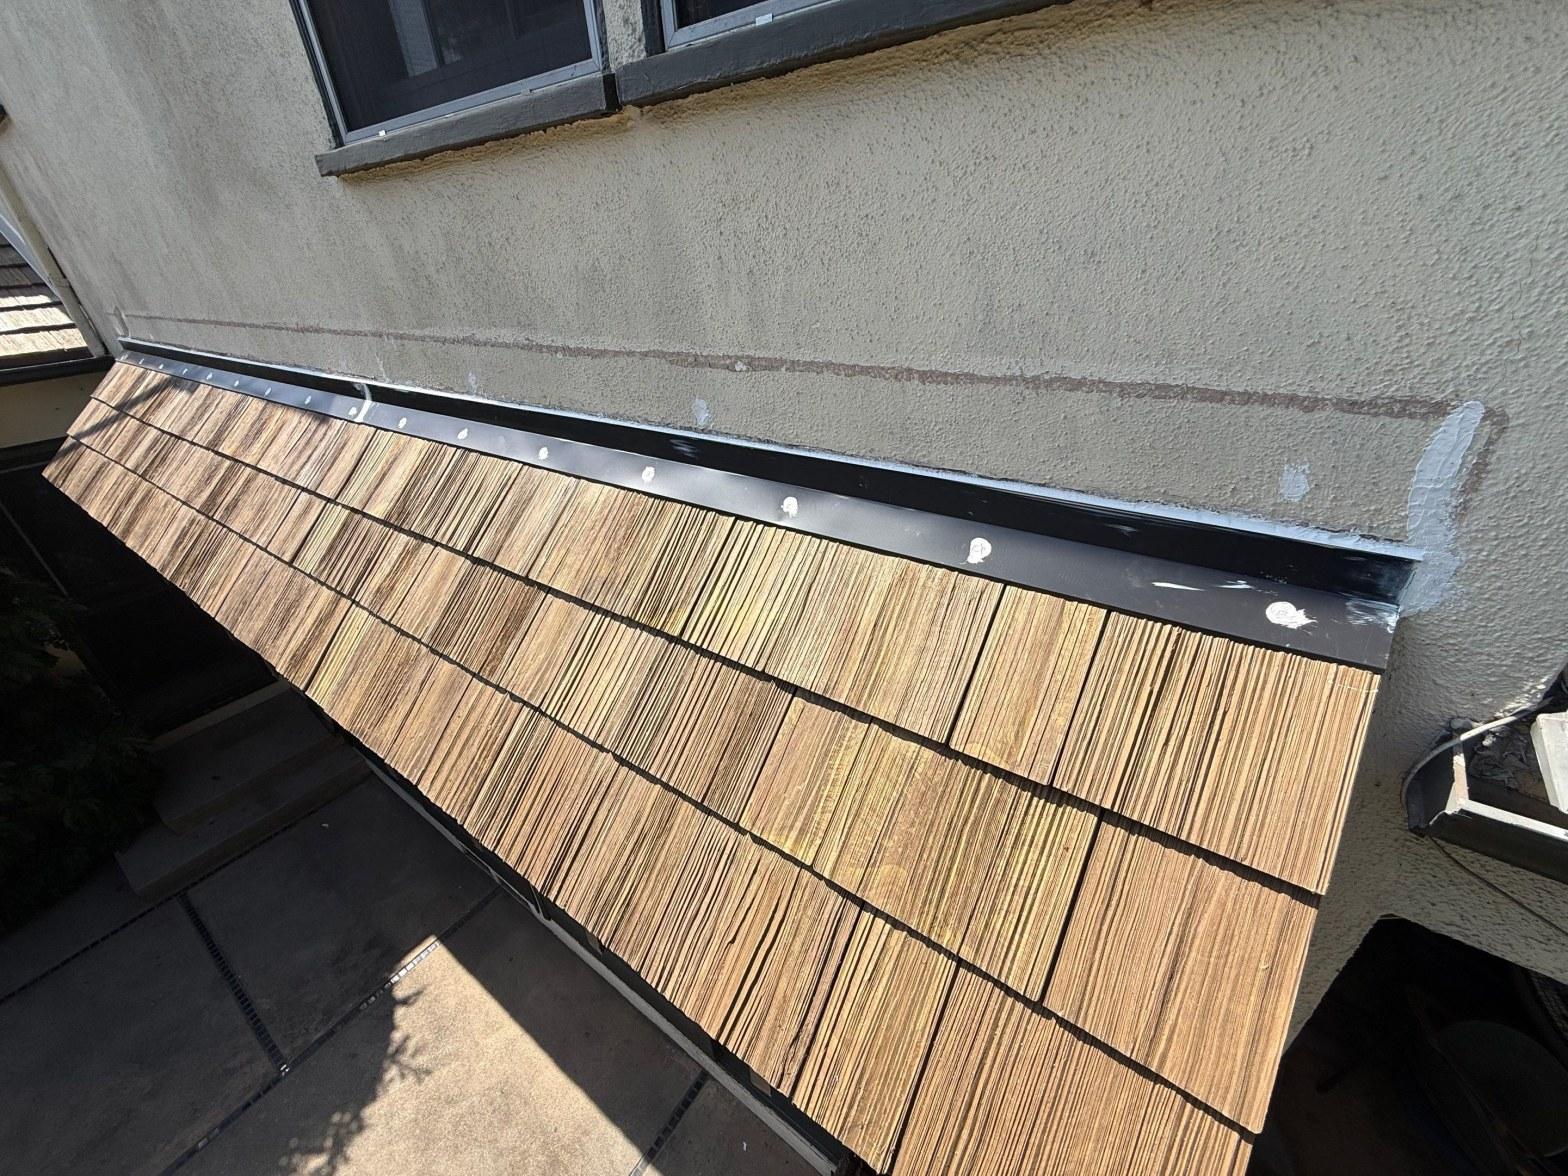
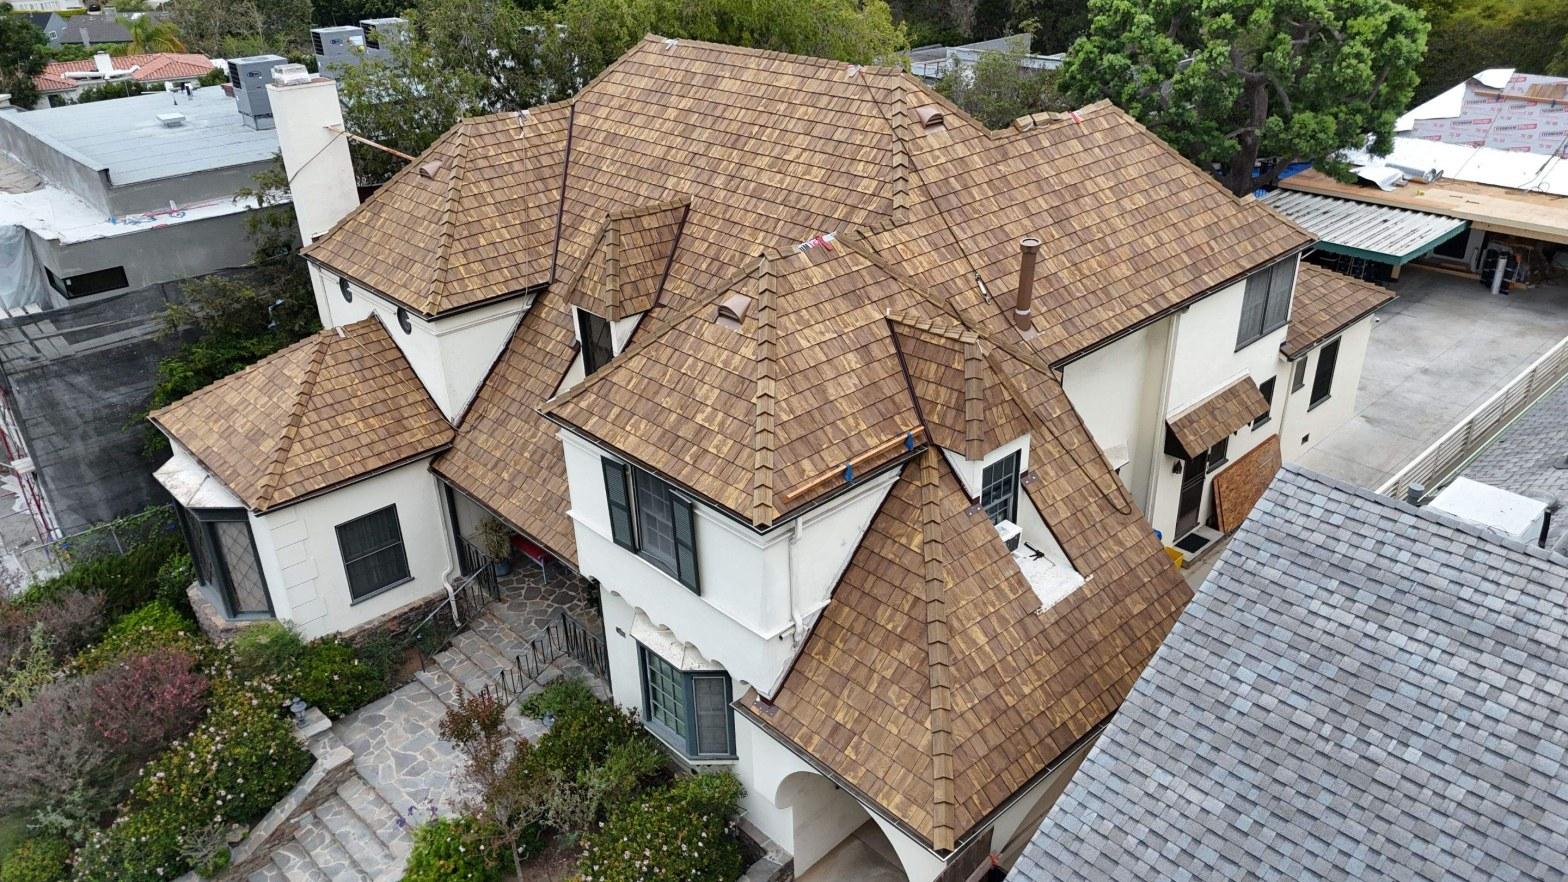
The step flashing visible in the close-up photo runs the full length of the wall-to-roof transition, with each individual piece of dark sheet metal lapped over the shake below and tucked behind the stucco above. The counterflashing cap along the wall face is mechanically fastened into the stucco and dressed tight, leaving a clean, finished appearance from below while creating a fully redundant water barrier at the most vulnerable joint on the roof.
This detailing work is unglamorous compared to the shake installation visible from the street, but it is where a re-roof either succeeds or fails in the long run. Licensed by the California Contractors State License Board (CSLB), Roof Replacement Inc carries the trades credentials required to pull permits and perform this complete scope under a single contract, so the homeowner had one point of accountability for every element of the system.
The Finished Result
The completed roof reads as a cohesive whole across all of the home’s many planes. The fresh wood shakes cover every pitched surface from the main ridge down to the turret, the dormers, and the bay-window extensions. The flat sections are sealed with a continuous modified bitumen membrane. All wall transitions carry new sheet metal. The house looks exactly like what it is: a well-maintained period home in one of west Los Angeles’s most established neighborhoods, now with a roof system built to protect it for the years ahead.
If you have a home with a complex wood shake roof, aging flat sections, or stucco wall transitions that need proper flashing, contact Roof Replacement Inc for a project assessment. We are happy to walk through what a full re-roof on a home like yours would involve.


