

What Was the Condition of This Roof Before Work Started?
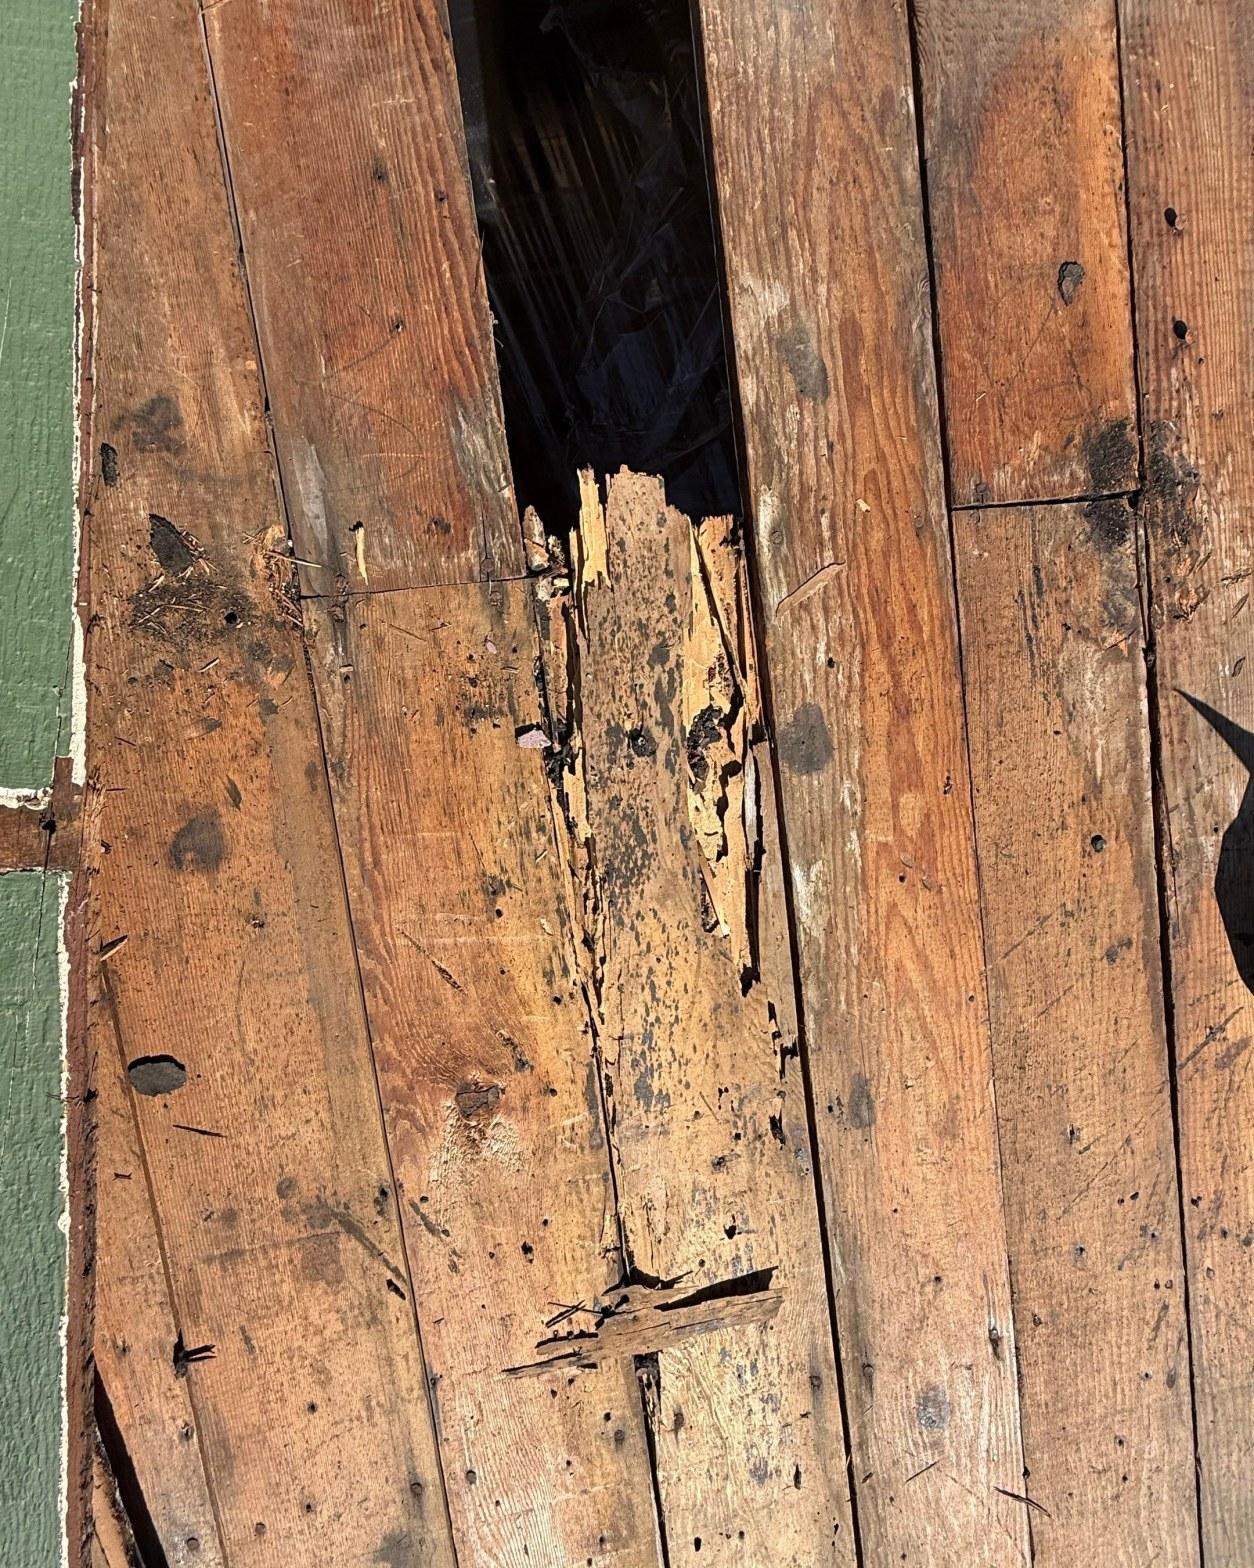
The original wood board sheathing on this Los Angeles hillside home had deteriorated far beyond the point where any surface repair made sense. When our crew stripped the clay tile and old felt, they found boards split along the grain, sections crumbled to soft fiber, and in the worst spots, holes opened completely through the deck to the rafter bays below.
The photograph above shows exactly what that looked like up close: a board sheared in half, the break exposing raw, punky wood beneath, and a gap wide enough to see through to the structure below. Rot like this doesn’t stay in one place. Once moisture works its way through a failed tile or degraded felt and reaches a wood board deck, it spreads laterally along the grain and downward toward the rafters over time. By the time a homeowner notices a stain on a ceiling, the deck above it has often been compromised for seasons.
Project Gallery
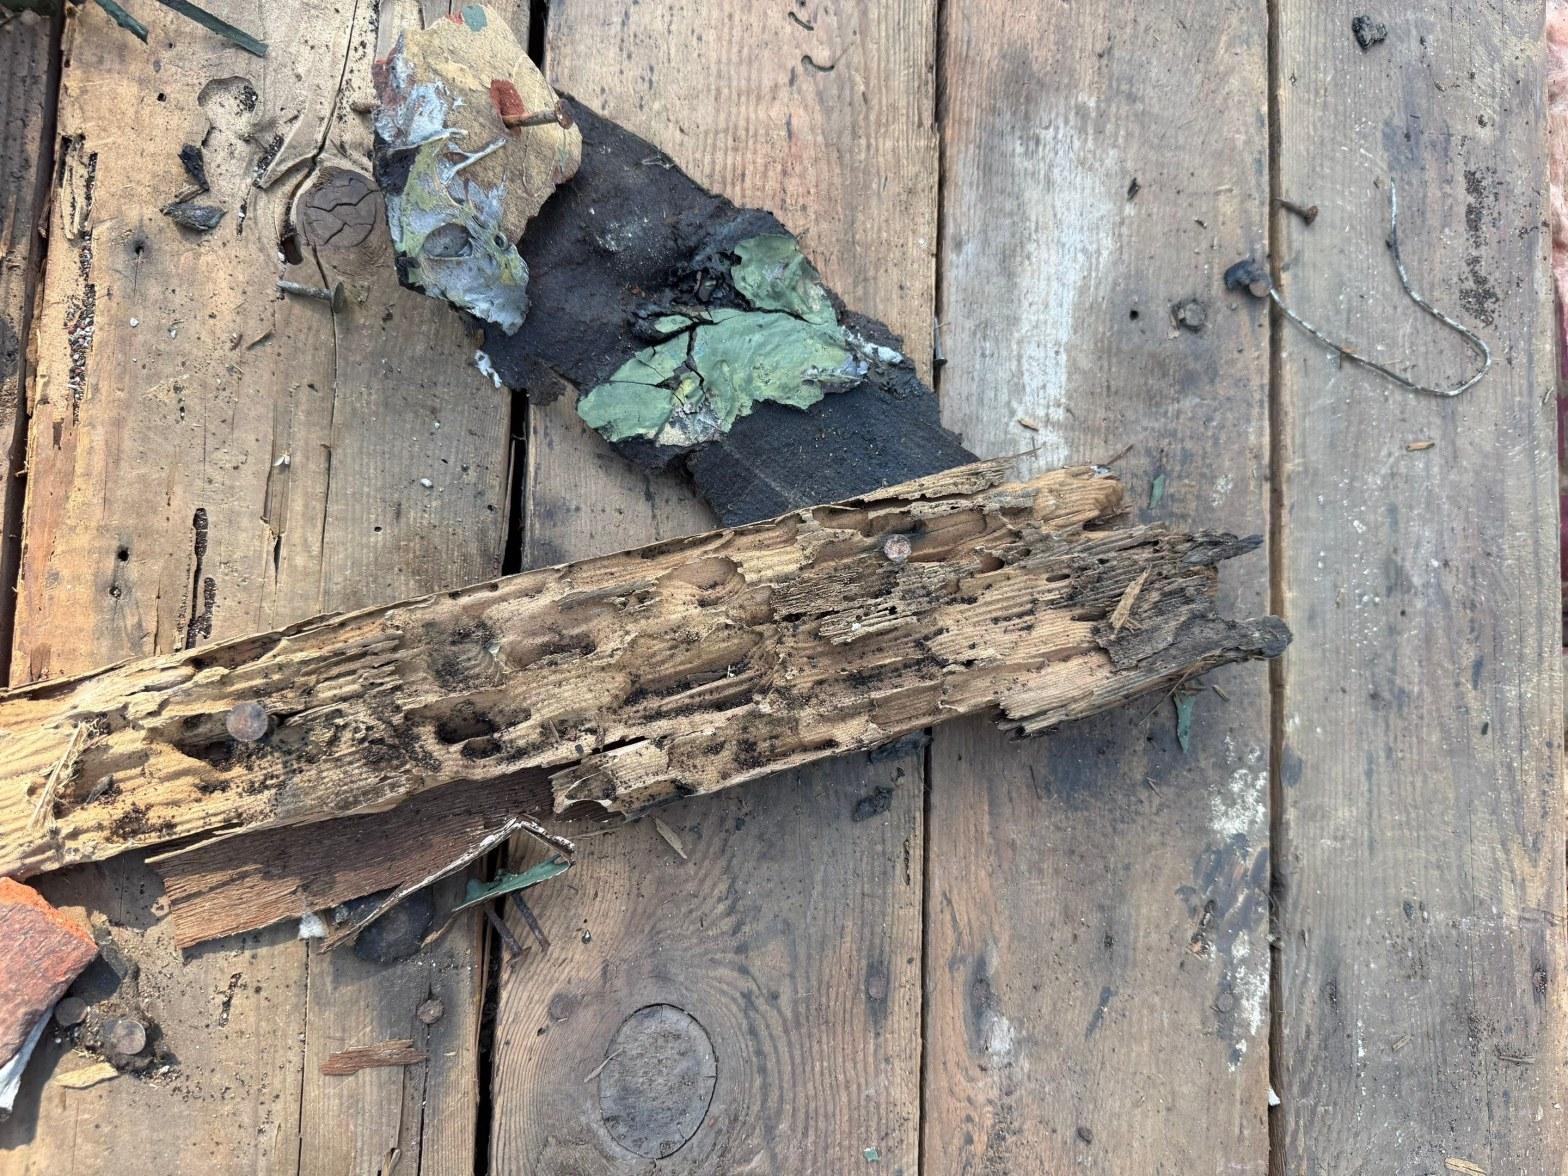
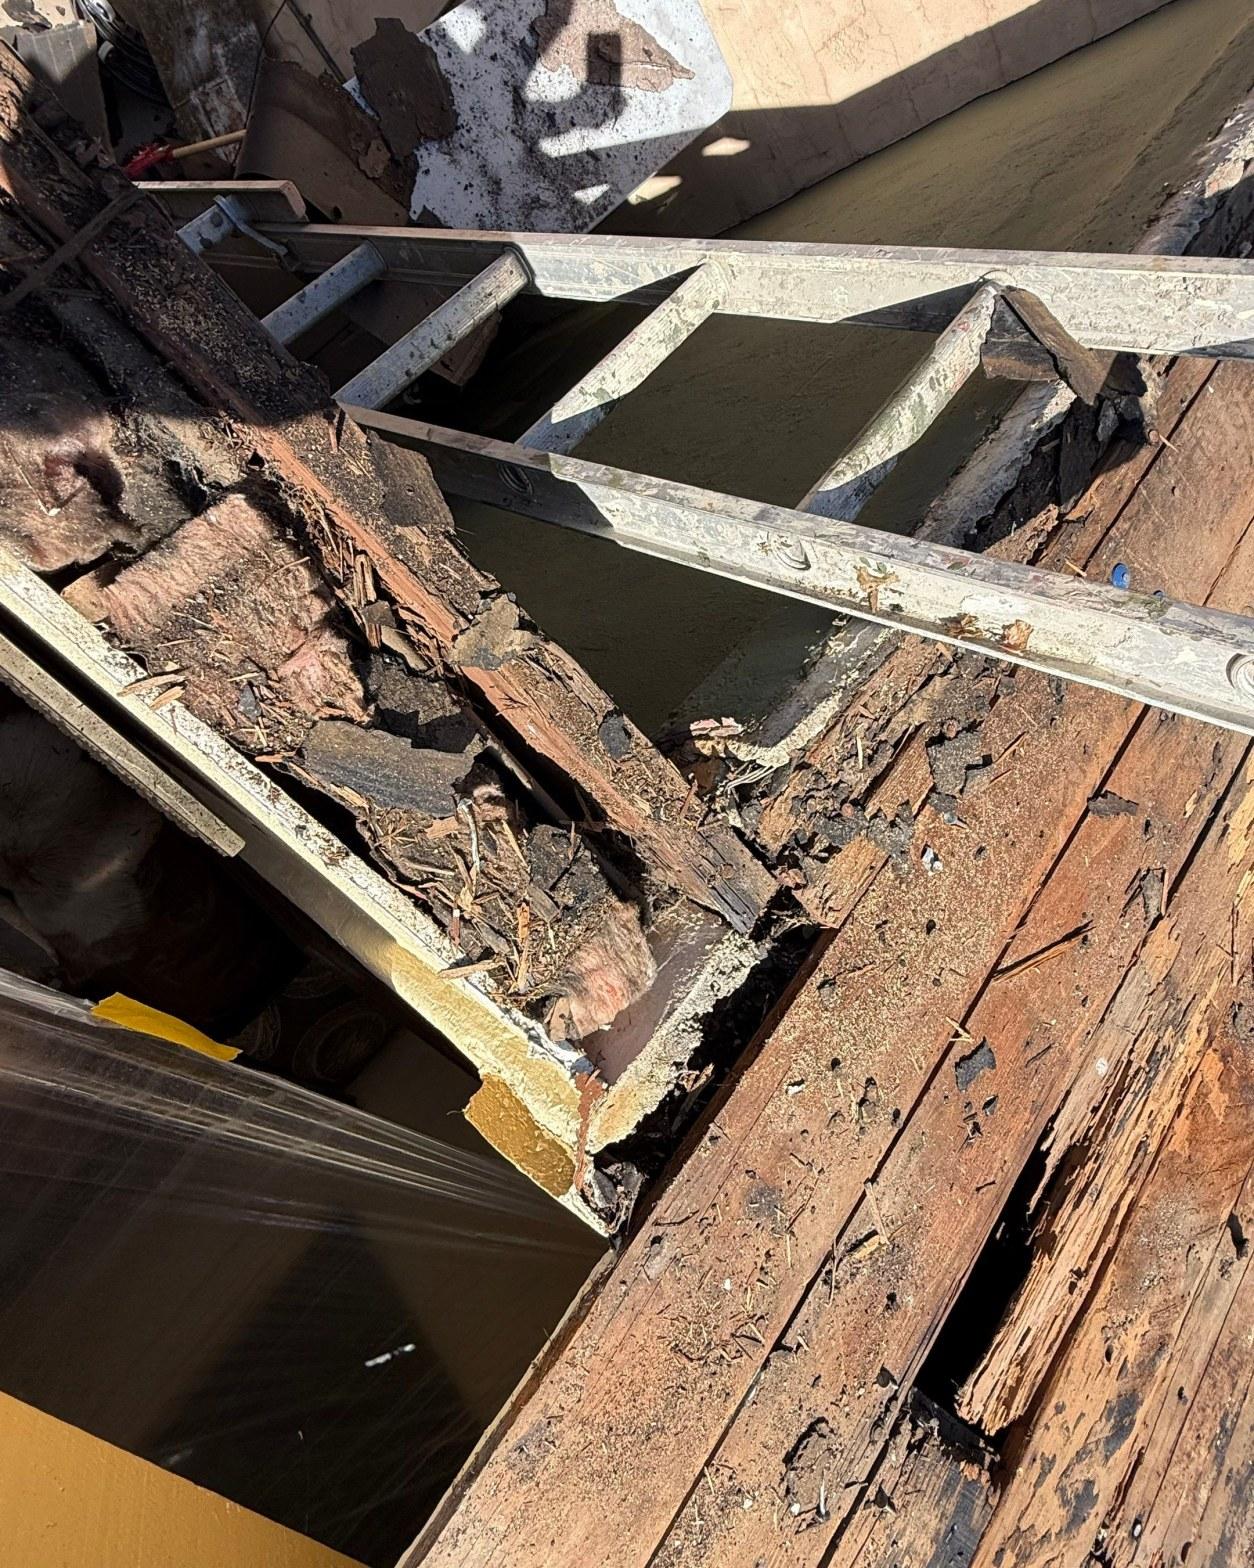
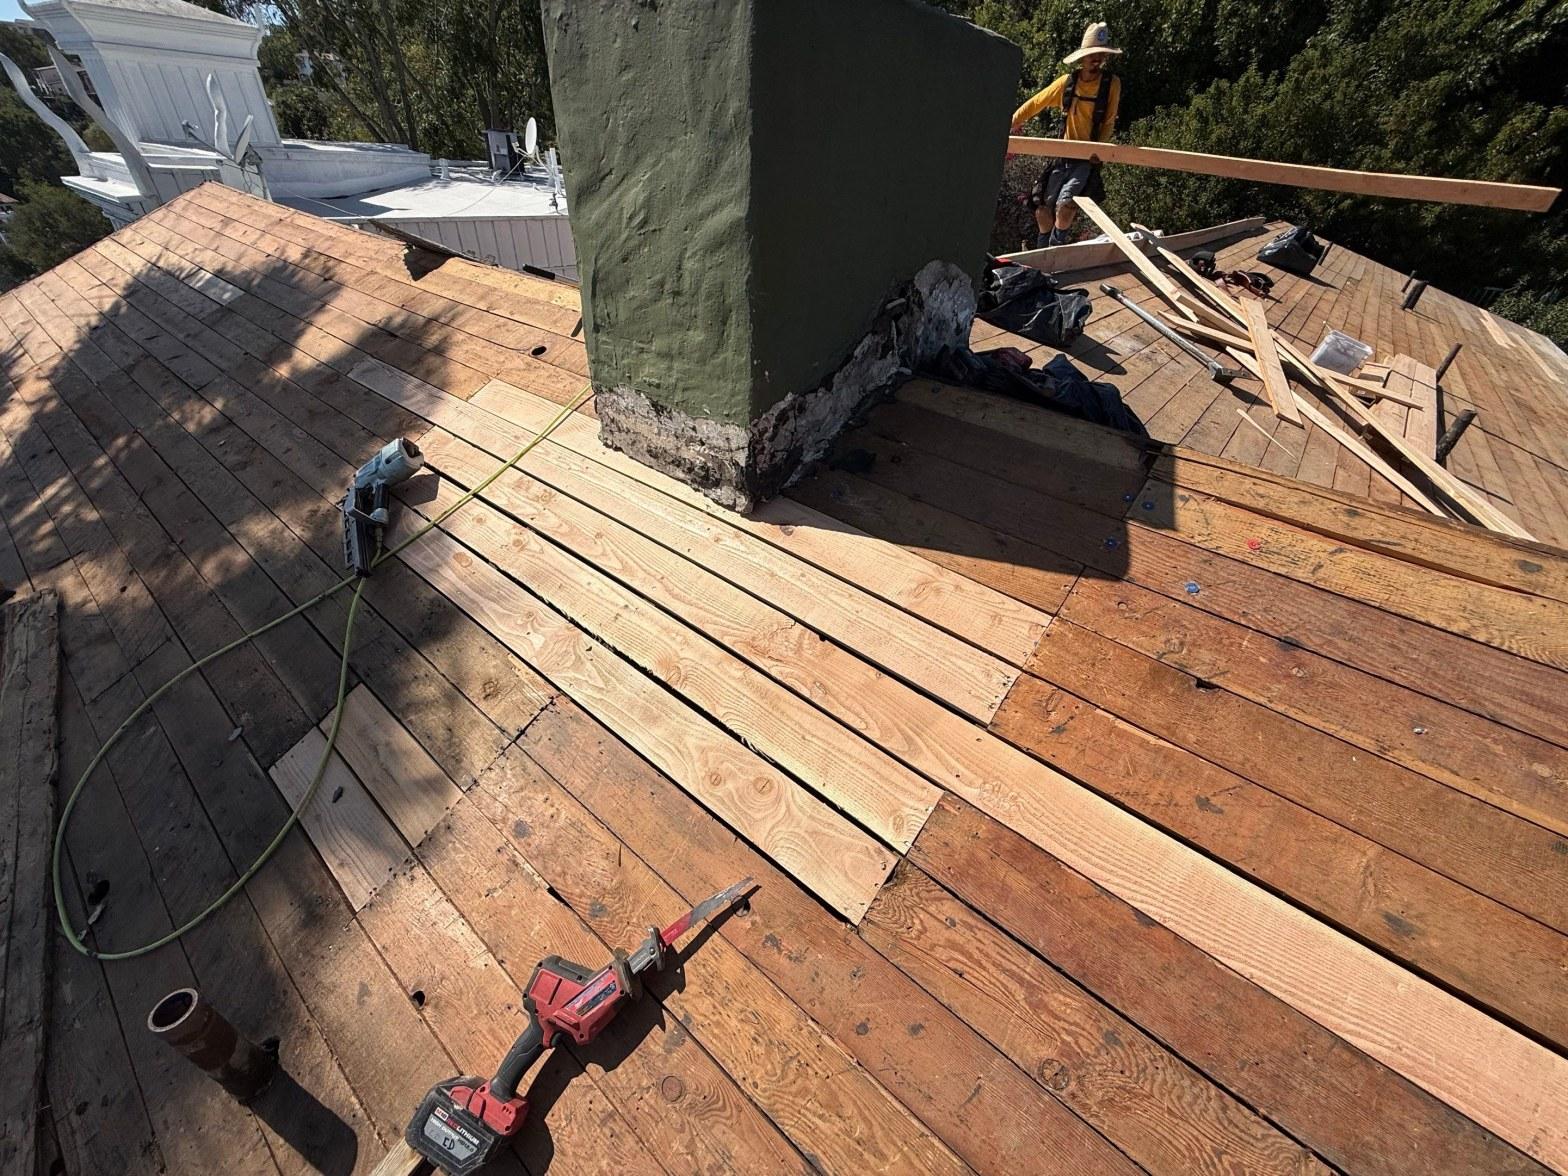
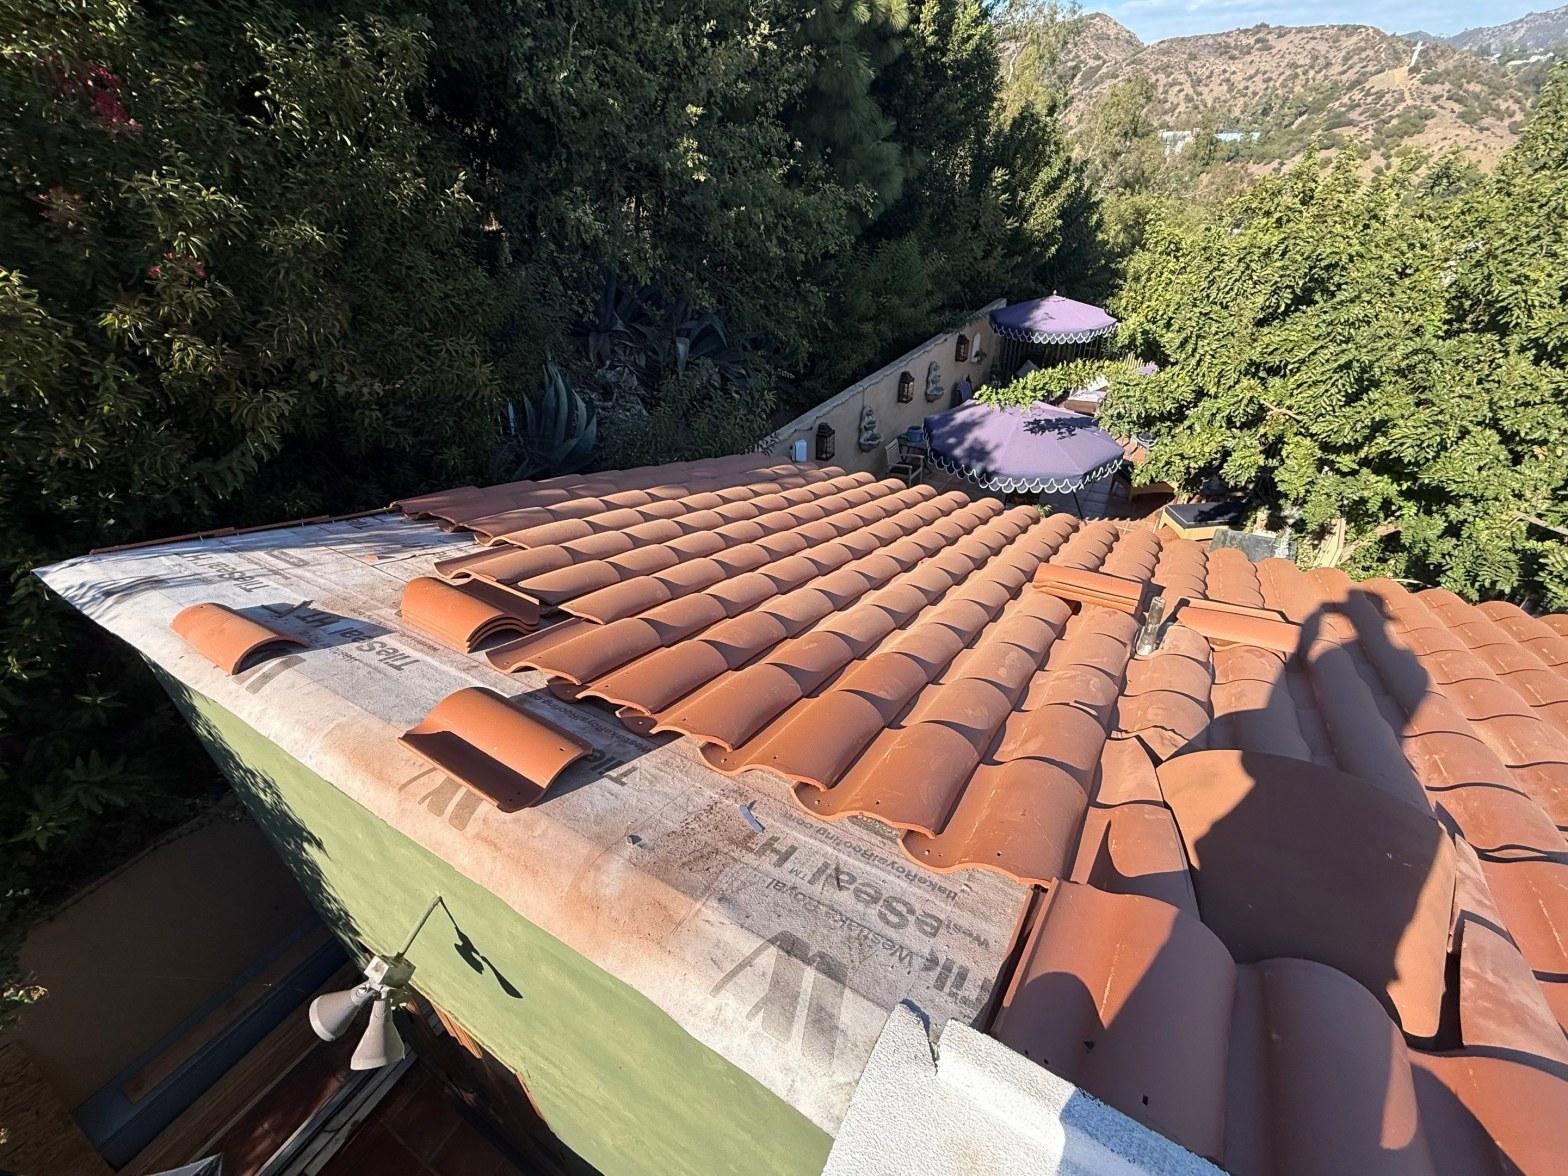
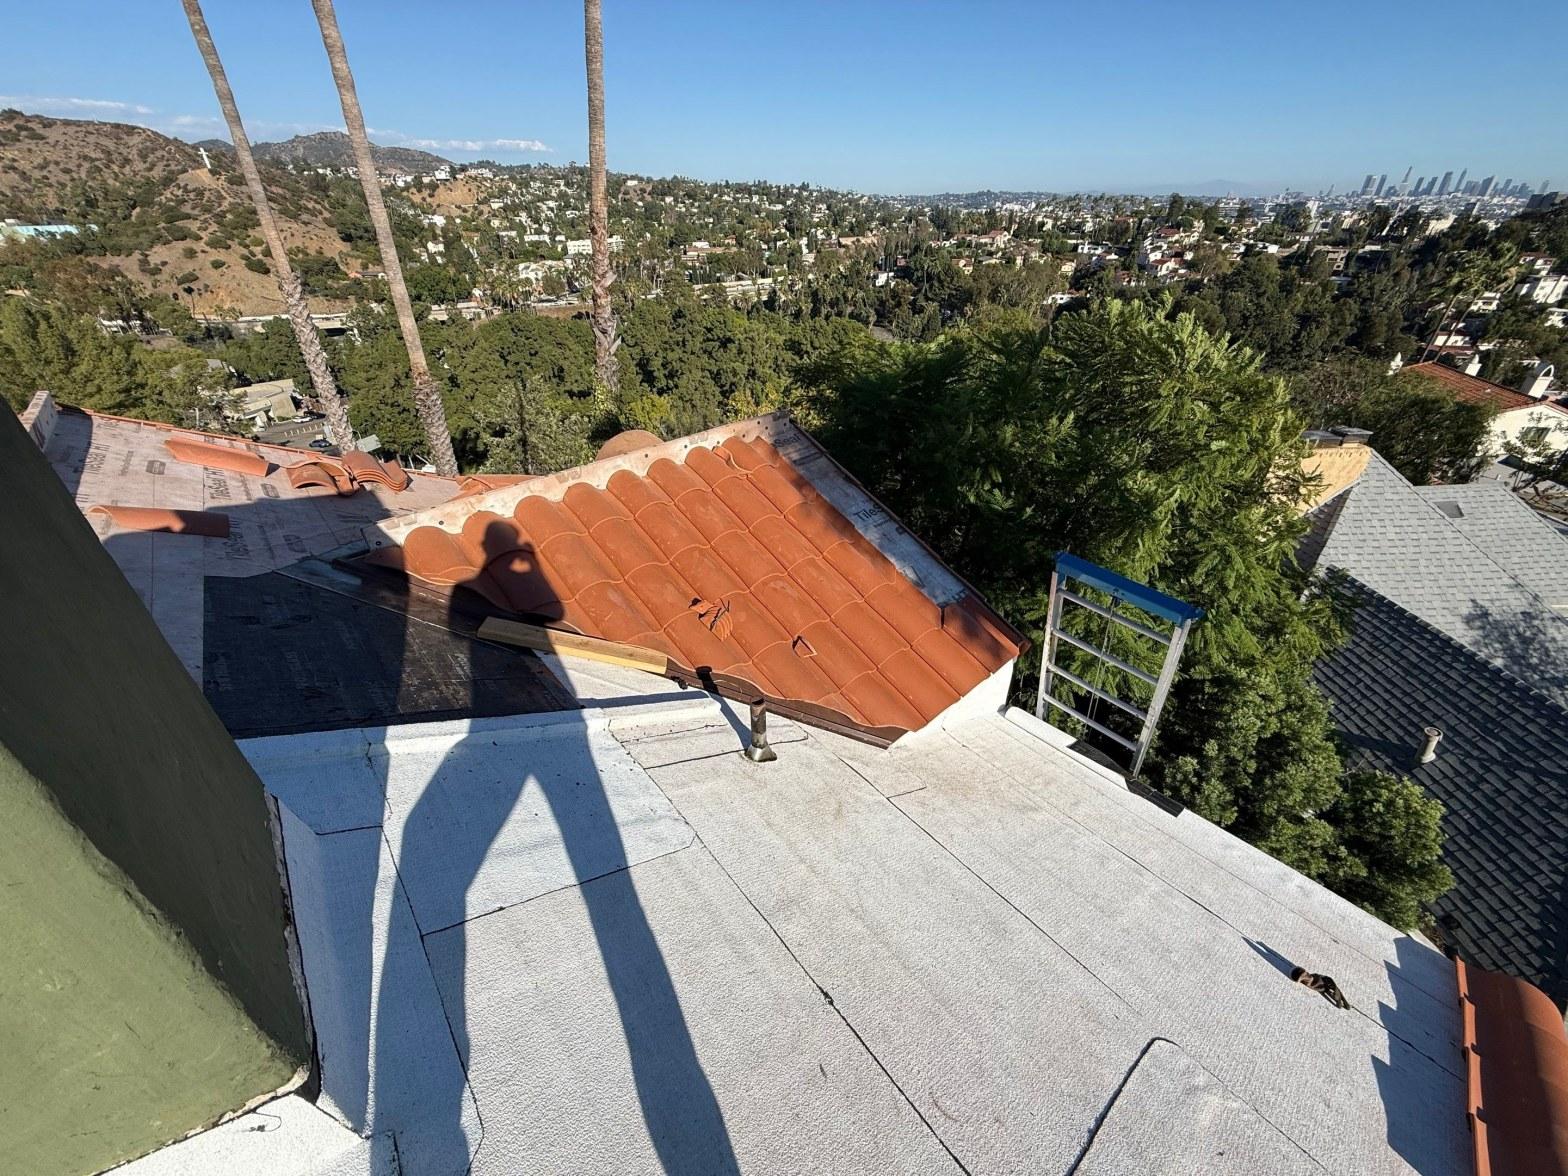
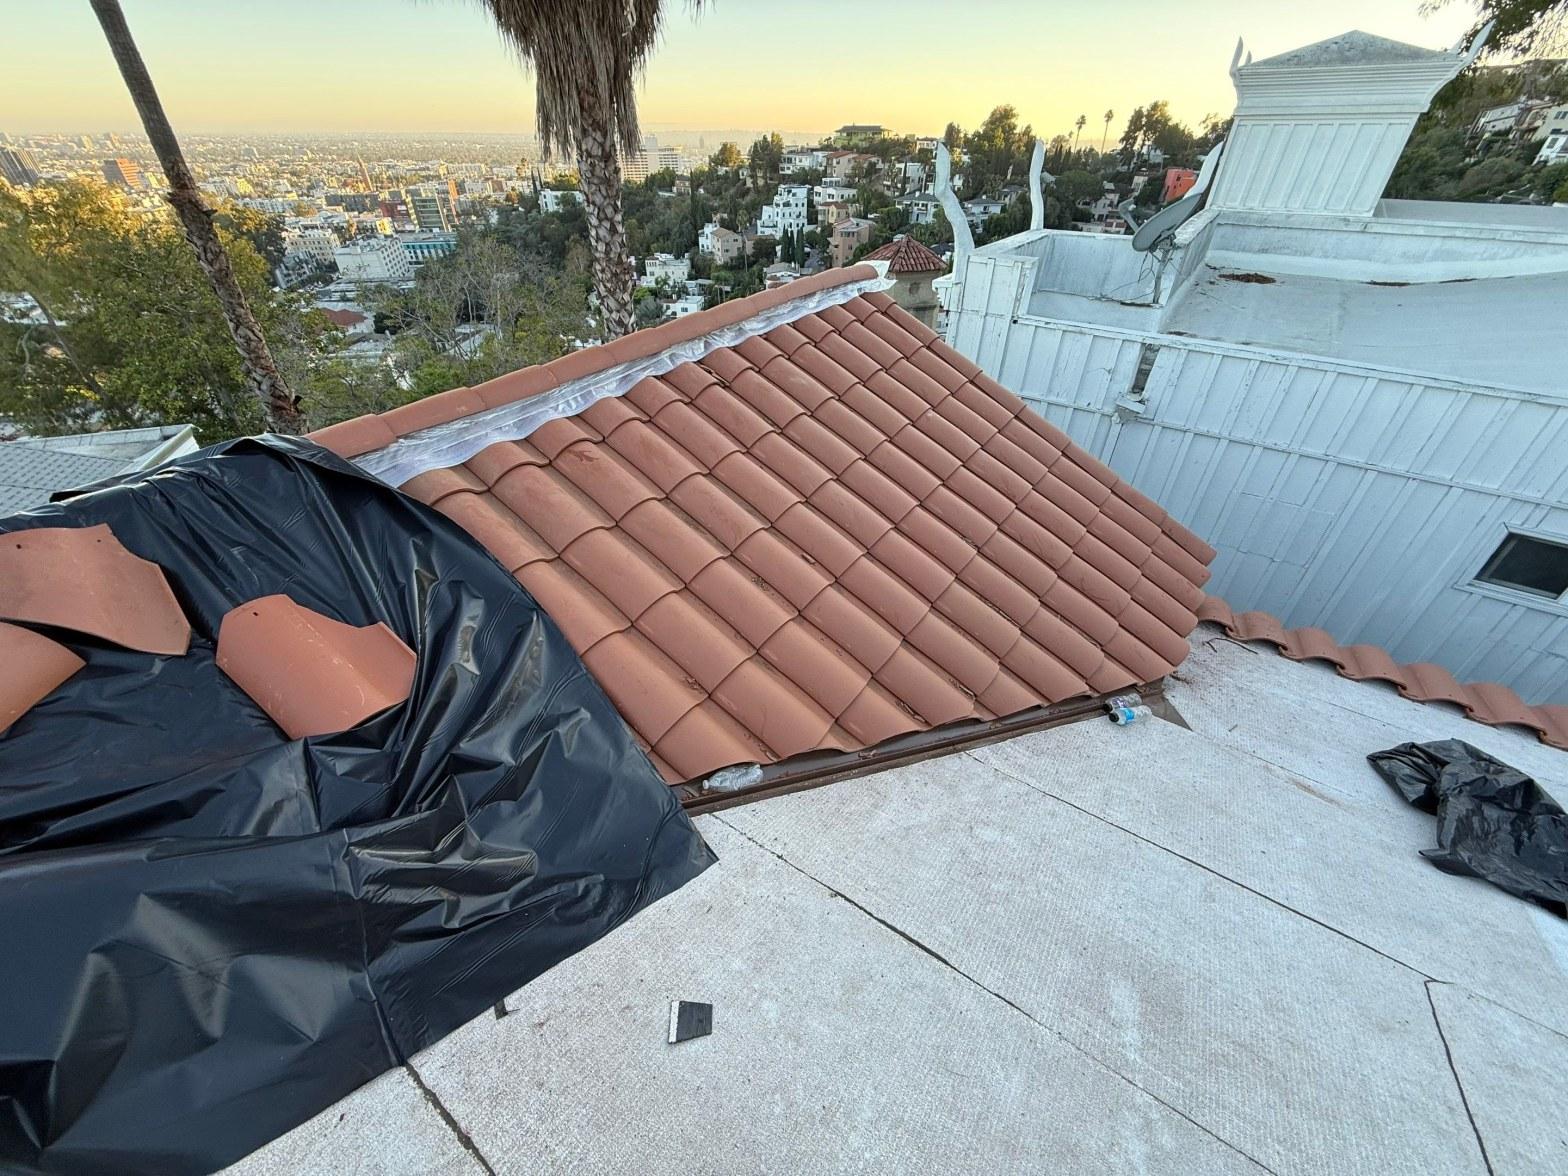
This property sits on a steep hillside lot in Los Angeles, with long hip-and-ridge tile planes that shed water fast but also channel it toward specific valleys and eaves. The pitch accelerates runoff, which is good for drainage, but it also concentrates water at the same spots year after year. When the felt underlayment beneath the original tile aged out, those concentration points became the first places the deck absorbed standing moisture. The result was what the photos document: not a few bad boards, but a deck that needed to come off across the affected planes entirely.
On re-roofs we pull off tile on older homes, the gap between what the homeowner expected and what the deck actually shows is often what determines whether the job is a straightforward swap or a full structural re-sheathing. This job was clearly the latter from the first day of tear-off.
How Did the Re-Sheathing and Weatherproofing Work?
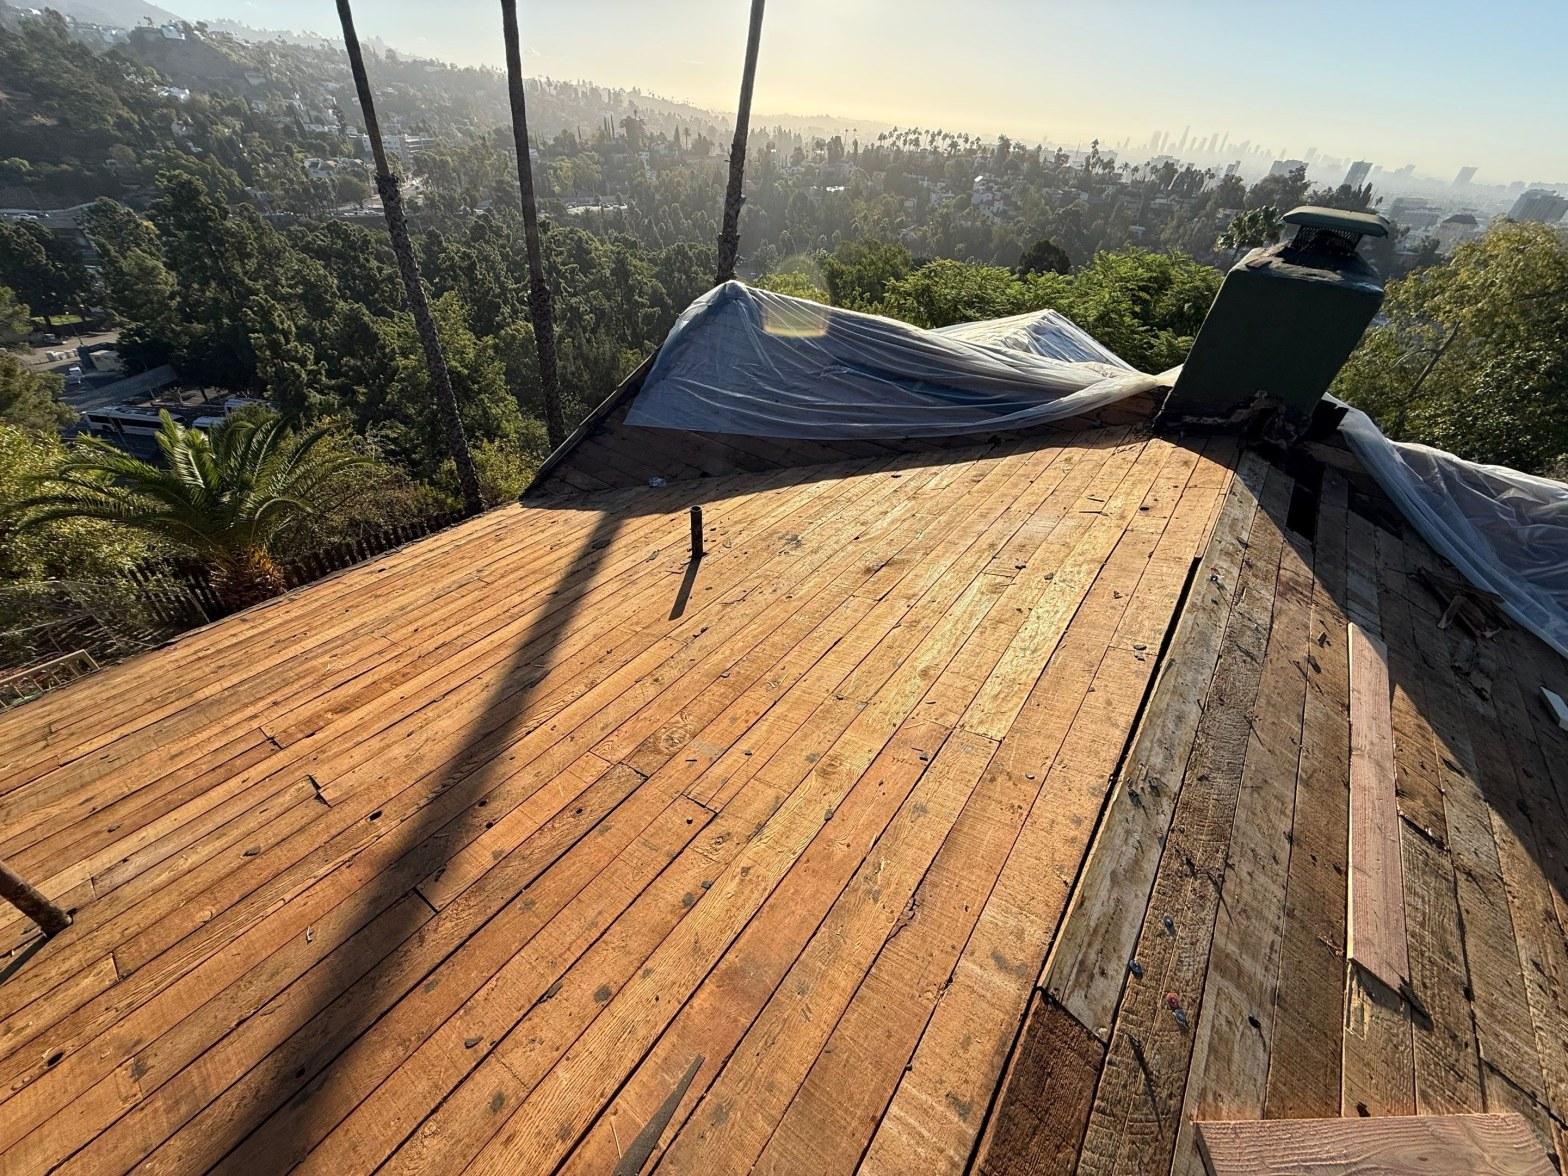
Once the failed sheathing was removed, the crew installed new wood boards across the affected planes, restoring a solid, continuous deck surface before any membrane or underlayment went down. The photos from mid-project show the deck in a state most homeowners never see: bare boards, freshly nailed, with the Los Angeles basin visible in the distance from the ridge.
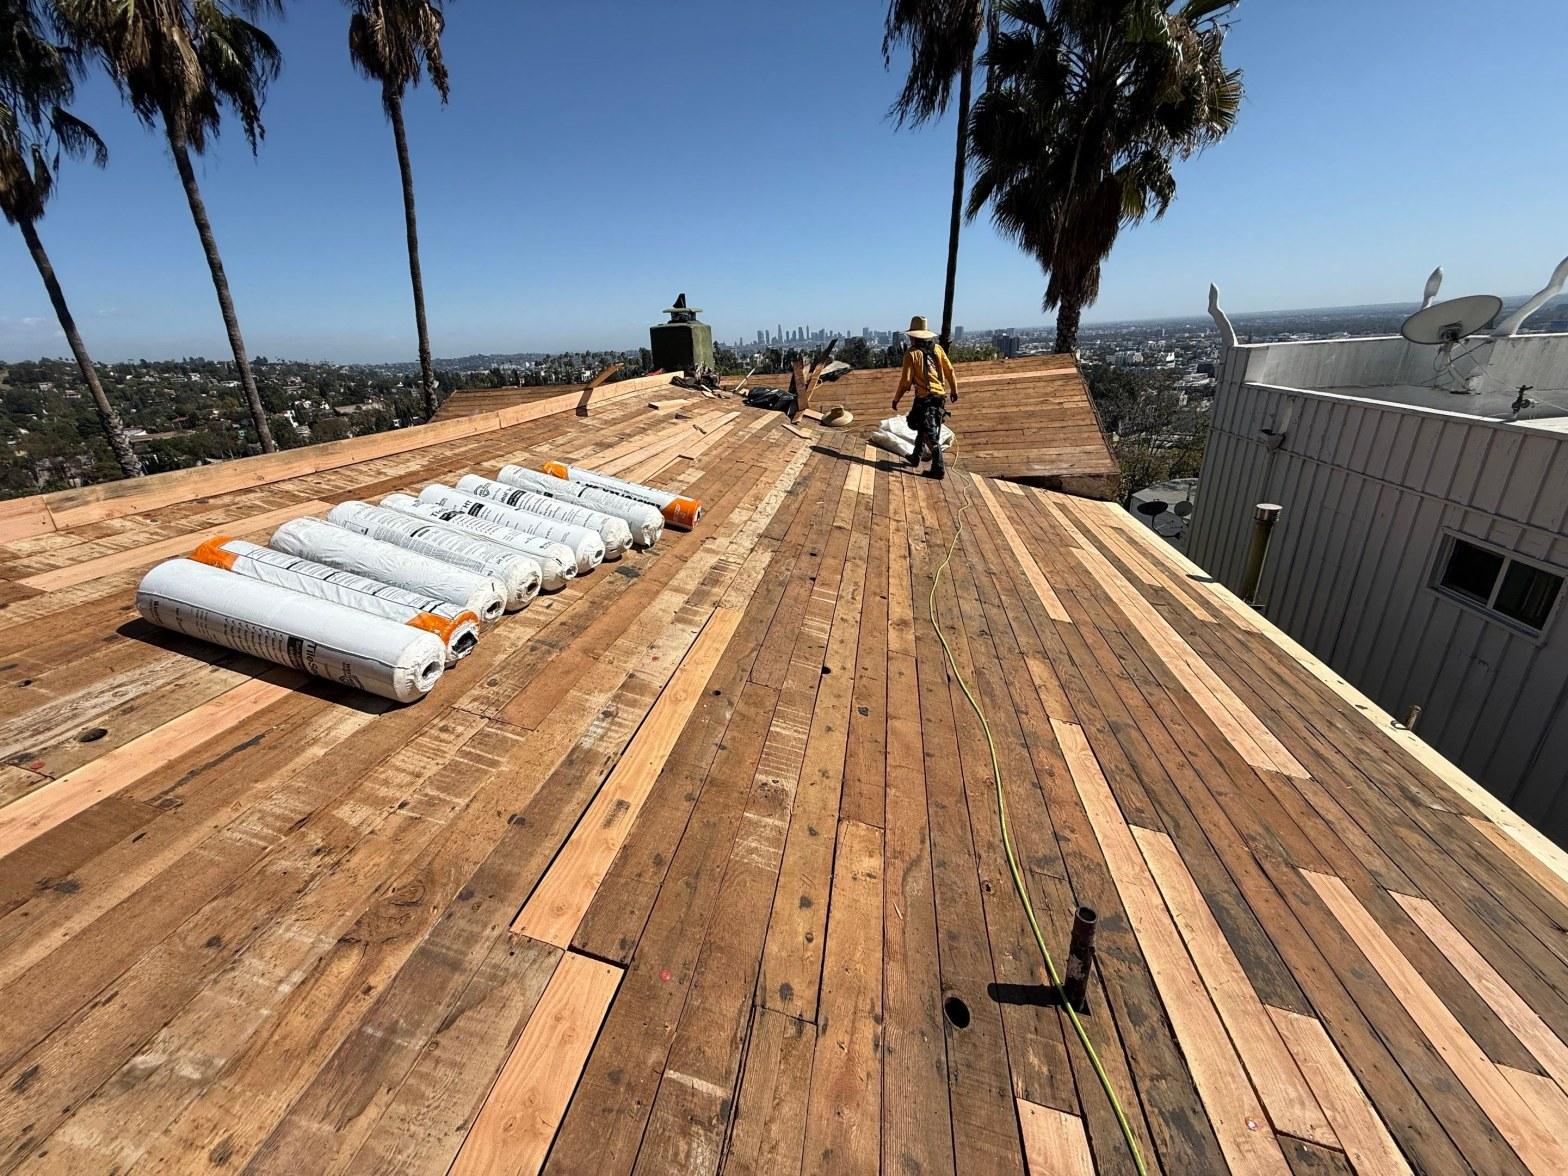
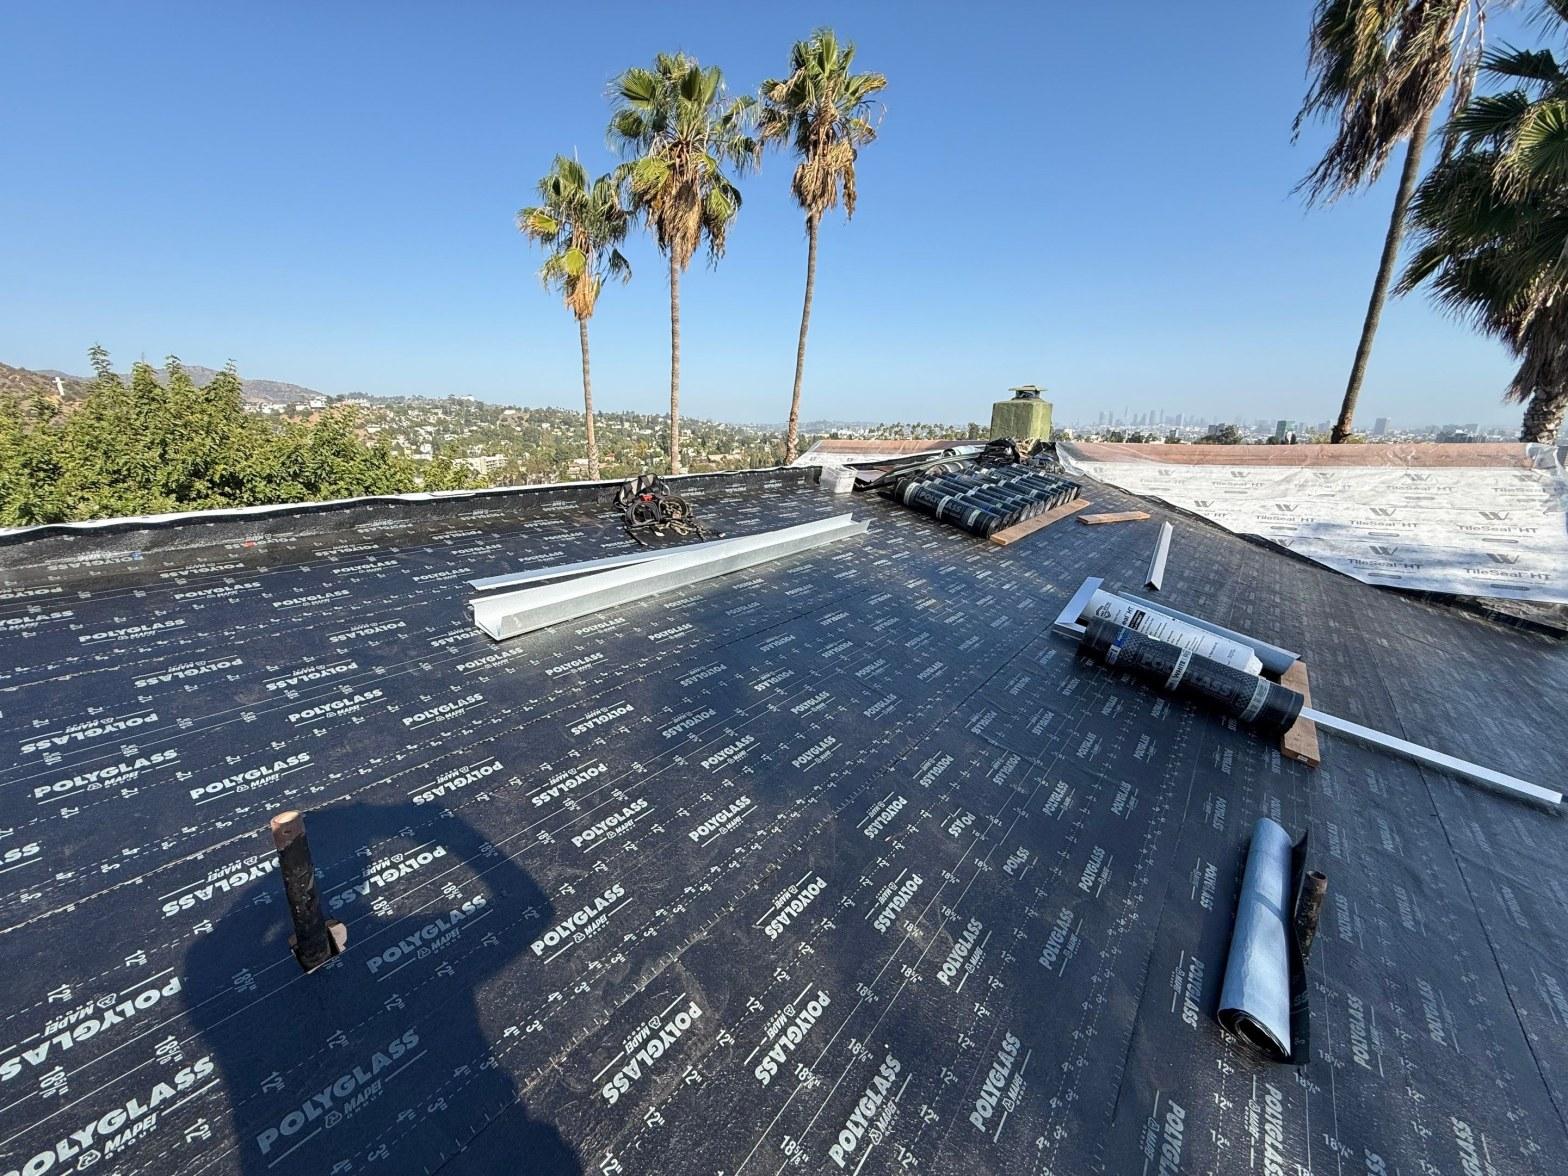
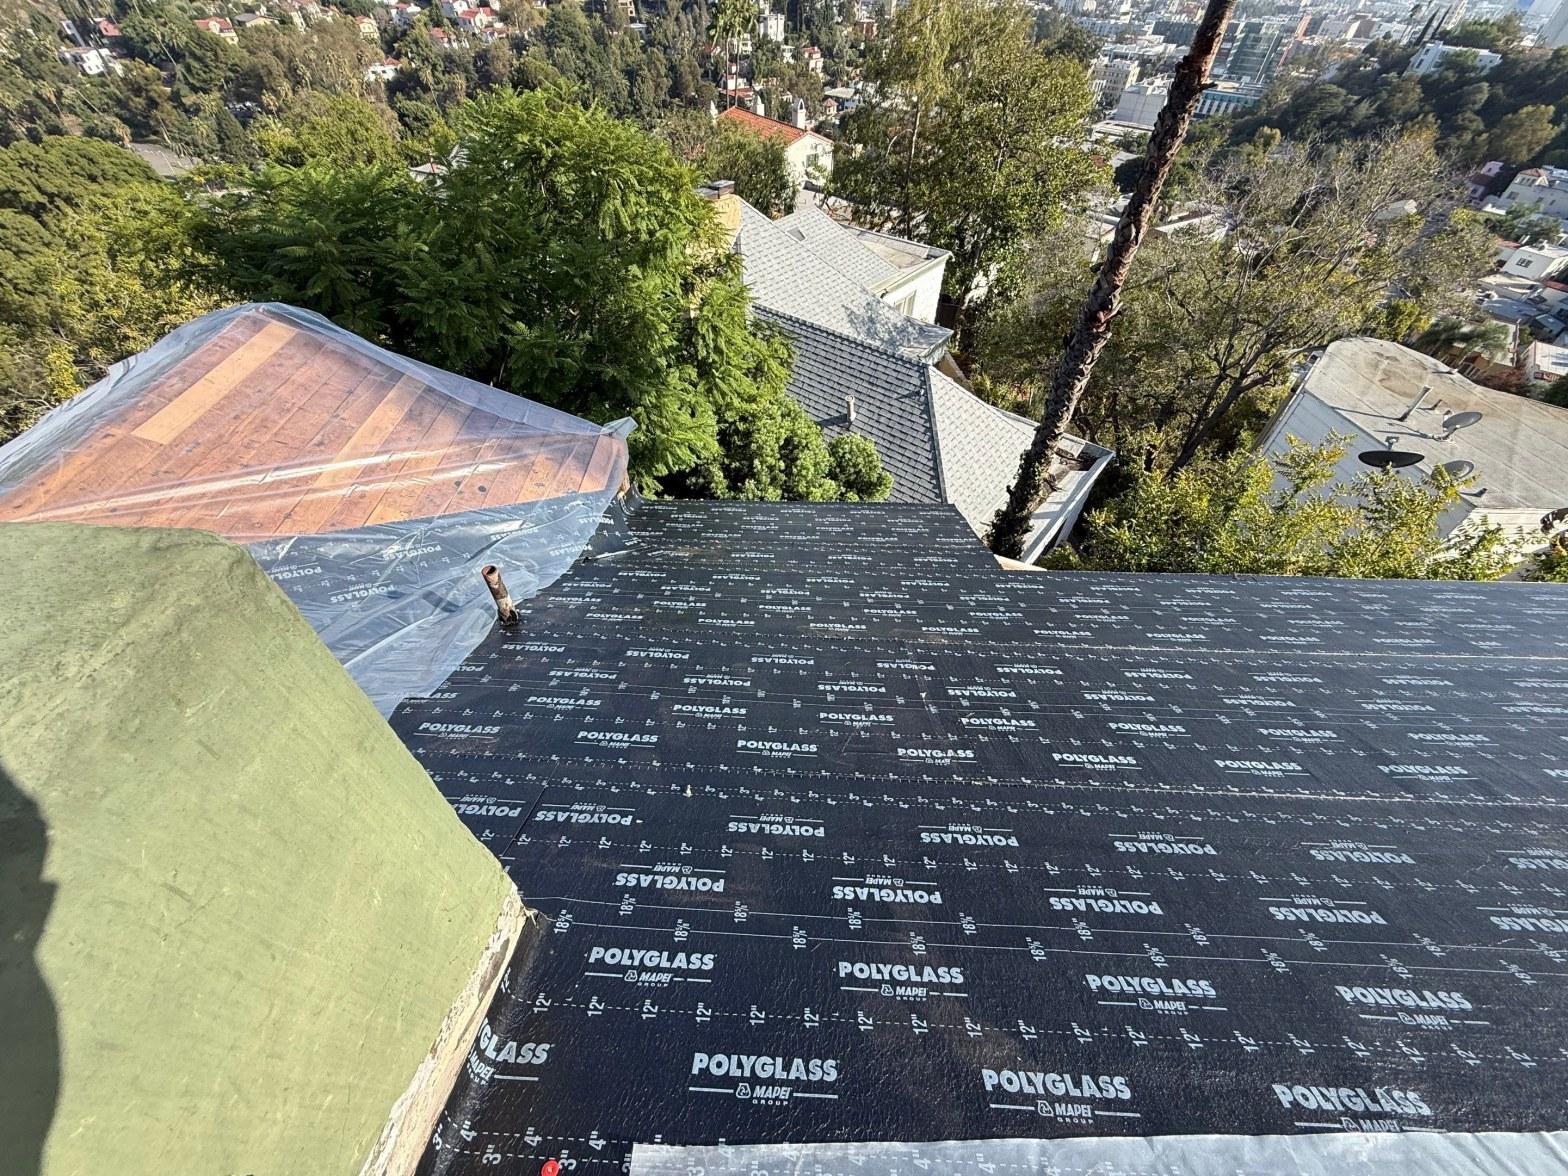
With a job of this scale running from September 20 through October 16, 2026, nearly four weeks of work in progress meant the open deck needed protection overnight. Plastic sheeting was draped over exposed sections each evening so that any coastal marine layer or unexpected rain event wouldn’t reach the new sheathing before the membranes were in place. This is a standard precaution on multi-day re-roofs, but it matters more on a steeply pitched hillside where even a light drizzle can run a long way across unprotected boards before it finds an edge.
The first layer over the new deck was a Polyglass base membrane. Polyglass is a modified bitumen sheet membrane that bonds directly to the deck and creates a fully adhered waterproof layer independent of everything above it. It bridges minor gaps, accommodates normal wood movement, and provides a true secondary water barrier. Because this home has both steep tile planes and lower-slope flat sections, having a reliable base layer under everything was not optional; it was the foundation of the entire system.
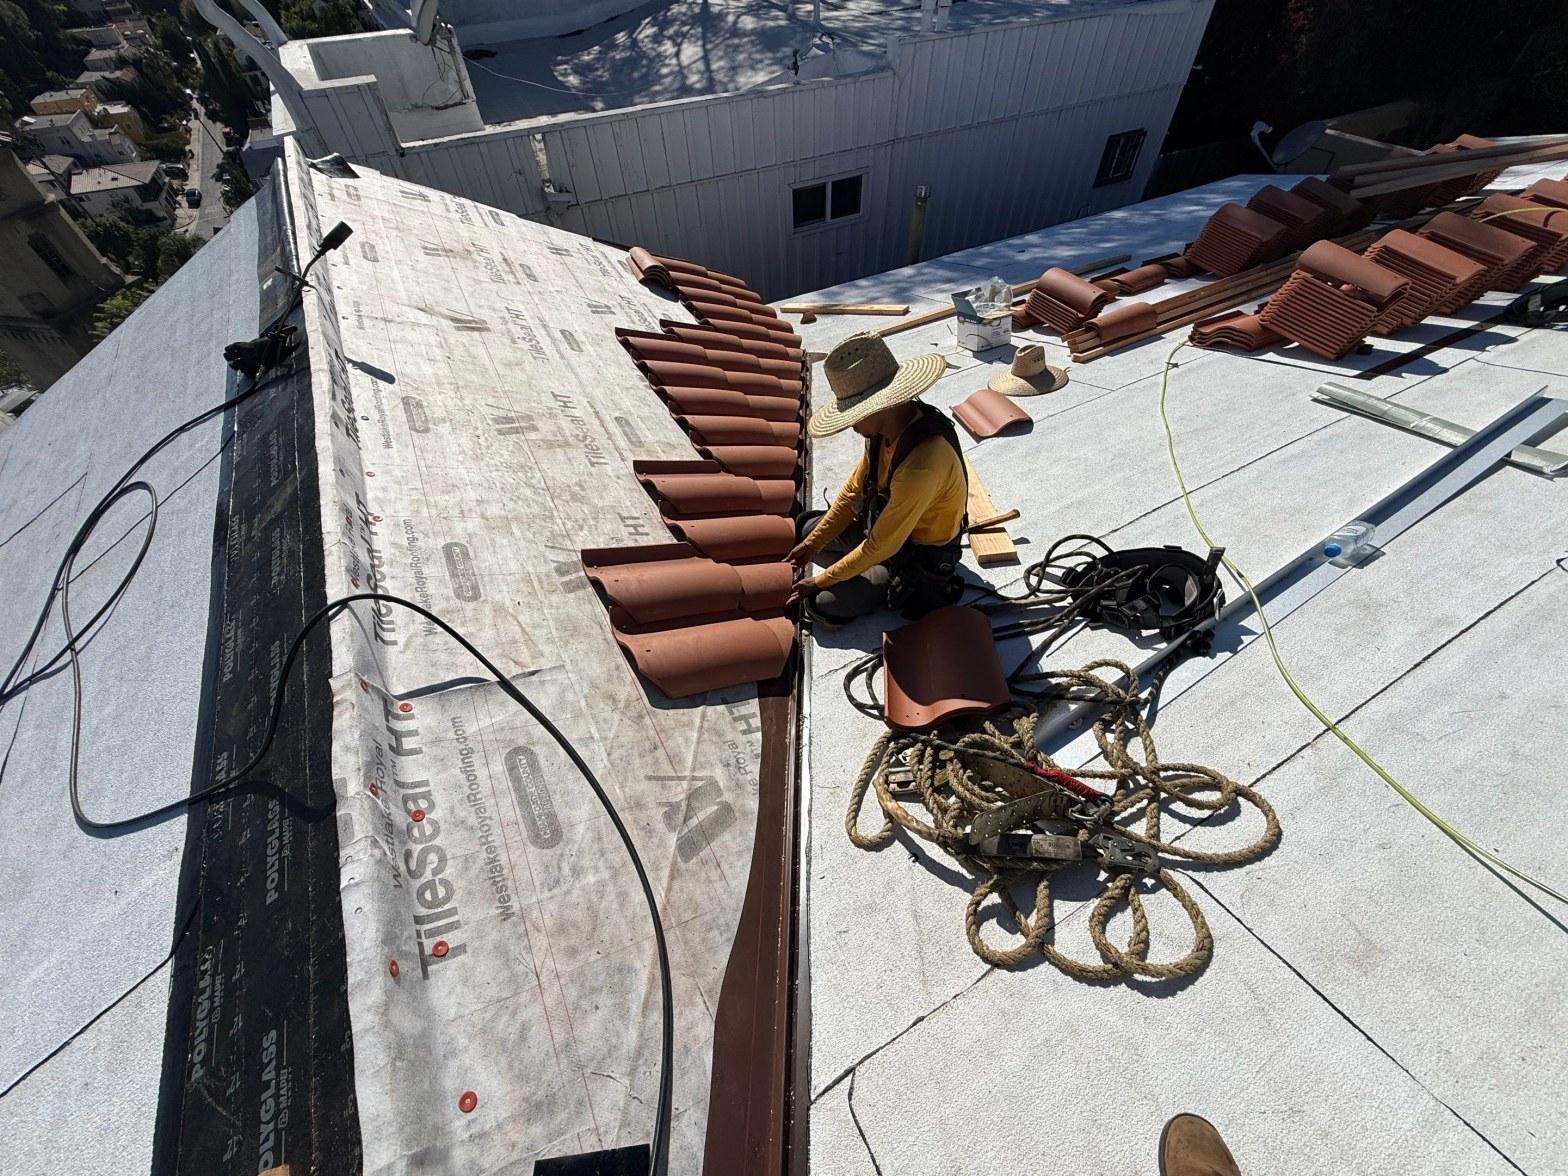
Above the Polyglass, the crew installed Westlake Royal TileSeal HT underlayment across the tile-receiving planes. TileSeal HT is a self-adhering, high-temperature-rated tile underlayment that meets the demanding thermal conditions a California roof sees through summer. California’s Title 24 building energy standards impose requirements on roofing assemblies, and using a rated underlayment system is part of complying with those specifications on a permitted re-roof. The product’s branding is clearly legible in the installation photos, showing the overlapping courses running up the slope in proper shingle-lap fashion.
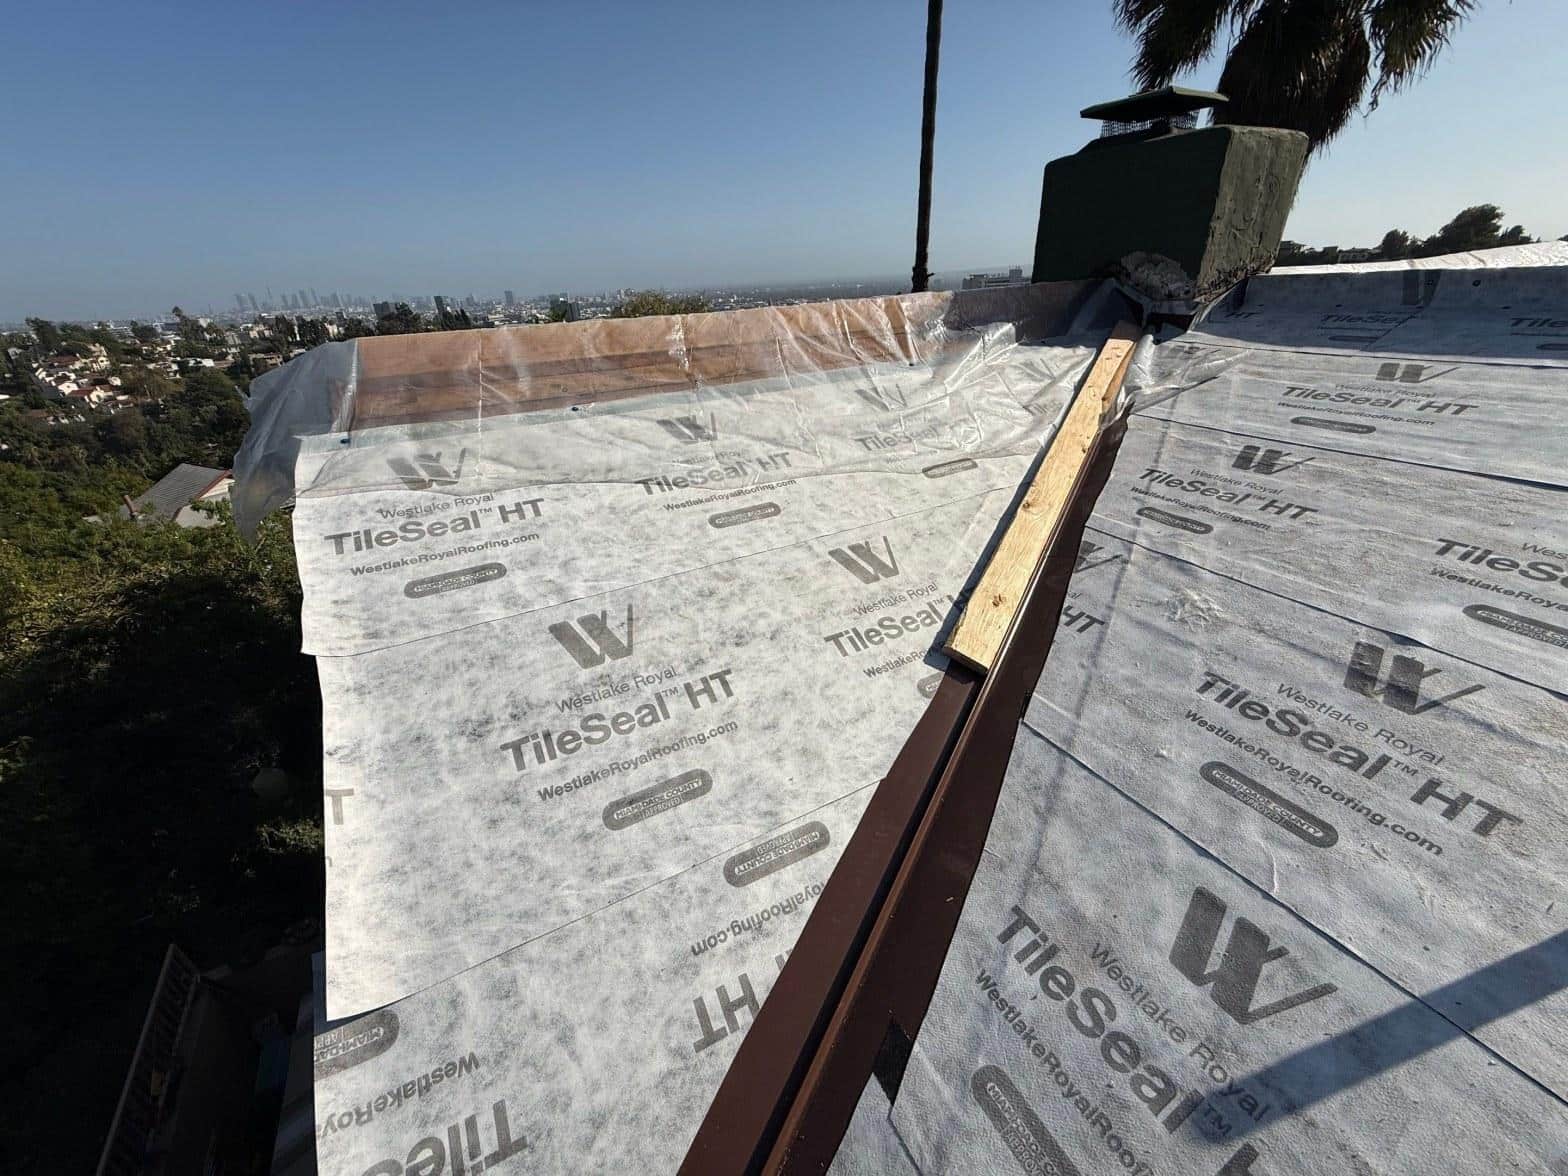
Metal battens were set over the underlayment to establish the tile-sitting plane, and all flashing, including the chimney step flashing and valley metal, was replaced as part of the scope. Reusing original flashing on a full re-roof is one of the more common places a job can be shortcut, and it’s also where leaks tend to reappear first after a new tile is laid. Replacing it all at this stage adds relatively little time but eliminates the most likely failure point going forward.
How Were the Tile Field and Flat Sections Finished?
The clay barrel tile field was laid course by course over the new battens and TileSeal HT underlayment, working up from the eave to the ridge on each plane. The mid-installation photo captures tile stacked in position across the deck, with the distinctive terracotta S-curve profile of a classic Spanish-style barrel tile taking shape from the lower courses upward.
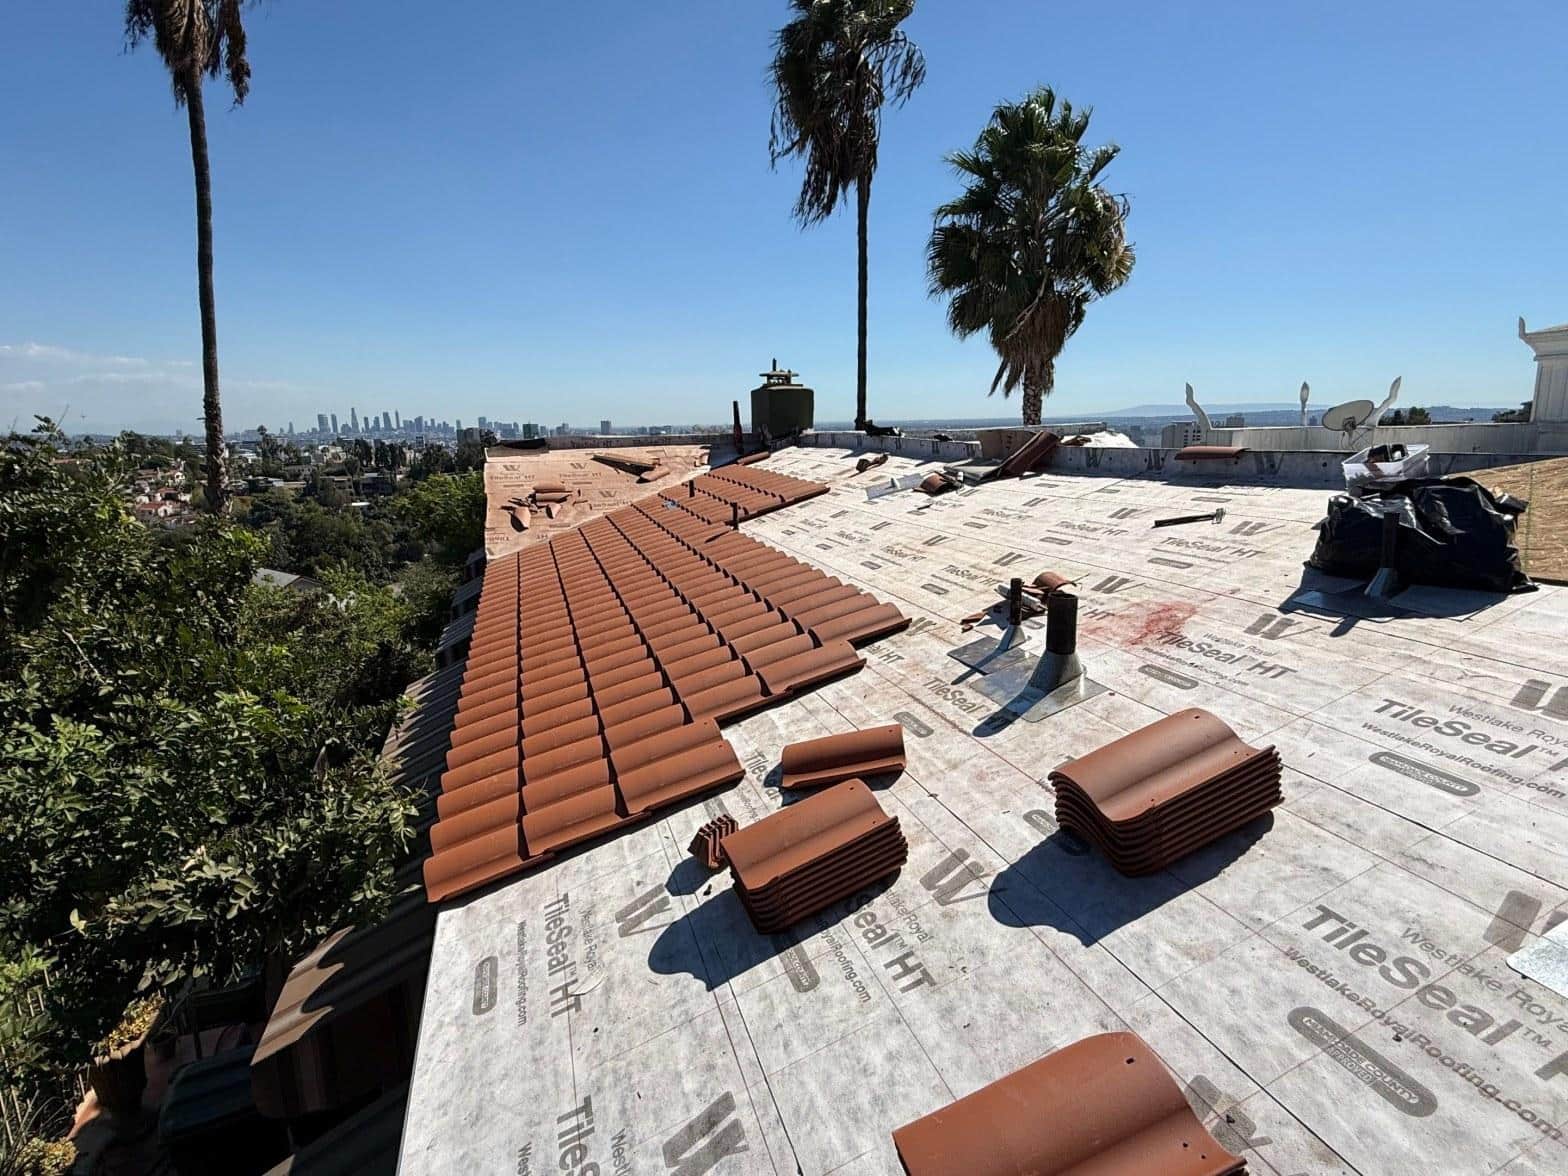
Barrel tile, also called Spanish tile or S-tile, is composed of two interlocking curved pieces: a concave under-tile (the canal) and a convex cover tile (the cap). Each course overlaps the one below by a set amount, creating the repeating shadow line visible in the finished photos. The weight of a clay tile system is significantly greater than an asphalt shingle roof, which is part of why a sound, fully continuous deck matters so much. The sheathing carries that load every day, and deteriorated boards simply cannot do it safely.
For a hillside home in the Los Angeles basin’s Mediterranean climate, clay tile has been a logical material choice for well over a century. It resists the region’s intense UV exposure, tolerates the wide seasonal temperature swings from cool marine nights to hot Santa Ana afternoons, and sheds the infrequent but sometimes intense winter rain events that the area receives. The thermal mass of the clay also moderates attic temperatures, which matters for a home with rooftop solar panels relying on stable conditions year-round.
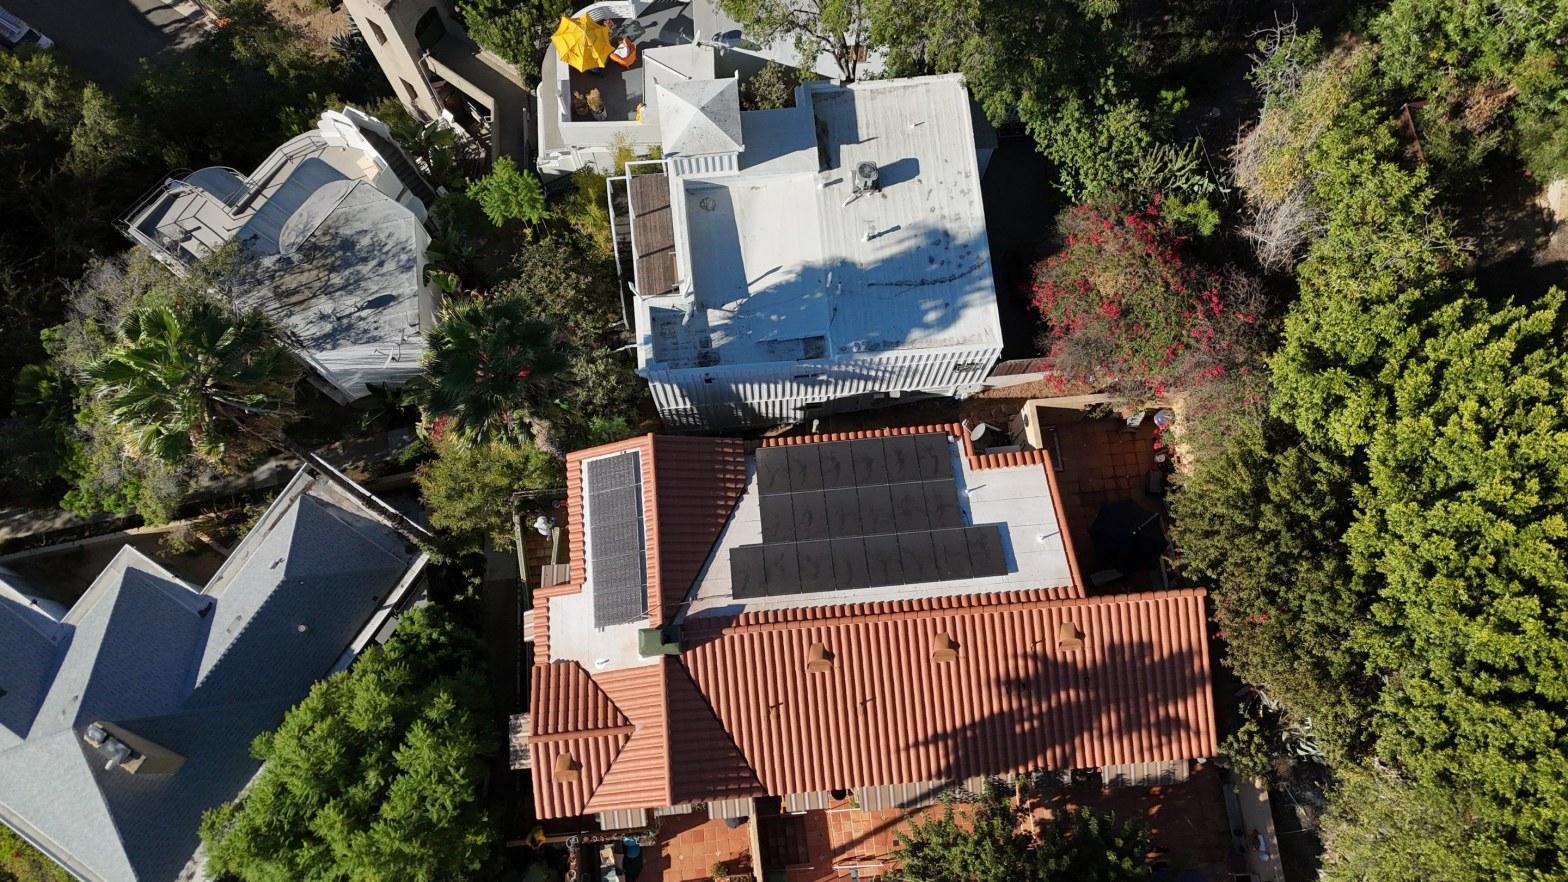
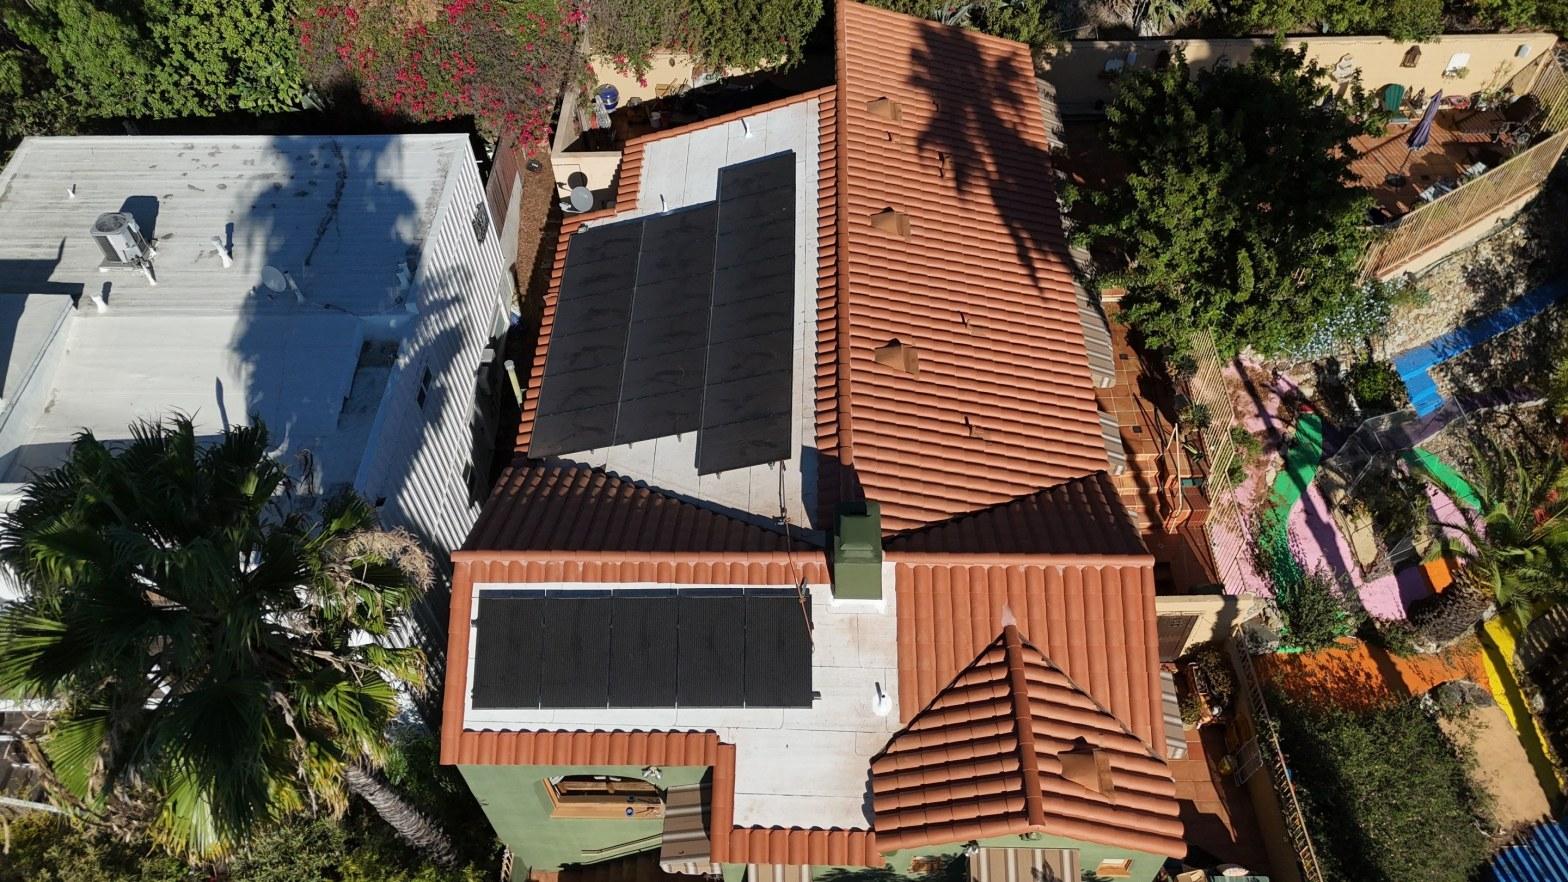
The low-slope and flat sections of this roof received a different finish entirely: a white reflective coating was applied to those planes. White reflective coatings are a recognized strategy under California’s Title 24 cool roof provisions, which set minimum solar reflectance values for low-slope residential roofing in the state’s climate zones. The aerial photo at the top of this article shows the contrast clearly: the terracotta tile planes on the main structure, and the bright white flat sections covering the adjacent portions of the building.
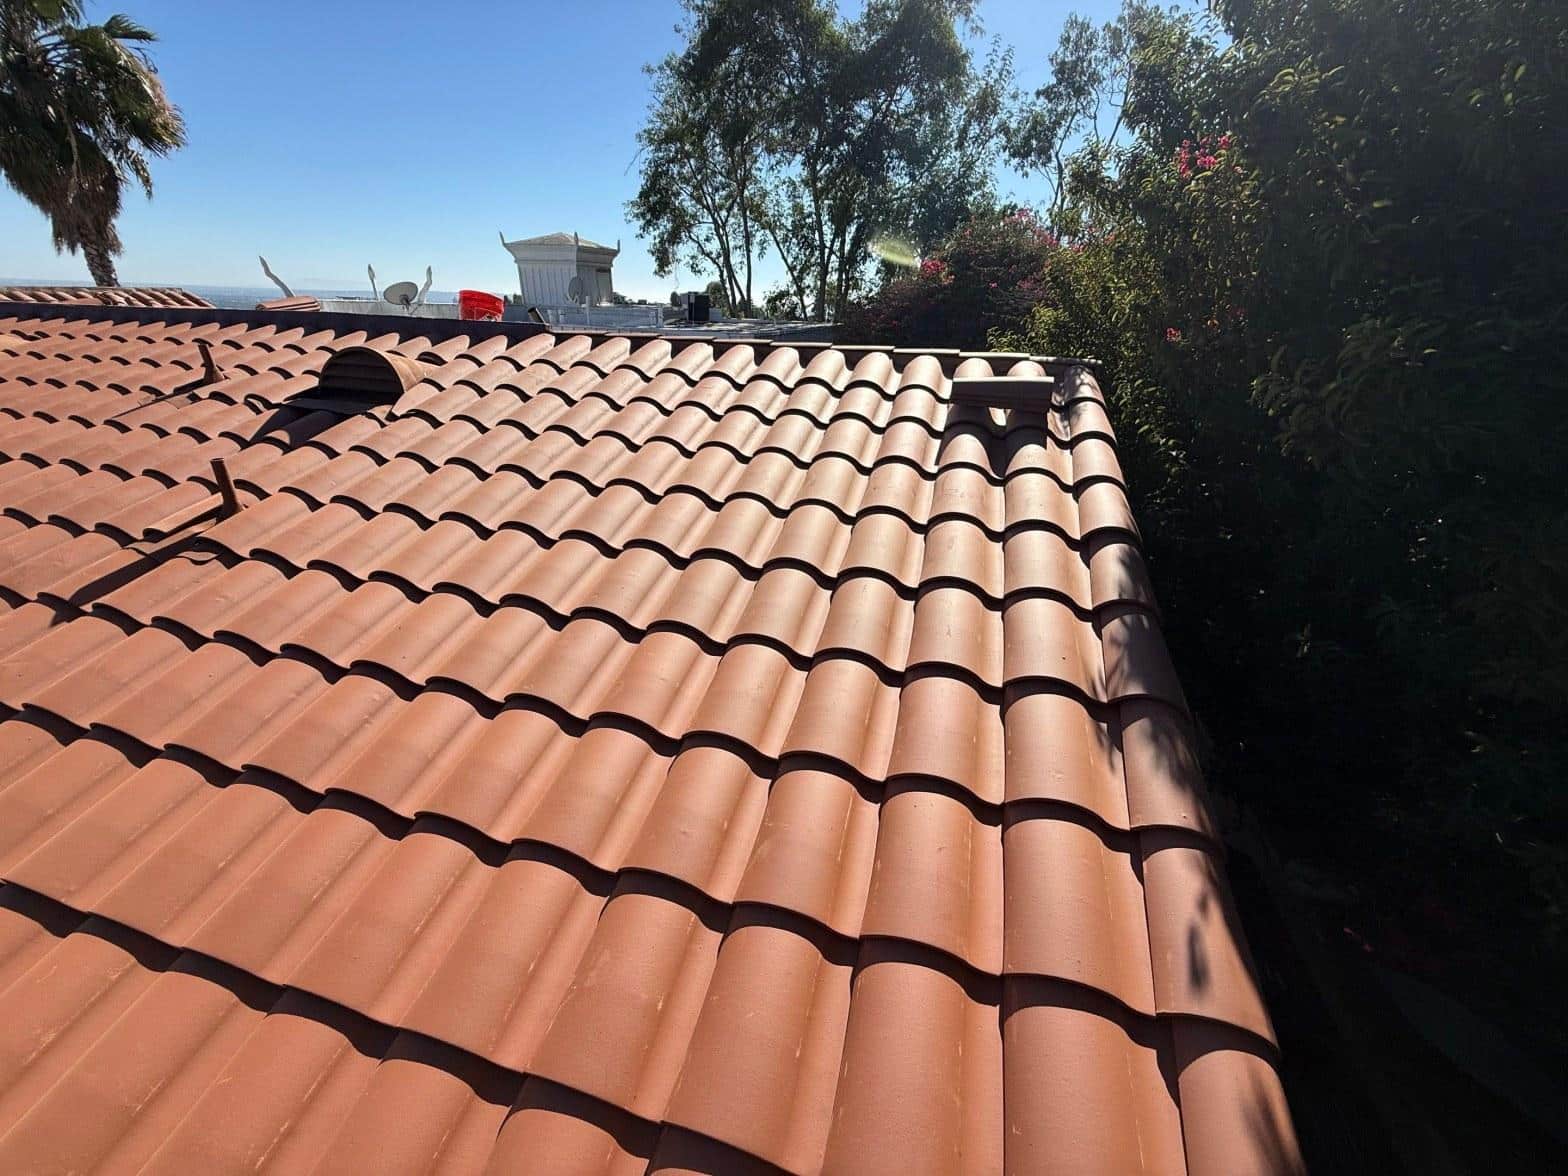
Ridge cap tiles were mortared and set along the peak of each plane, and pipe vents were flashed and integrated into the finished tile field. The chimney, which presented its own flashing complexity where the tile planes intersect the masonry, was addressed as part of the standard scope. Getting the chimney step flashing and counter-flashing right on a steeply pitched clay tile roof is detail work; the angles are unforgiving and each cut has to account for the tile profile as well as the masonry surface.
What Does the Completed Roof Look Like?
The finished roof presents the uniform terracotta color and clean ridge lines that a Spanish-style clay tile system is known for, with no visible patching or mismatched sections. The low-slope sections are sealed under white reflective coating, and rooftop solar panels occupy the flat section visible in the aerial photographs.
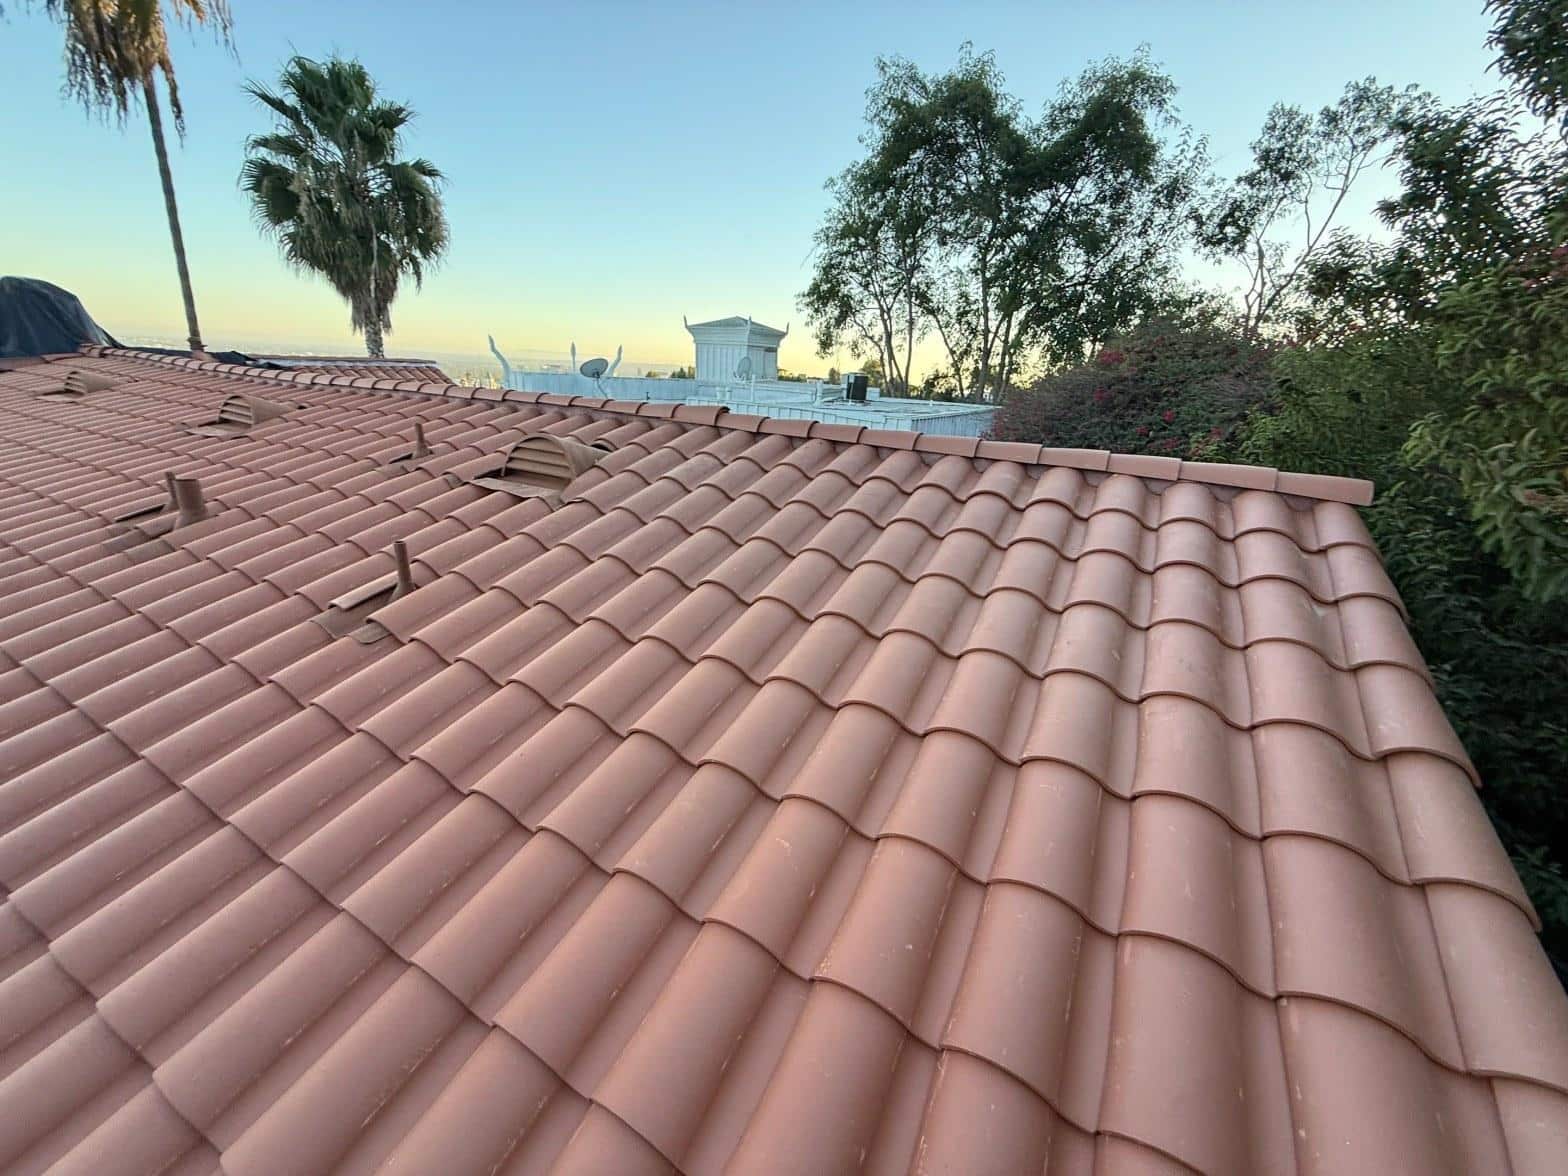
From the ground and from the drone shots captured at completion, the roof reads as a cohesive system across all its planes. The hip intersections are tight, the ridge caps run continuously across each peak, and the pipe vent flashings sit flush within the tile field. The solar array on the flat section sits on the finished surface of the completed roof.
Projects like this one illustrate why a tile re-roof is not simply a cosmetic upgrade. The tile itself is the visible part, but the performance of the assembly depends entirely on what happens beneath it: a solid deck, a reliable base membrane, and a rated tile underlayment installed in correct lap and sequence. Skipping or shortcutting any of those layers doesn’t save money over the life of the roof; it just shifts the cost forward to the next repair cycle.
Roof Replacement Inc is licensed by the California Contractors State License Board (CSLB). If your home has a clay tile roof showing age, interior stains, broken tiles, or any sign that the assembly beneath the tile has been compromised, this project is an example of the full scope that may be needed and what a properly executed replacement looks like from start to finish.
Ready to Talk About Your Clay Tile Roof?
Schedule a roof inspection to find out what’s happening under your tile before a small problem becomes a full deck replacement. Contact Roof Replacement Inc to get the conversation started.


