- What Is An Asphalt Shingle Roof?
- Types Of Asphalt Shingles
- Advantages Of Asphalt Shingle Roofs
- How To Assess And Plan Roof Changing
- Choosing The Best Roof Shingles For Your Home
- Which One To Choose: Hiring Professionals vs. DIY
- Step-by-Step Asphalt Shingle Installation
- Maintenance And Longevity
- FAQs
A strong and reliable roof is not only a cover over your head․ It is your first line of defense against harsh weather, temperature extremes, and potential water damage. Investing in a durable roof protects not only you, your family, and your belongings but also significantly enhances your home’s value.
If you are considering a roof that is both affordable and durable, an asphalt shingle roof is an ideal choice. These types of roof shingles have proved to be very effective and suitable for the sunny California climate.
Today, we’ll guide you through all the things that you need to know about installing and maintaining an asphalt shingle roof. We’ll cover how to choose the best roof shingle types for your home and understand their advantages compared to traditional roofs.
Whether you’re planning a DIY project or hiring professional contractors, this guide will help you get more information about asphalt shingles and help you make informed decisions.
Let’s get started.
Key Takeaways
- Asphalt shingle roof offers an affordable and durable roofing solution for most homes.
- Proper planning and inspection before installation prevent costly mistakes and structural issues.
- Professional installation ensures safety, long-lasting performance, and warranty protection.
- Regular inspections and maintenance can extend the roof’s lifespan beyond 25–30 years.
What Is An Asphalt Shingle Roof?
Before diving into installation details, it’s important to understand what an asphalt shingle roof (architectural roof shingles) is and why they are very popular among homeowners in LA. Asphalt shingles are roofing materials that combine durability and affordability, and are a great fit for a wide variety of homes.
An asphalt shingle typically consists of three main components: a fiberglass base, a layer of asphalt, and ceramic granules embedded on the surface. The fiberglass provides structural strength and remains light. The asphalt layer has weather resistance. It is flexible and has water protection that ensures the roof can withstand heavy rain, snow, and temperature fluctuations.
Ceramic granules protect the asphalt on the roof from UV rays and contribute to the roof’s color and overall appearance. Some shingles also include algae-resistant granules that help to maintain long-term curb appeal.
Types Of Asphalt Shingles
There are various materials from which asphalt shingles are made. This means that you can choose from several roof shingle types to match both their budget and taste:
Tab/Standard Shingles: This is the most budget-friendly option. It offers a flat, uniform appearance and is ideal for homeowners who want a functional and cost-effective roof.
Architectural Roof Shingles: These shingles are heavier than standard shingles. However, they are more durable and have a multi-dimensional look that mimics natural materials.
Luxury/Designer Shingles: These are premium shingles that deliver top-tier protection. They have a realistic, natural look so that they can be used for high-end appeal instead of wood shakes or slate.
For many years, Roofreplacement.inc has helped homeowners choose the right roof shingles for their homes.
Advantages Of Asphalt Shingle Roofs
In addition to their durability and cost-effectiveness, architectural roof shingles have other advantages. One of the main advantages is that they are easy to install, repair, and replace. They have very simple maintenance. Moreover, asphalt shingle roofs are very versatile in design compared to other roofing materials, and allow you to choose from their colors and textures.
How To Assess And Plan Roof Changing
Before starting your asphalt shingle roof project, it is important to plan and assess carefully. A good plan will help you prevent costly mistakes and ensure that your roof will be a long-lasting protection for your home.
The first thing to start with is to know the right time to replace your roof. This can save you money and prevent structural damage. Signs that say “It is time to change the roof” are:
- The current roof has a lot of cracked, curled, or broken shingles.
- The ceiling leaks, and there are water stains on the ceiling or walls.
- Roof age is about 20-25 or 30+
- Granule loss is visible in gutters or downspouts.
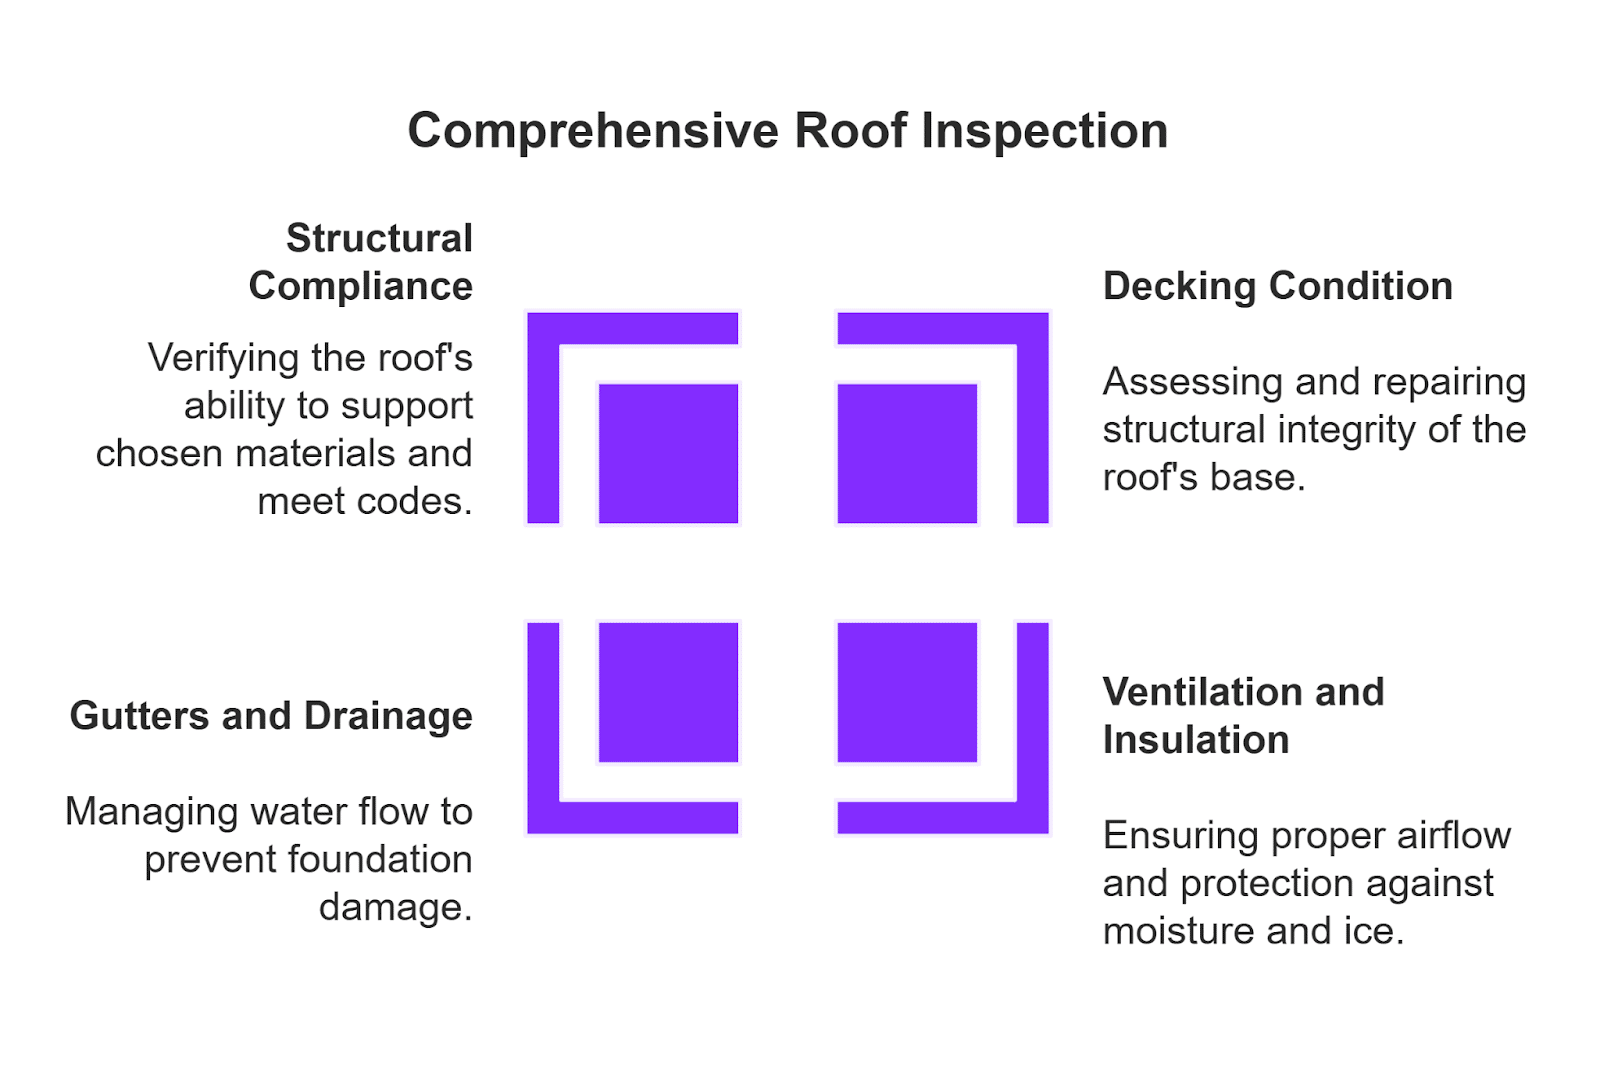
These are the signs that you don’t want to ignore, as they can lead to more expensive repairs or compromise your home’s safety. However, assessing and planning are not enough. You also need to inspect your roof before changing it. This will ensure that before installing a new roof, you will address all the issues.
Check Decking Condition: This includes checking the deck for rotting, warping, or sagging areas. If you find any that need to be repaired or replaced, do so before moving to installation.
Ventilation and Insulation: Ensure that there will be no moisture in the attic. Also, you would need to check vents and insulation to protect the roof from ice dams.
Gutters and Drainage: During this inspection, ensure that gutters, downspouts, and roof slopes direct water away from the foundation to prevent leaks and erosion.
Structural and Code Compliance: Confirm the roof framing can handle the weight of the shingles that you have chosen. Check that all work will meet local building codes and permit requirements.
Choosing The Best Roof Shingles for Your Home
Once you are done with the inspections, it is time to choose the best roof shingles. This decision is very important as it affects both the performance and the aesthetic appeal of your roof and house. So, what to consider when choosing architectural roof shingles?
Durability vs Climate: Architectural roof shingles are more durable. They have high wind resistance and durability, making them suitable for harsh climates. Compare this against standard shingles that are suitable for mild conditions.
Budget vs. Style: shingles have realistic, natural textures, are more aesthetically pleasing and protective than budget-friendly ones. However, they also have higher prices.
Warranty Considerations: It is also very important to compare the manufacturers and the material quality that they suggest. To further safeguard your investment, you will also need to gather more information about the team that will install the roof.
With this, Roofreplacement.inc has 20+ years of experience in roof replacement. Check out the references to find out what others think about us.
Which One To Choose: Hiring Professionals vs DIY
Installing a new roof is complex, potentially dangerous, and requires expertise. While you may think that the DIY method is a good choice, professional installation has many more advantages. The main advantages are:
Professional Expertise: Experienced contractors ensure proper installation, and they will follow safety protocols. Moreover, they will provide warranties, and in case you have any problems, you can refer them to help you.
Red Flags in Contractors: If you decide to DIY, you may purchase materials from an unlicensed contractor. Though you may find materials that have unusually low prices, the quality of the materials may suffer. On the other hand, trusting your architectural roof shingle installation to a professional team will reduce the risks, and you will get licensed materials.
DIY Pros and Cons: It is true that DIY may reduce labor costs. However, improper installation will shorten the roof’s lifespan.
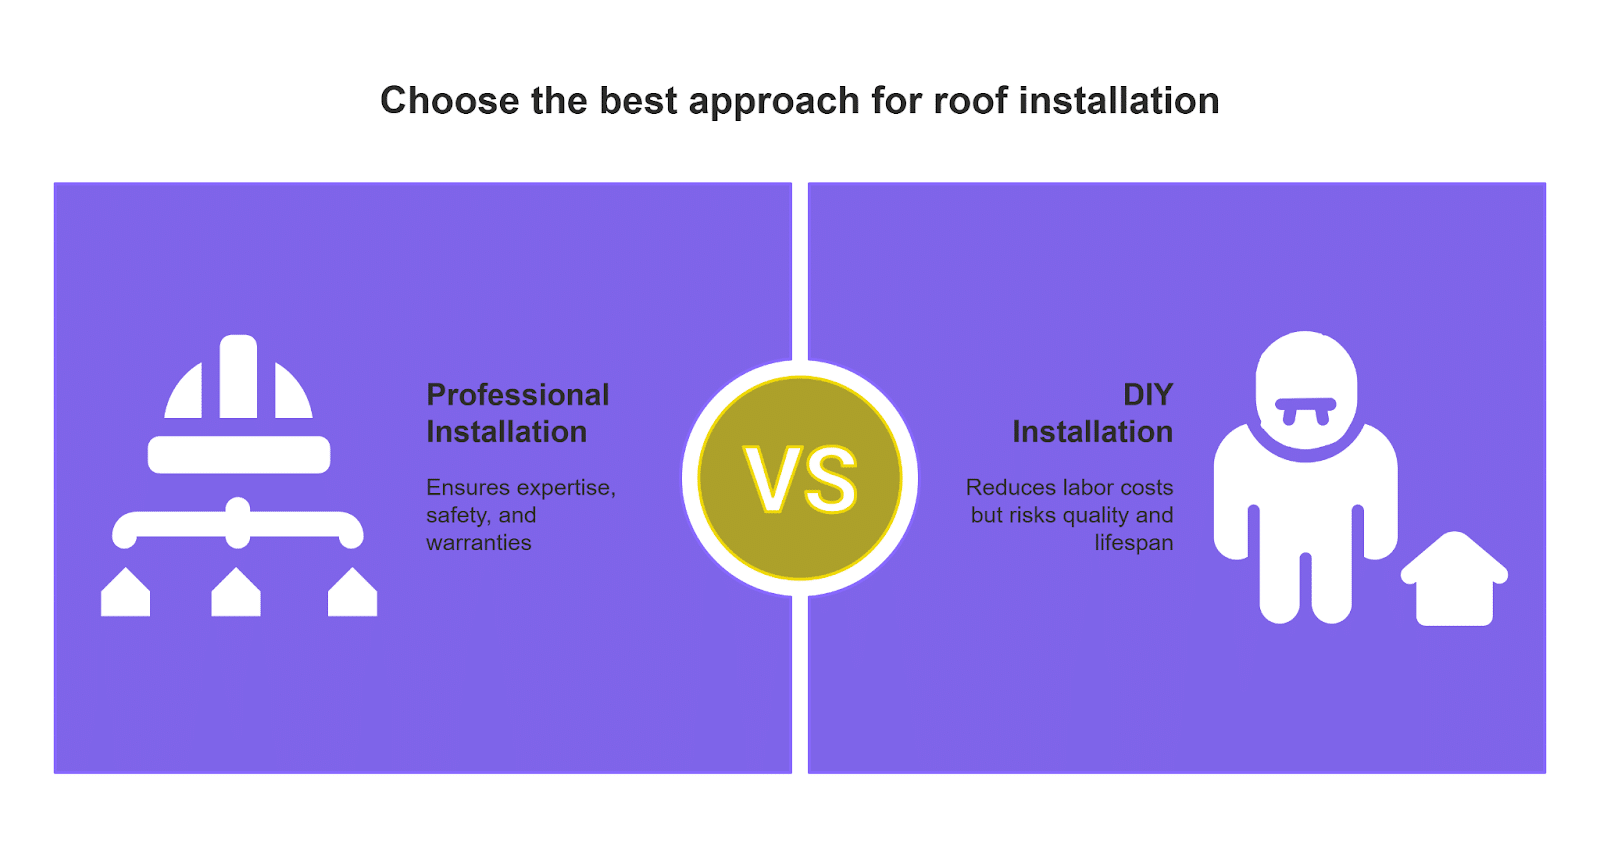
By hiring qualified professionals, you can be confident that your asphalt shingle roof installation is on a high level and it will last you a long time.
Step-by-Step Asphalt Shingle Installation
As we’ve already spoken about, installing an asphalt shingle roof requires careful planning, attention to detail, and safety. A well-planned asphalt roof installation will last for decades and even more.
So let’s walk through a pro-level architectural roof shingle installation process.
Step 1: Preparing the Roof Surface
Start by removing all old roofing materials. This may include old shingles, nails, flashing, and underlayment. Collect debris on a heavy-duty tarp or place it directly into a dumpster to prevent nails from littering the yard. When the surface is bare, examine the decking (the structural layer that supports the roof).
Look for dark stains, delamination, or soft spots. These indicate that there is water damage. Once you find any, you need to replace the weakened panels.
To create a solid base, re-nail any loose panels with nails at every six inches along the joists. Blow or dust away any fine dust so the underlayment adheres evenly.
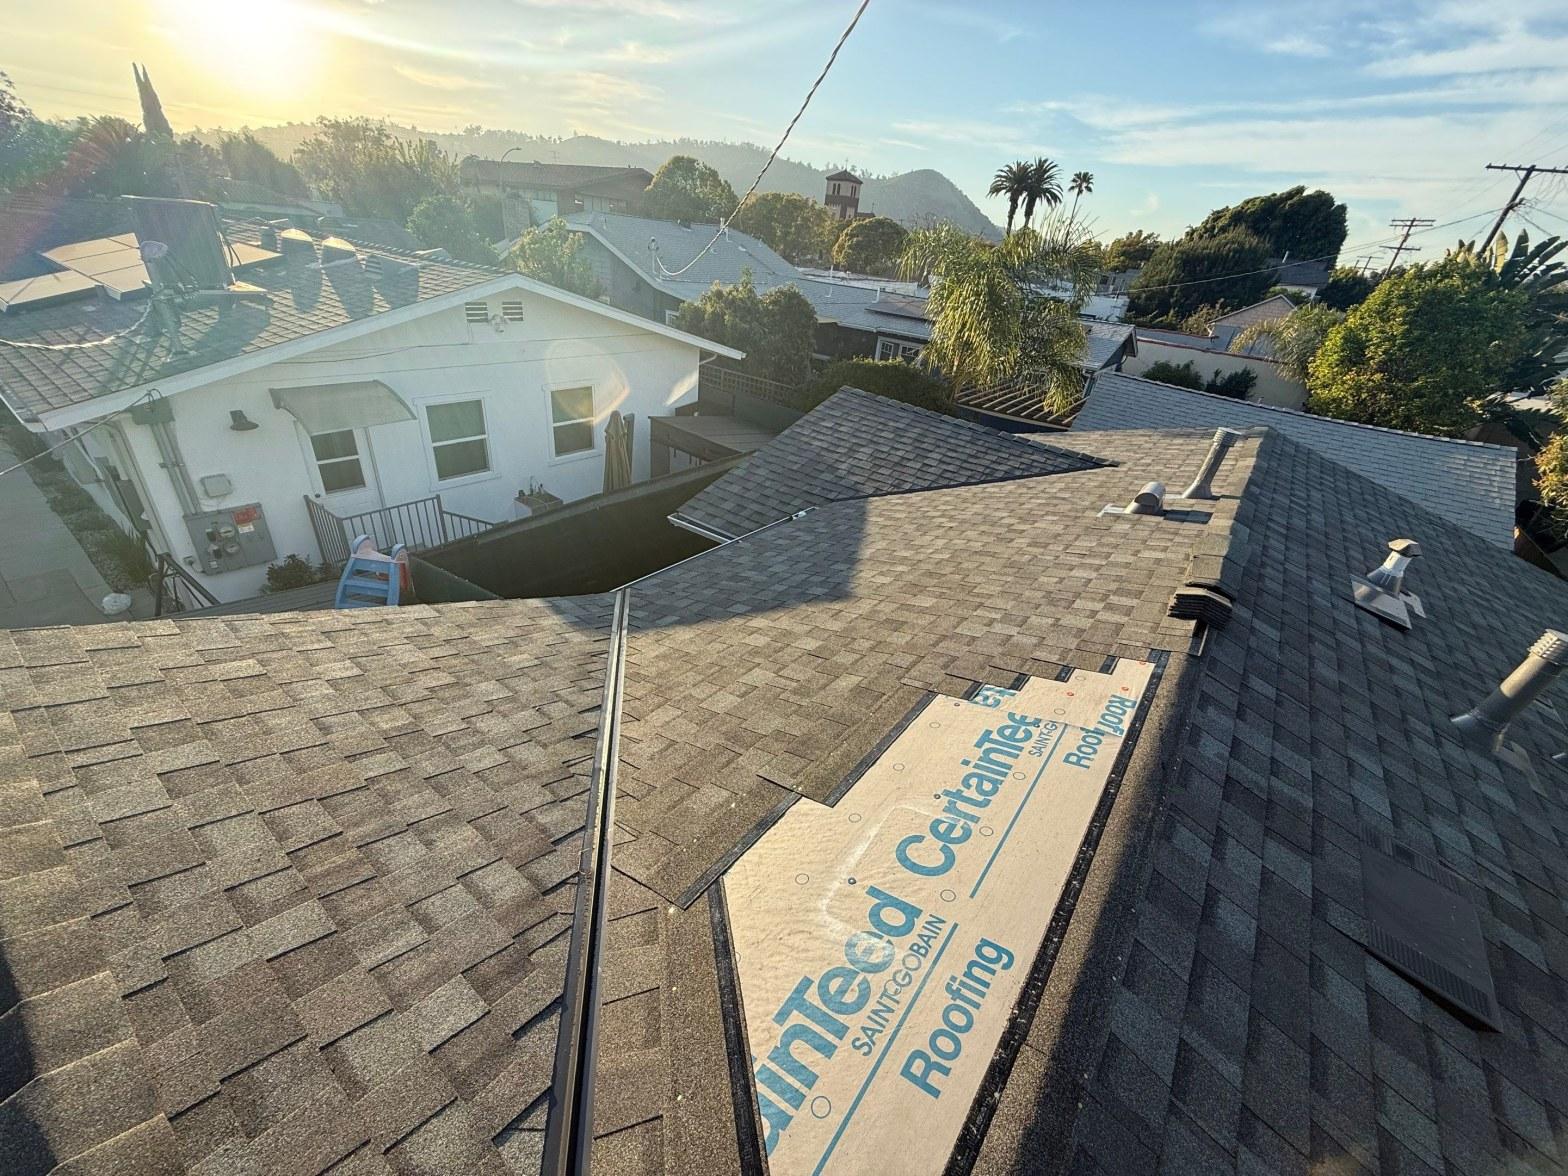
Step 2: Installing Underlayment and Moisture Barriers
The underlayment acts as the roof’s hidden shield against moisture and wind. To cover it, you can choose either traditional felt or modern synthetic sheets. Synthetic underlayment is lighter, highly resistant, and withstands longer exposure to sunlight. On the other hand, felt is less expensive but more prone to absorbing water.
Begin at the eaves, rolling each course horizontally and overlapping the previous one by four to six inches. Cap-nail the edges every twelve inches and the field every twenty-four inches to prevent uplift.
PRO TIP: In colder climates or anywhere ice dams are a risk, add an ice-and-water barrier. Roll it along eaves, valleys, and around penetrations such as skylights and chimneys, overlapping seams by at least six inches and extending it a full two feet inside the warm wall line for maximum protection.
Step 3: Starter Strips and First Row Installation
Seal the starter strip and the lower edge of the roof. This step prevents wind-driven rain from getting under the shingles. Align the starter course flush with the drip edge. Allow a slight quarter-inch overhang so water can run cleanly into the gutter. Nail each strip with four nails placed about two inches above the cutouts and one inch from each end (for high-wind regions), and add two extra nails for extra holding power.
PRO TIP: Snap a straight chalk line before nailing anything. Even a slight misalignment in the first row will become a significant one as you move up the roof.
Step 4: Installing Shingles
Once the foundation is complete, it is time to lay the main field of shingles. Place each new row at least about six inches apart for standard three-tab shingles. This will help to break vertical seams and improve water shedding. Ensure to maintain a consistent five- to six-inch spacing so that every row is even. Drive nails straight and flush. Try not to overdrive or underdrive, and place the nails just below the factory seal strip to preserve warranty coverage and prevent leaks.
PRO TIP: Complex roof features require extra attention. In open valleys, first install a metal liner, then cut shingles to stop two inches from the valley center and seal the edges with roofing cement. For a closed-valley look, weave shingles across the valley and ensure the underlayment overlaps by at least twelve inches.
Dormers and skylights need step flashing, places where the flashing meets the siding, secured with nails and high-quality roofing sealant. Use a three-part system around chimneys. At ridges, overlap opposing courses and leave a half-inch gap if you plan to install a ridge vent.
Step 5: Flashing and Roof Penetrations
Because water intrusion often begins around penetrations, careful flashing is critical. Slide a pre-formed rubber boot over each plumbing vent and secure the flange with nails and seal it with roofing cement. For walls and dormers, step flashing is preferred because each shingle course overlaps a separate flashing piece, ensuring a watertight seal. This allows the system to expand and contract with temperature changes. You can install continuous flashing faster, but it is less flexible and can trap water.
Step 6: Ridge Cap Shingles
The ridge cap provides the roof’s final weather seal and a finished appearance. You can use factory-made ridge caps or cut standard shingles into twelve-inch segments. Begin on the end opposite prevailing winds, so each piece overlaps with the wind direction. Overlap each cap about five inches and secure it with two-inch galvanized nails. Position them just below the overlap so the nail heads remain hidden.
PRO TIP: If you are adding a ridge vent for improved attic ventilation, make sure there is an even half-inch slot on each side of the ridge before placing the caps.
Step 7: Final Inspection and Cleanup
Before you put away tools, conduct a detailed inspection. Examine every slope to ensure that it is straight and reveals are consistent. Check that all nails are flush and covered by the shingle above. If there are any exposed heads, add a dab of asphalt roof cement to them. Tug gently on a few random shingles to confirm they have adhered properly. Once satisfied, clean the site thoroughly. Sweep and run a magnetic nail sweeper over the ground to catch stray fasteners.
PRO TIP: Carefully sort waste. There are recycling centers that accept old asphalt shingles and use them in road paving, so your project has a smaller environmental footprint. Store any leftover shingles in a dry, flat location for future repairs.
Maintenance And Longevity
A new asphalt shingle roof is a long-term investment, and thoughtful maintenance can extend this period beyond the typical 20-30 years. Homeowners should plan to examine their roof at least twice a year, in the spring and in the fall. It will always be a good idea to inspect the roof after any severe weather.
As part of the examination, you can look for missing or curled shingles, flashing that has pulled away from chimneys or vents, and dark streaks. All this examination you can do standing on the ground.
You can also check for daylight showing through the decking or water stains. This often indicates that there are hidden leaks. Finding out about these in the early stages allows you to conduct minor repairs before they develop into expensive problems.
If you ever need an expert who can help you (beyond regular maintenance) with a full roof replacement or roof repair, consider trusting your roof to Roof Replacement Inc.
Our experienced team specializes in roof inspections, repairs, and complete installations, with tailored solutions and solid warranties.
Get a quote
FAQs
What other features should I look for beyond basic materials when picking among the different roof shingle types?
Beyond material and color, you’ll want to consider impact resistance (e.g., UL Class 4), wind resistance rating, fire rating, and warranties. For example, some roof shingle types include algae-resistant granules or reflective coatings that help protect them from the intense heat of the sun. Also consider how well the manufacturer supports their warranties. There may be cases when premium shingles are only good for their company’s reputation and service.
How long will an asphalt shingle roof really last in Southern California compared to harsher climates?
In mild, sunny climates like many parts of SoCal, roofs often benefit from reduced freeze-thaw cycles and less snow load. These become the typical causes of wear in colder regions. As a result, a properly installed asphalt shingle roof in Southern California can often last about 25-30 years. In case it has good attic ventilation, occasional cleaning, and timely repairs. In harsher climates, it is advisable to conduct more frequent maintenance or use stronger roof shingle types.
Can I mix or match roof shingles types on one roof to save cost while achieving specific style priorities?
Yes, in some cases it is possible to use a couple of roof shingle types, especially if you’re using standard 3-tab shingles in less visible areas (e.g., rear slopes or secondary structures) and architectural or designer shingles in visible zones for aesthetics. However, mixing might complicate warranty claims, affect uniformity of weathering, and cause performance inconsistencies. Always consult with your roofer or manufacturer before blending types.
Which brands are known for the best roof shingles, especially for durability and warranty in the US market?
Brands like GAF, Owens Corning, and CertainTeed are frequently cited among the brands that offer some of the best roof shingles in terms of durability, design, and support. These manufacturers offer strong warranties, a wide style/color selection, and good wind/fire resistance ratings.
Does choosing roof shingle types with reflective granules or lighter colors reduce energy bills?
Yes, lighter-colored or reflective shingles can help reflect more of the sun’s rays and reduce heat absorption. This helps keep attic space cooler, which can reduce air conditioning loads in hot weather. Among various roof shingle types, those with cool roof or reflective granule options tend to offer this benefit more than darker, non-reflective materials.
Related Posts


What Our Clients Say

Roof Replacement Inc. offers professional, high-quality work, guaranteed (call for details); ensuring all clients projects meet all code and design requirements. We are dedicated to exceptional customer service and will strive to ensure you with the highest quality roofing services. Roof Replacement Inc. offers lifetime warranty (call for details) on all of our workmanship to ensure the quality of our work. With over four decades of experience and success within the roofing and construction industry, Roof Replacement Inc. has grown and developed in all areas of roofing construction, including roof inspections. As a leading residential and commercial roofing company in LA, we have hundreds of references from previous clients, so rest assured, that your roofing job will be done right the first time. Replacing an old roof can help add curb appeal and will increase the perceived value of your home. First impressions are vital when selling your home, especially when your roof takes up more than half of the exterior of your residence or business. Not only is the return of investment on a new roof attractive for potential buyers, but can be as beneficial as remodeling the kitchen or bathrooms within your residence.
